This post was sponsored by Valspar. Thank you for supporting the
sponsors that help make The Sweetest Occasion possible!

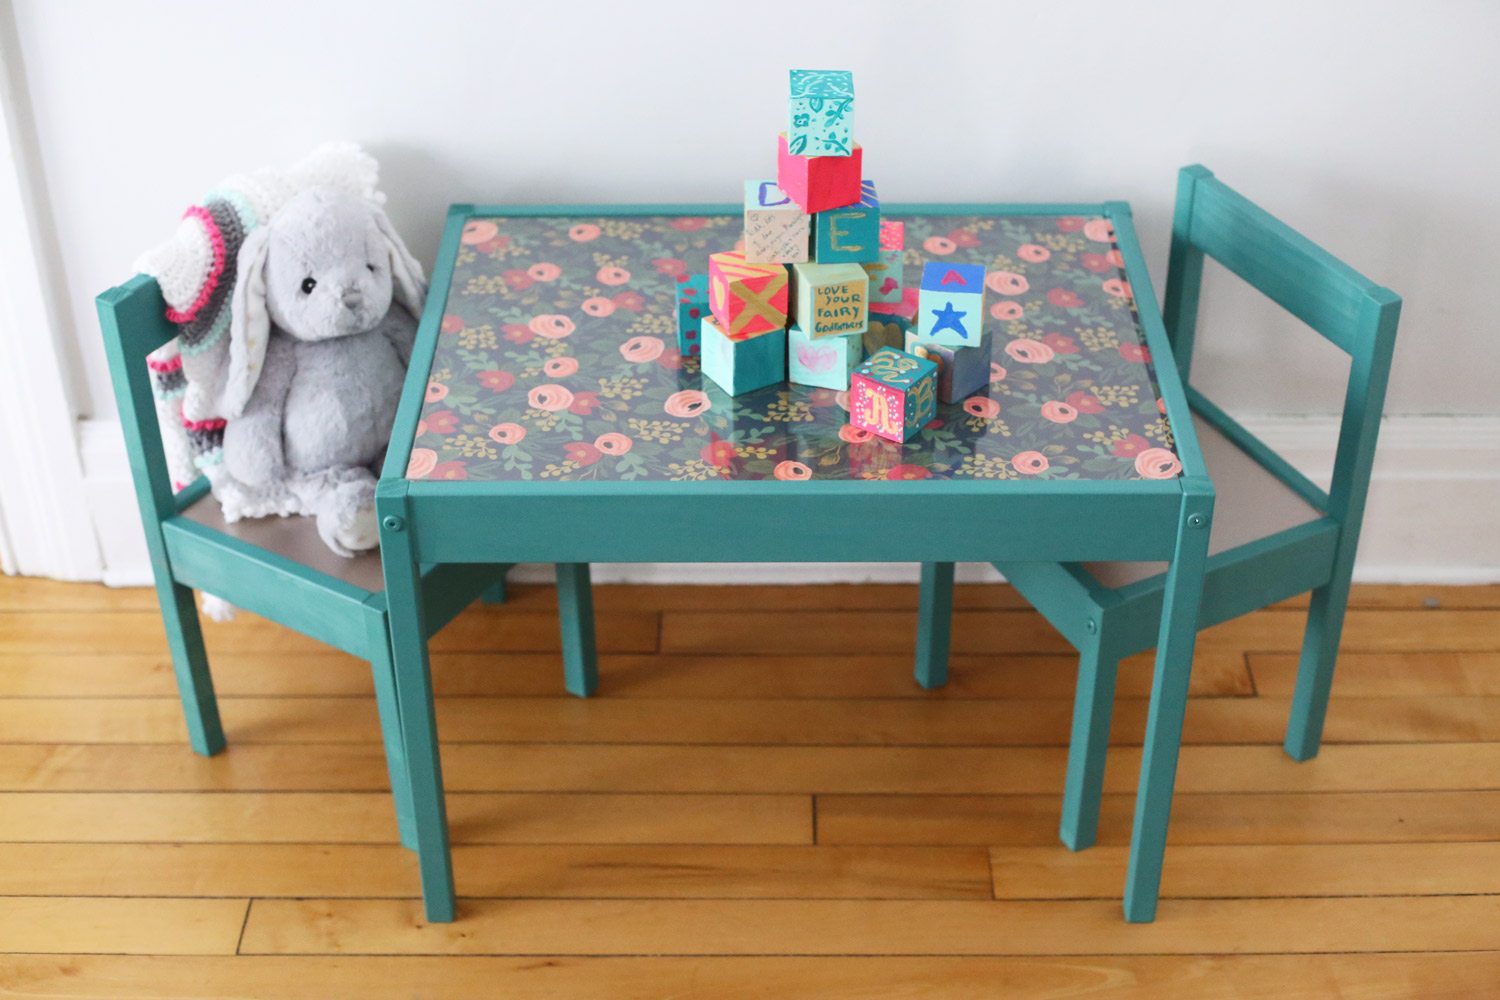
A few weeks back I shared some of the nursery ideas that have been percolating in my brain since I first found out we were expecting, and since then I’ve been working to bring the room to life. We’re officially in the home stretch on the baby growing front so today I wanted to share the fun DIY makeover of the adorable little kids table that will be in her room! To pull it off I teamed up with my friends at Valspar and put their awesome new Valspar Furniture Paint to work transforming an inexpensive and otherwise forgettable kids table and chair set. The result is a totally custom piece that is going to look perfect with the modern yet whimsical vibe I’m going for in our little one’s room!
![]()
![]()
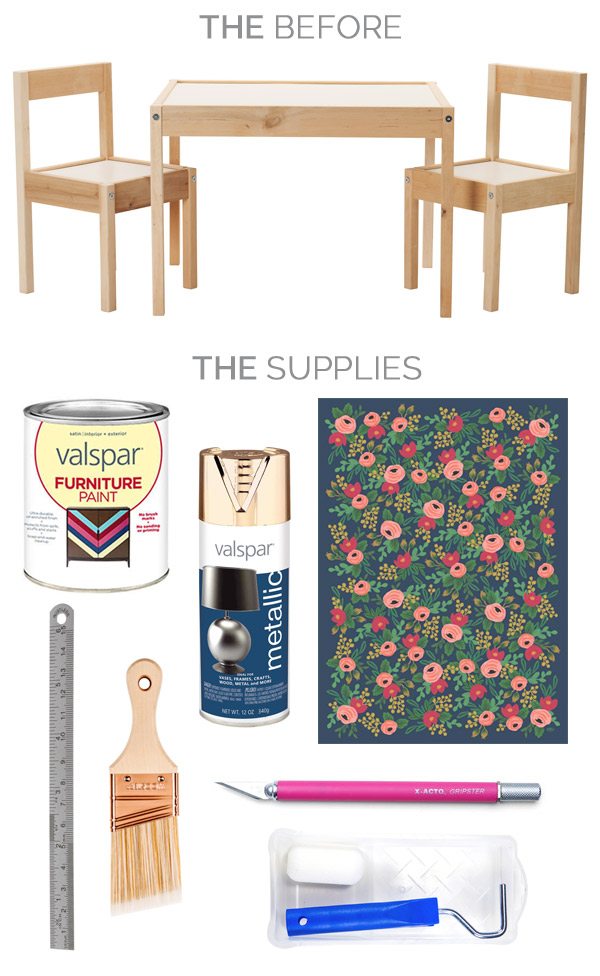
- Valspar Furniture Paint in Elegant Silk 5010-7 (available at Lowe’s)
- Valspar Rose Gold Spray Paint (available at Lowe’s)
- Ikea Latt kids table
- 2″ foam roller and tray
- 2″ paint brush
- Painter’s tape
- Wrapping paper or wallpaper
- Metal straight edge
- X-Acto knife
- Sheet of acrylic cut to 17-3/8 x 23-5/8″
Valspar’s new Furniture Paint and Cabinet Enamel both come in an awesome array of colors (you can find the complete selection by visiting Lowe’s) and the furniture paint is perfect for rehabbing old furniture that could use a little love or adding personality to an otherwise lackluster piece. In other words, it was perfect for this little project! I chose to go with Elegant Silk 5010-7 to coordinate with the overall color palette of the nursery and this wrapping paper that I used to add a fun burst of color and pattern to the top of the table.

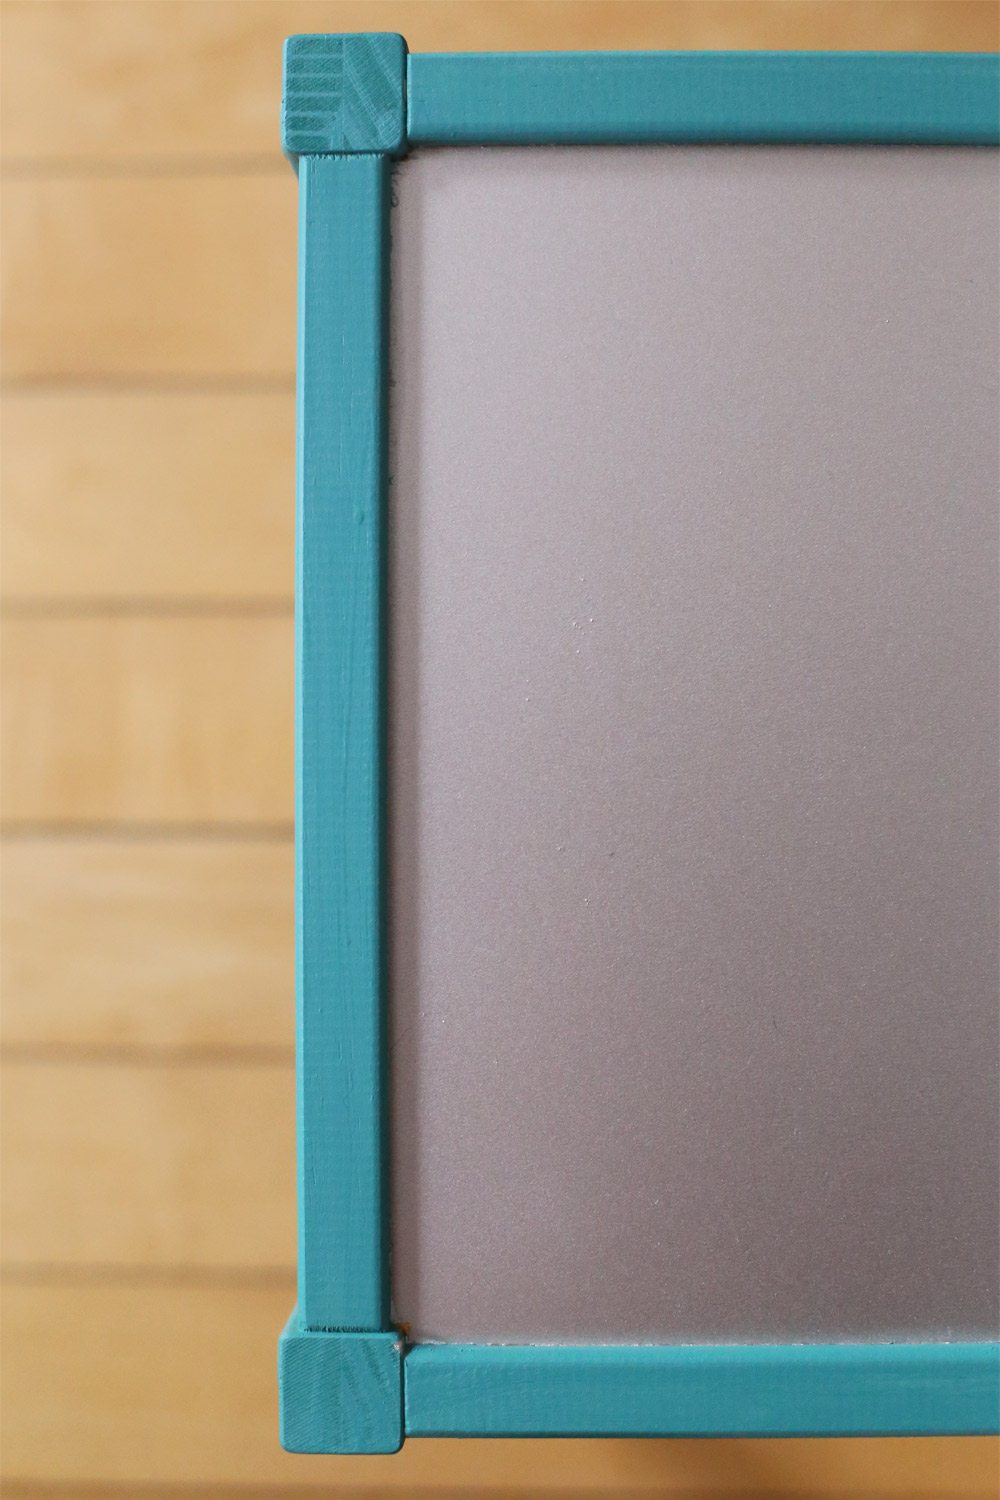
To get started, I taped off the edges of the tabletop and chair seat to avoid getting any paint on the white laminate. Then, I used a small 2″ foam roller to apply a light coat of paint. As I always preach, multiple thin coats of paint are the best when painting furniture, allowing the paint to dry and then repeating with additional coats as necessary. After rolling on the first coat, I went back with my paint brush to make sure I’d covered all the little nooks and crannies before allowing things to dry completely. The coverage of Valspar’s furniture paint is seriously excellent and the consistency is really workable, making for virtually no drips while I was working. Two coats covered the table and chairs perfectly!
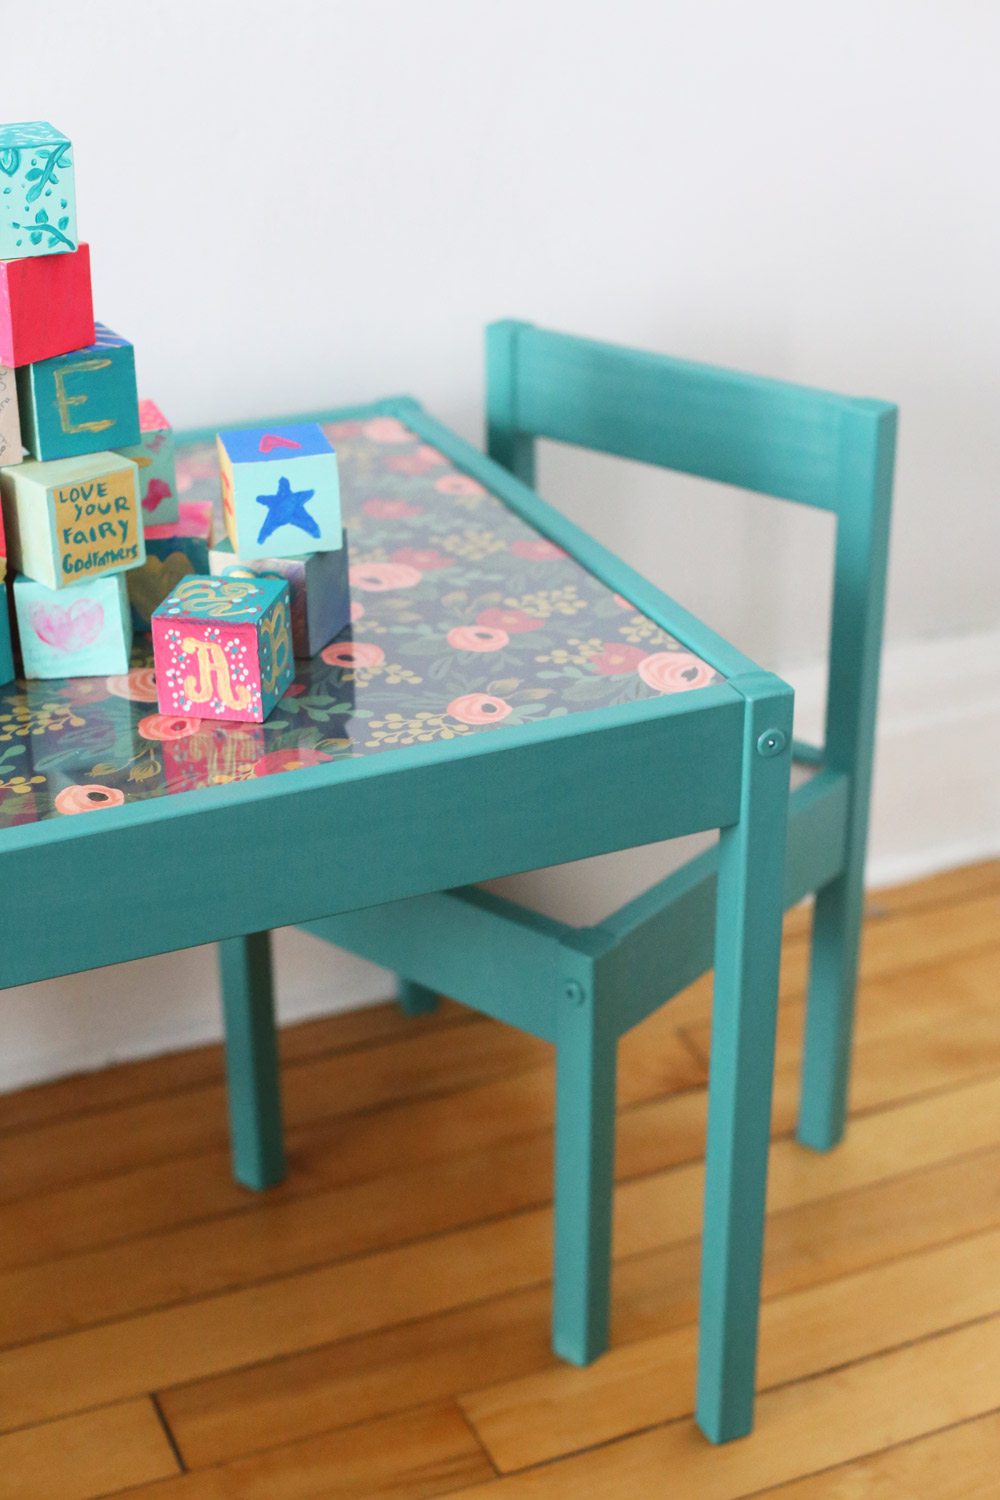
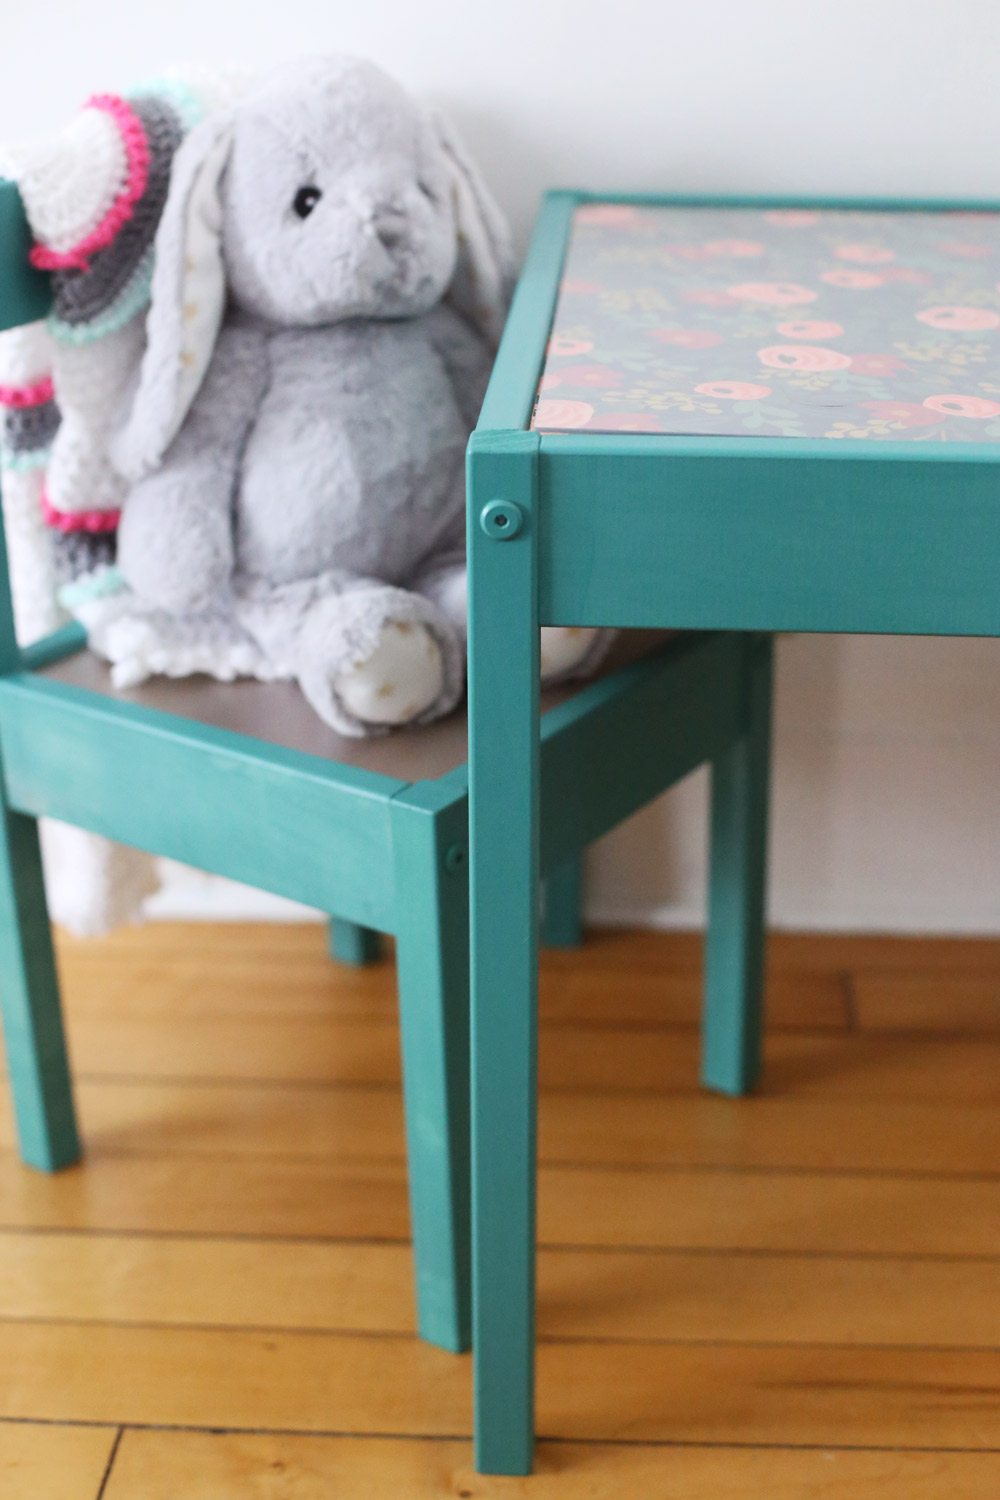
Once everything was completely dry, I masked off the seat of the chairs with painter’s tape and plastic to protect the rest of the piece. I knew I didn’t want to leave the white laminate exposed on the chair seats, so I took a stroll through the spray paint section in Lowe’s and picked up a can of Valspar’s Rose Gold spray paint. Allowing drying time in between, I applied four thin and light coats of spray paint to the seats. The rose gold color is soft and super pretty and was the perfect way to finish off the adorable little chairs.
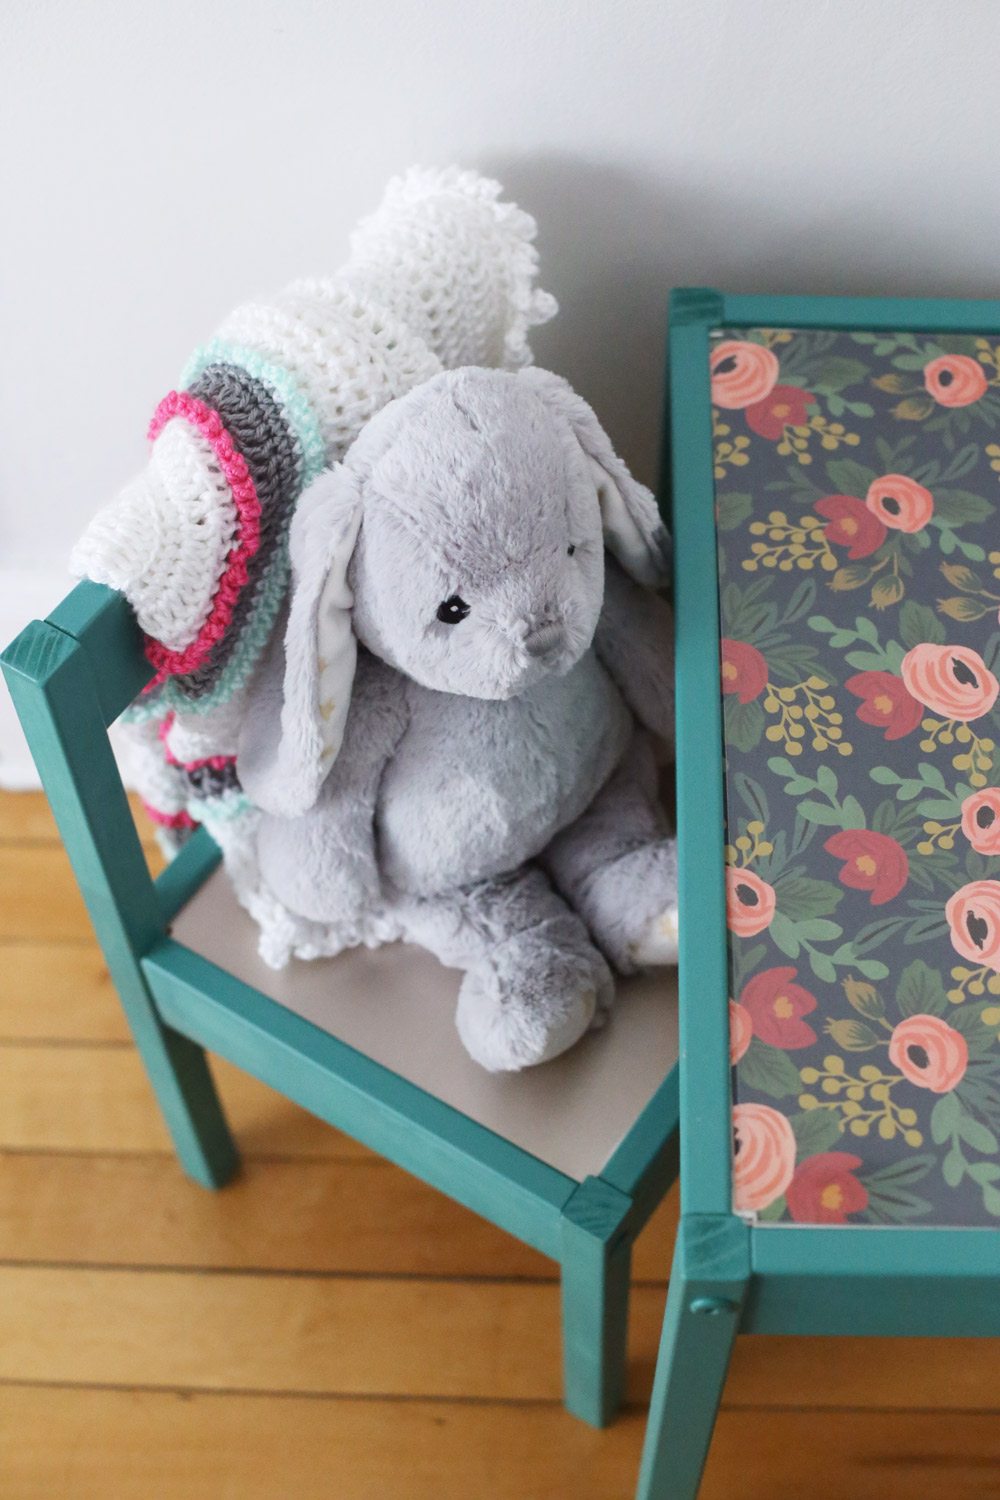
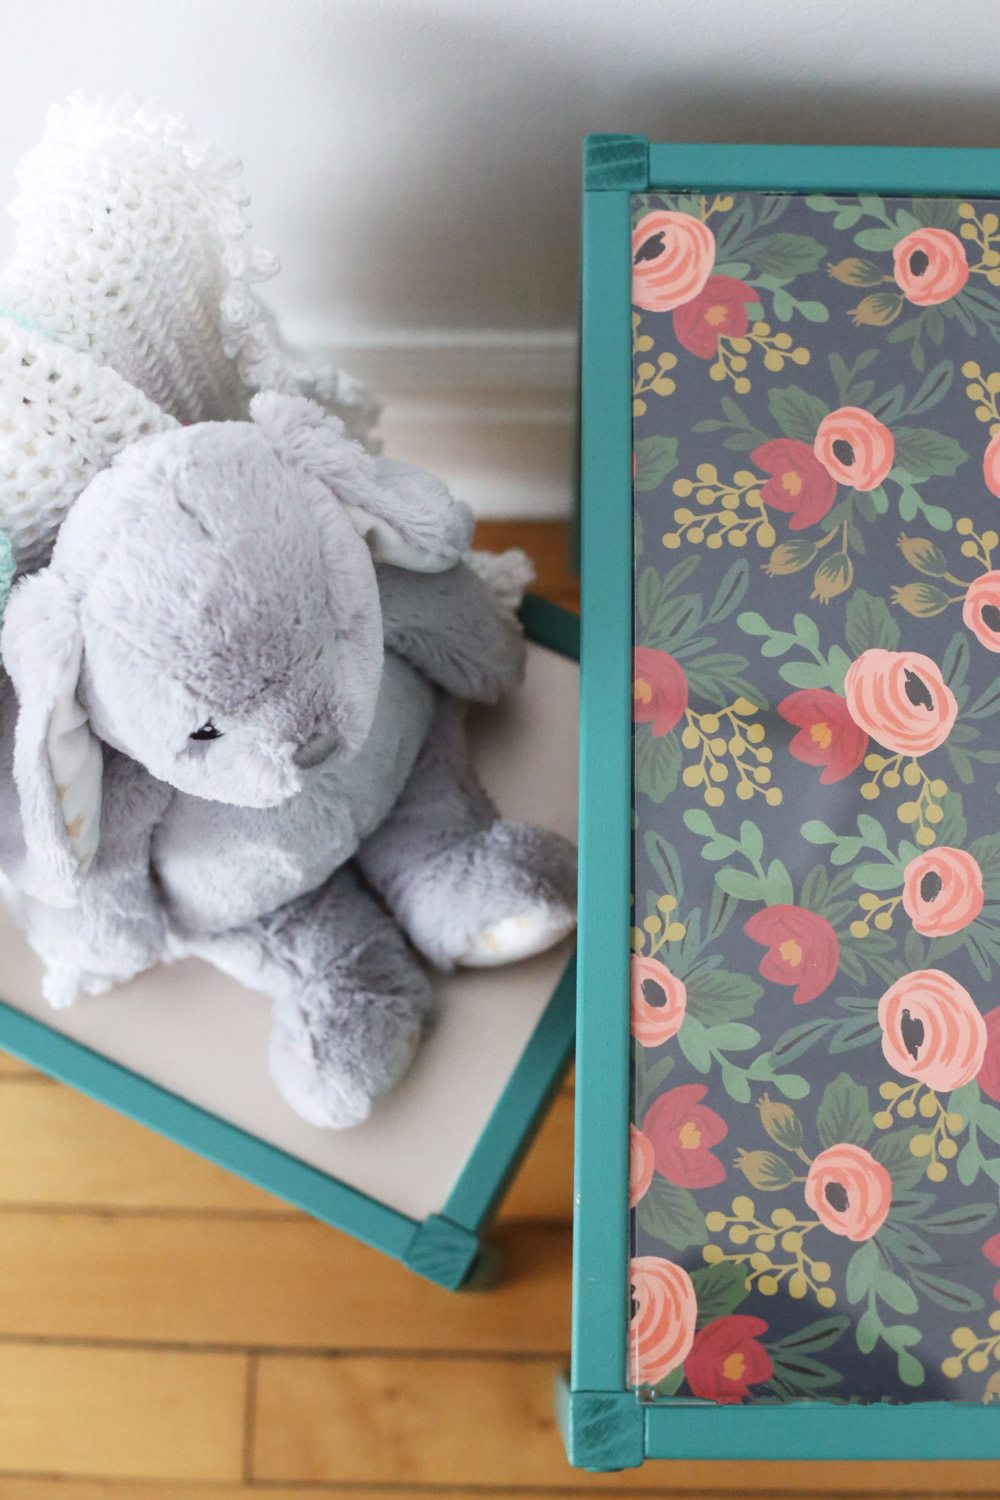
Finally, for the top of the table I wanted to add a bit of pattern, so I opted to add a fun wrapping paper with an acrylic sheet over top to protect the surface of the paper. This also makes it so you can switch the paper up whenever you like! While at Lowe’s I picked up an 18×24″ sheet of acrylic in the 0.080 thickness and asked them to cut it down to 17-3/8 x 23-5/8″ to fit the top of the table. (The people at Lowe’s rock so this was seriously about a three minute process. So easy!) While the paint was drying, I trimmed my paper down to the same size. The table top is recessed a bit to begin with, so it was easy to lay the paper down and then cover it by placing the acrylic over top.
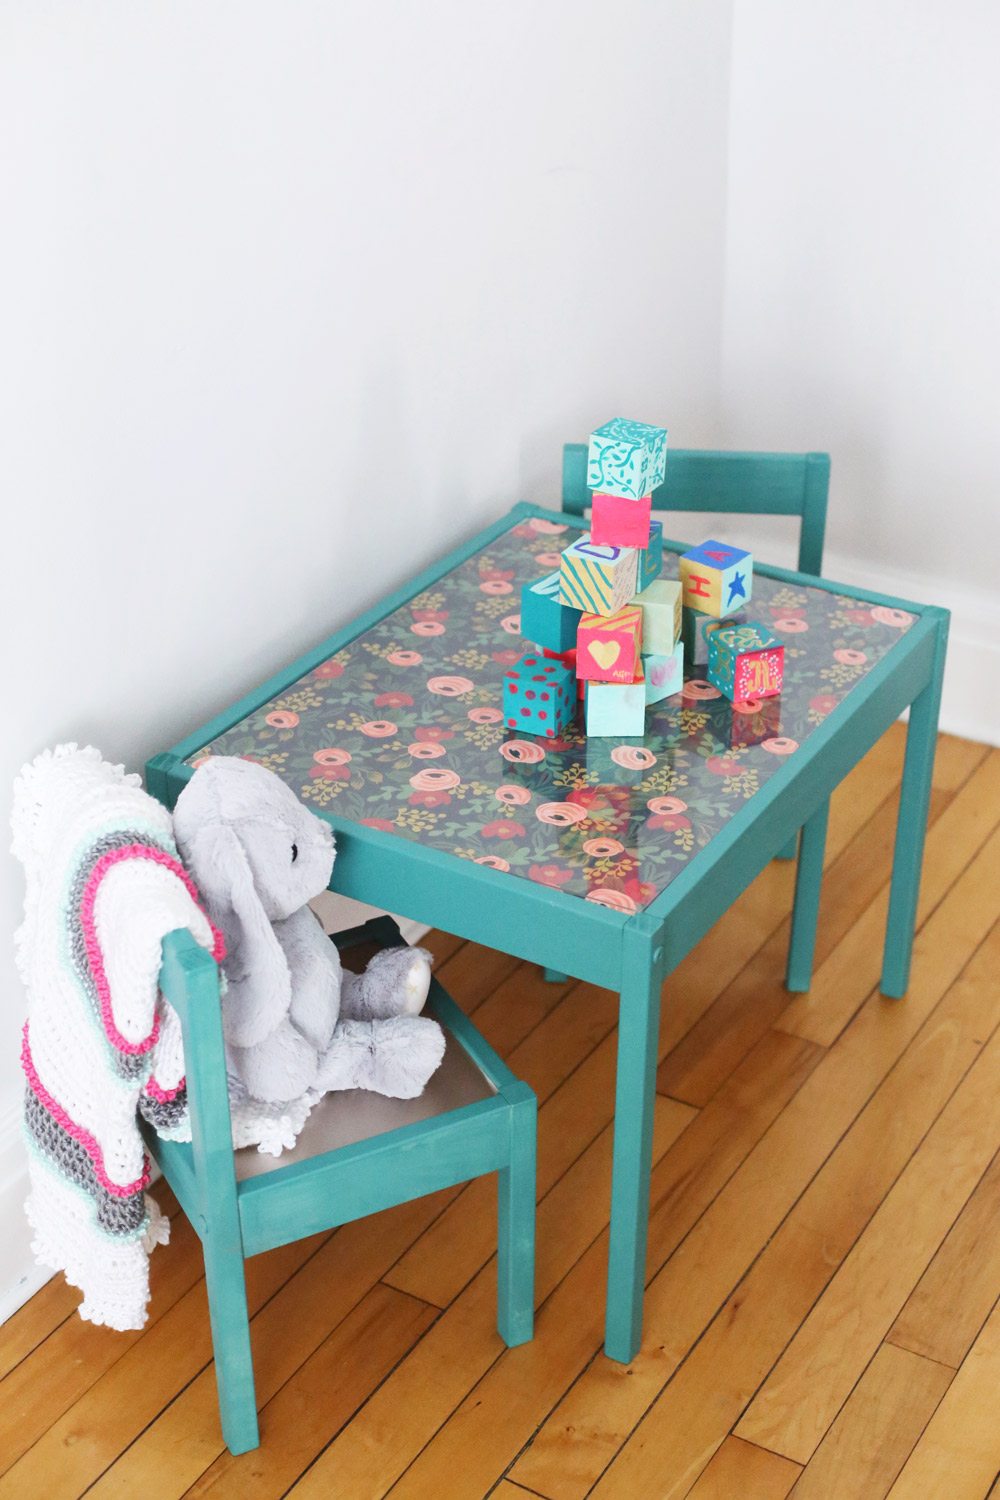
And that’s it, friends! I really love how it turned out and I can’t wait to see how everything comes together in her finished nursery. (Stay tuned over the next few weeks for a full reveal!) In the meantime, for more DIY projects like this one, be sure to check out Valspar’s Rehab Project featuring loads of fun furniture rehab projects, videos and more. (I personally love the colorful TV tray makeover!)
p.s. Those baby blocks were painted by loved ones at our baby shower! I’ll be sharing more from that soon. Love the wall color? It’s Valspar Modern Gray 25-1B and it’s my new favorite gray paint! Everyone always raves about it when they come over to our house.
![]()
![]()
[Photos by Cyd Converse for The Sweetest Occasion.]
The fine print: Please link with love! As with all of our posts, DIY projects featured on The Sweetest Occasion may not be copied, distributed or reproduced without express written permission. Love and links are always appreciated! If you’d like to share a maximum of 1 – 2 images from this post, please link to this post directly for the DIY tutorial and do not include the instructions in your own post. Thanks so much! xoxo
This post was sponsored by Valspar. Read more about our editorial policies.
JoLynn
Saturday 14th of May 2022
Does the acrylic make the table able to be wiped off? We have one with a stain on it we'd like to use for snacktime.
Cyd Converse
Wednesday 1st of June 2022
Hi JoLynn! Yes, it make it very easy to wipe clean.
Kahl
Saturday 7th of March 2020
Hi! I was wondering how much each thing on the supply list cost? Or an estimate
Morgan
Sunday 8th of November 2015
This is such a great idea! We have this table and I stained it before we put it together and left the top of the table and seats white but the table top took a hit recently and this is the perfect solution!! So excited! Now to figure out what paper to choose! :)
Cyd Converse
Sunday 8th of November 2015
I love to hear that, Morgan! I am so glad this provided some good inspiration. I love the idea of that table stained, too! The paper looks so great on the top and I love that it can be switched out to change up the look later, too. Have fun!
It’s the Weekend – Happy Halloween! | Hello Lidy
Friday 30th of October 2015
[…] Kids Table Makeover – a great project to do this […]
Ideas for DIY Non Traditional Thanksgiving Decorations
Friday 30th of October 2015
[…] cute to leave it just for the kids, thinking I might need a grownup […]