This post was sponsored by Ristorante Pizza by Dr. Oetker. Thank you for supporting
the sponsors that help make The Sweetest Occasion possible!
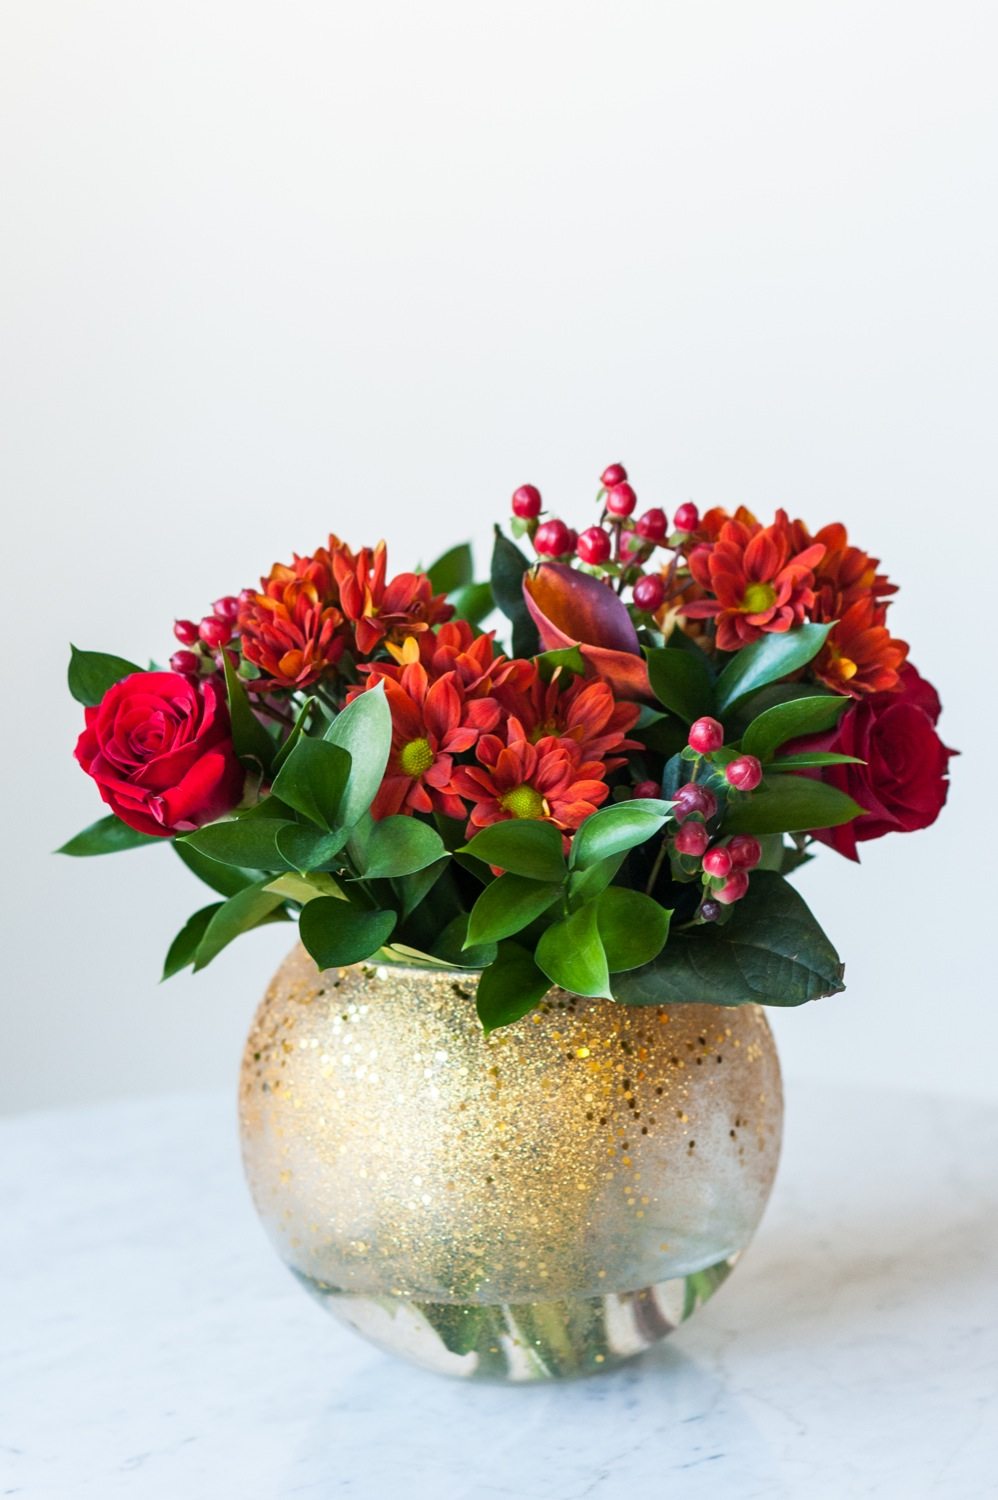
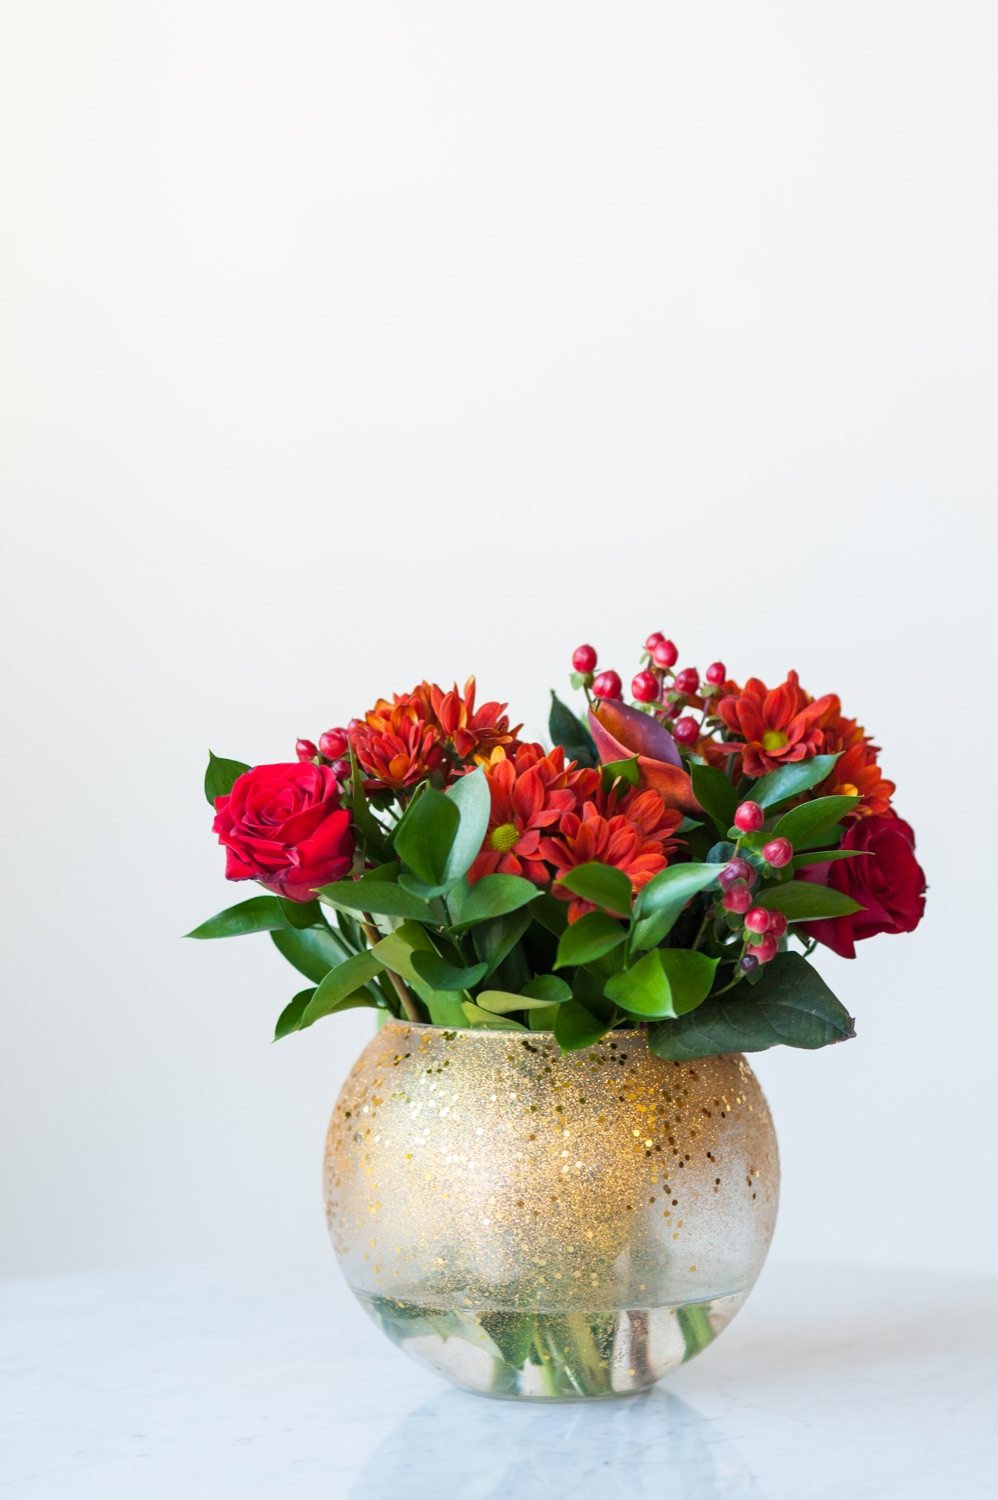
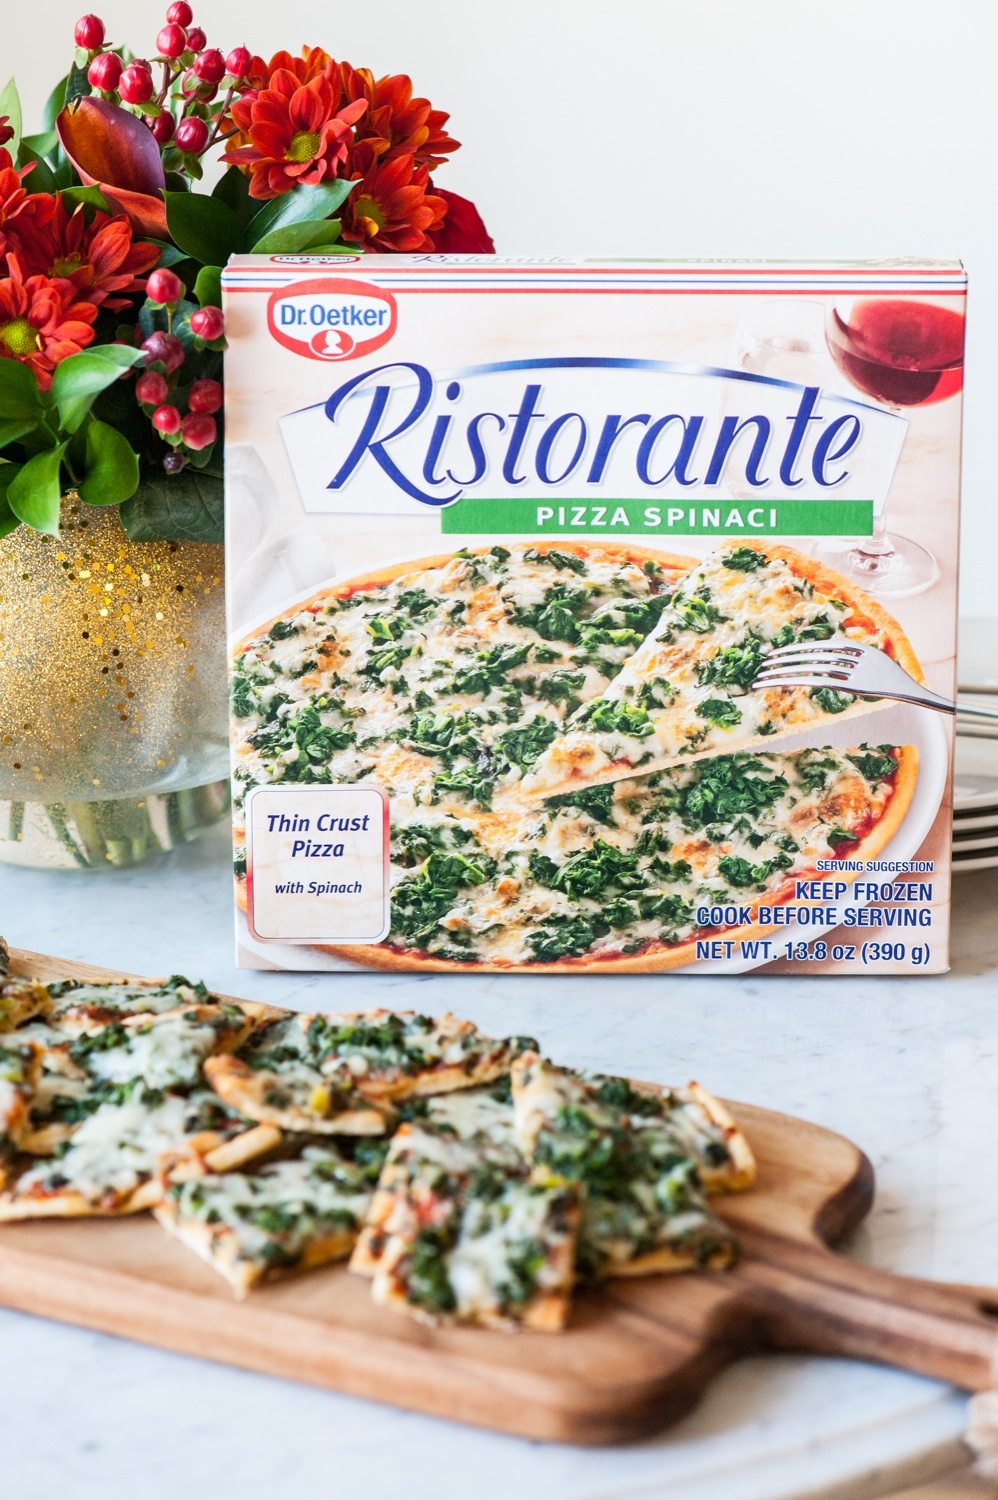
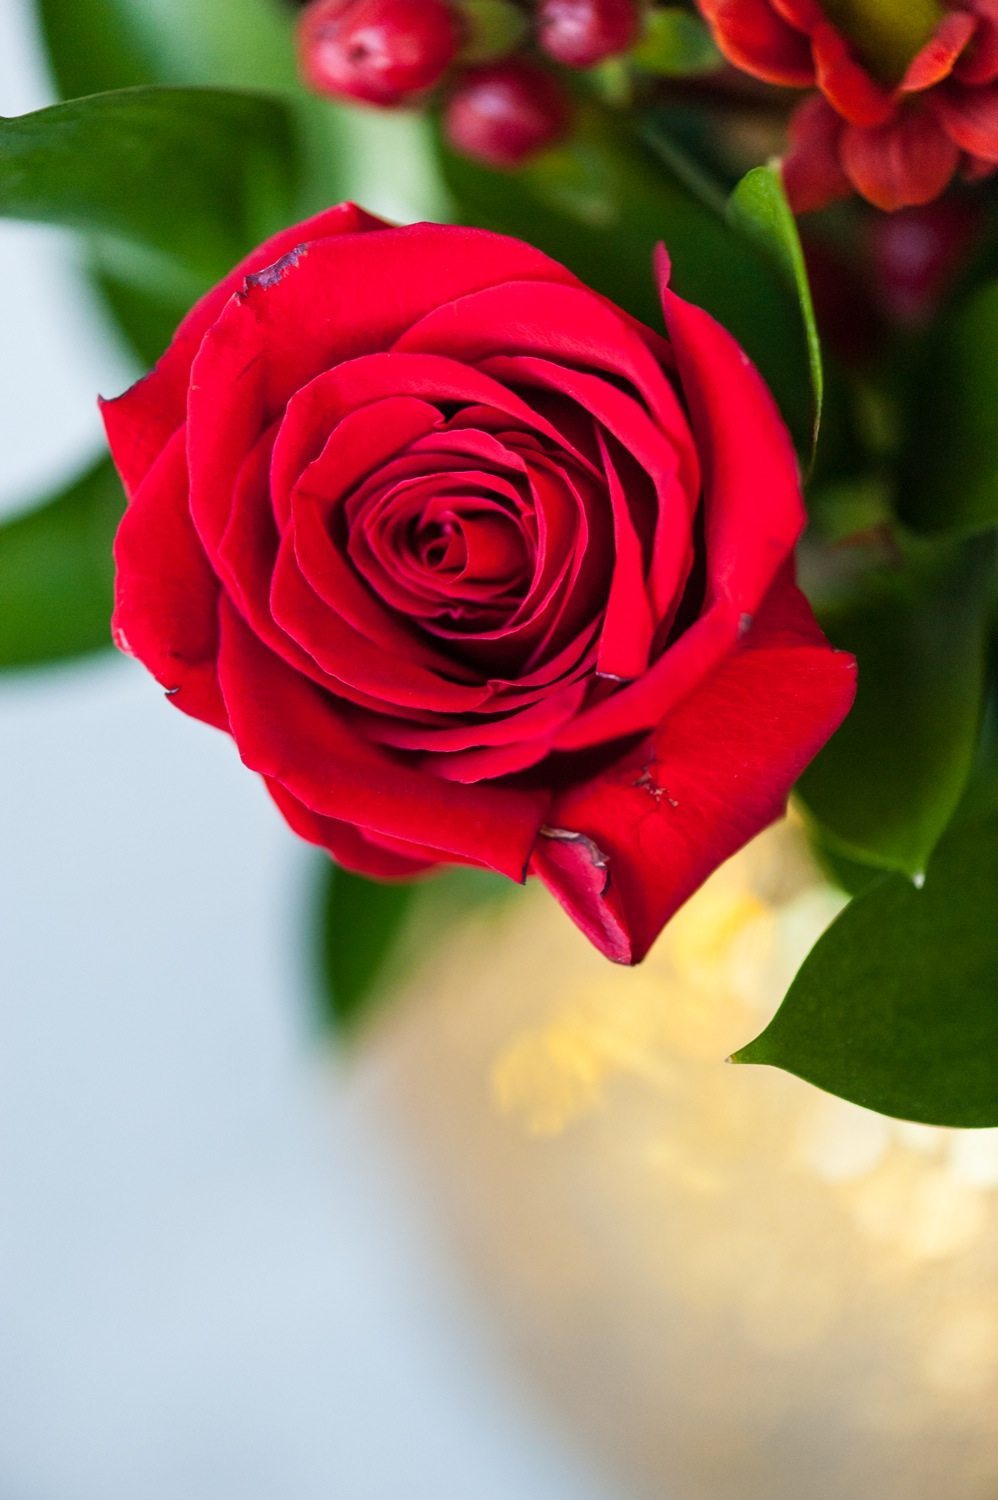
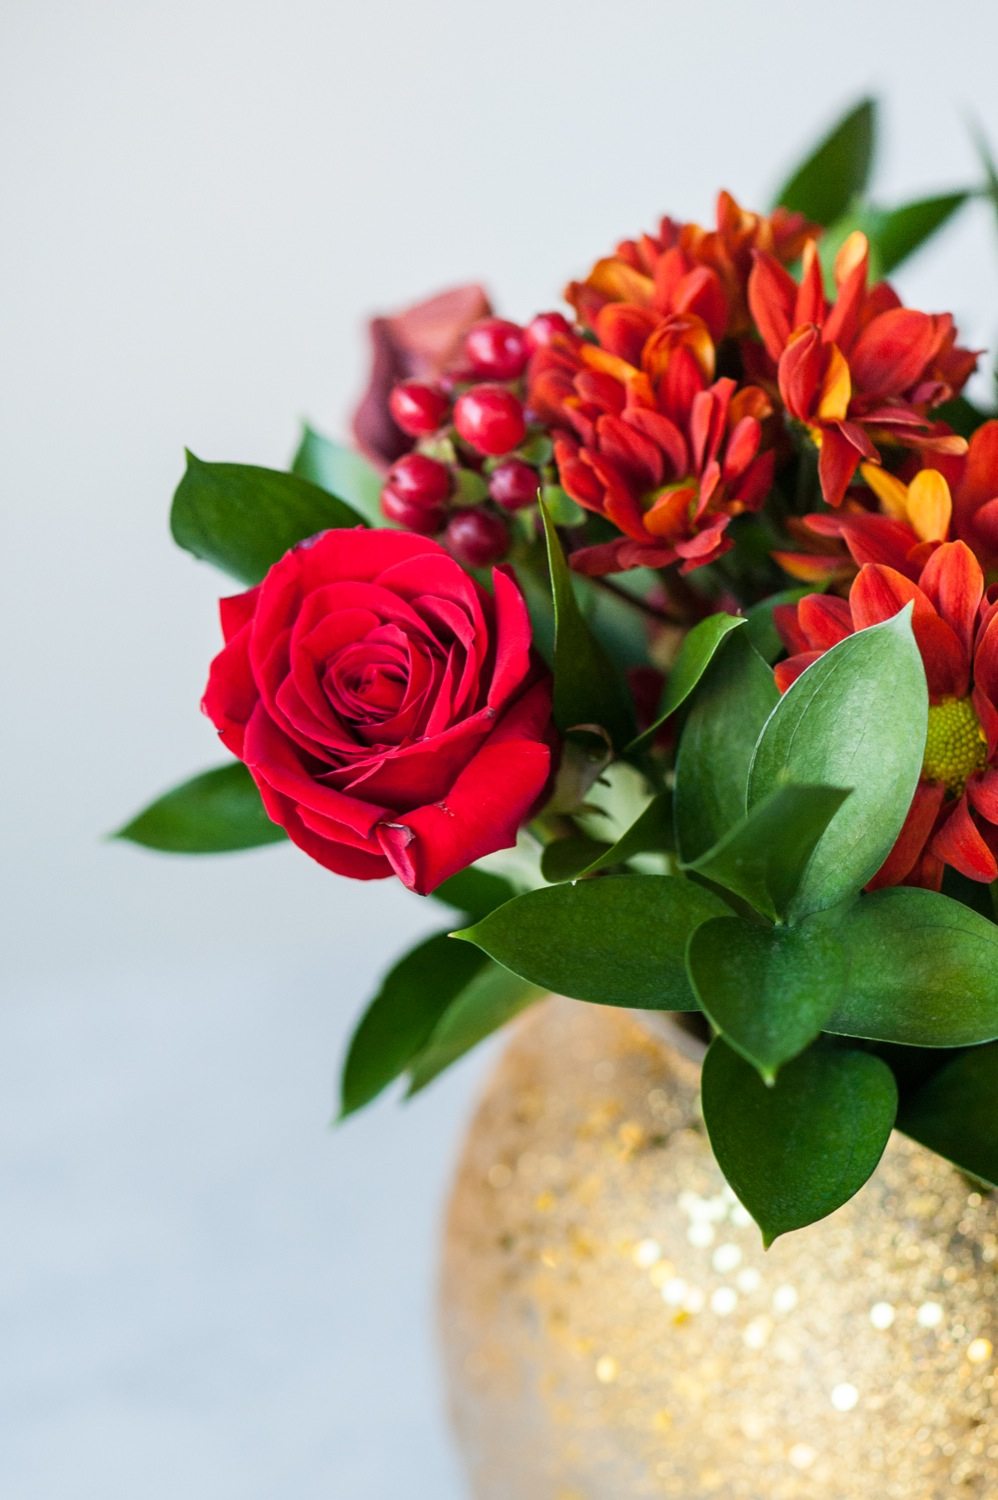
With holiday entertaining quickly approaching it’s peak for the season, my good friends at Dr. Oetker and I are teaming up today to inspire all of your upcoming Christmas parties and New Year’s Eve festivities with one seriously gorgeous centerpiece! This beauty makes setting the stage for a festive holiday gathering a cinch. Pair this gold confetti vase with the prettiest seasonal flowers you can find and you’re officially in business. You can use this to dress up the table at a cocktail party (where I definitely suggest serving up my latest Ristorante Pizza by Dr. Oetker obsession, the Pizza Spinaci flavor) or at a formal sit-down Christmas dinner. Either way, it’s a total show stopper. (All that gold glitter!) You know, even if I do say so myself.
![]()
![]()
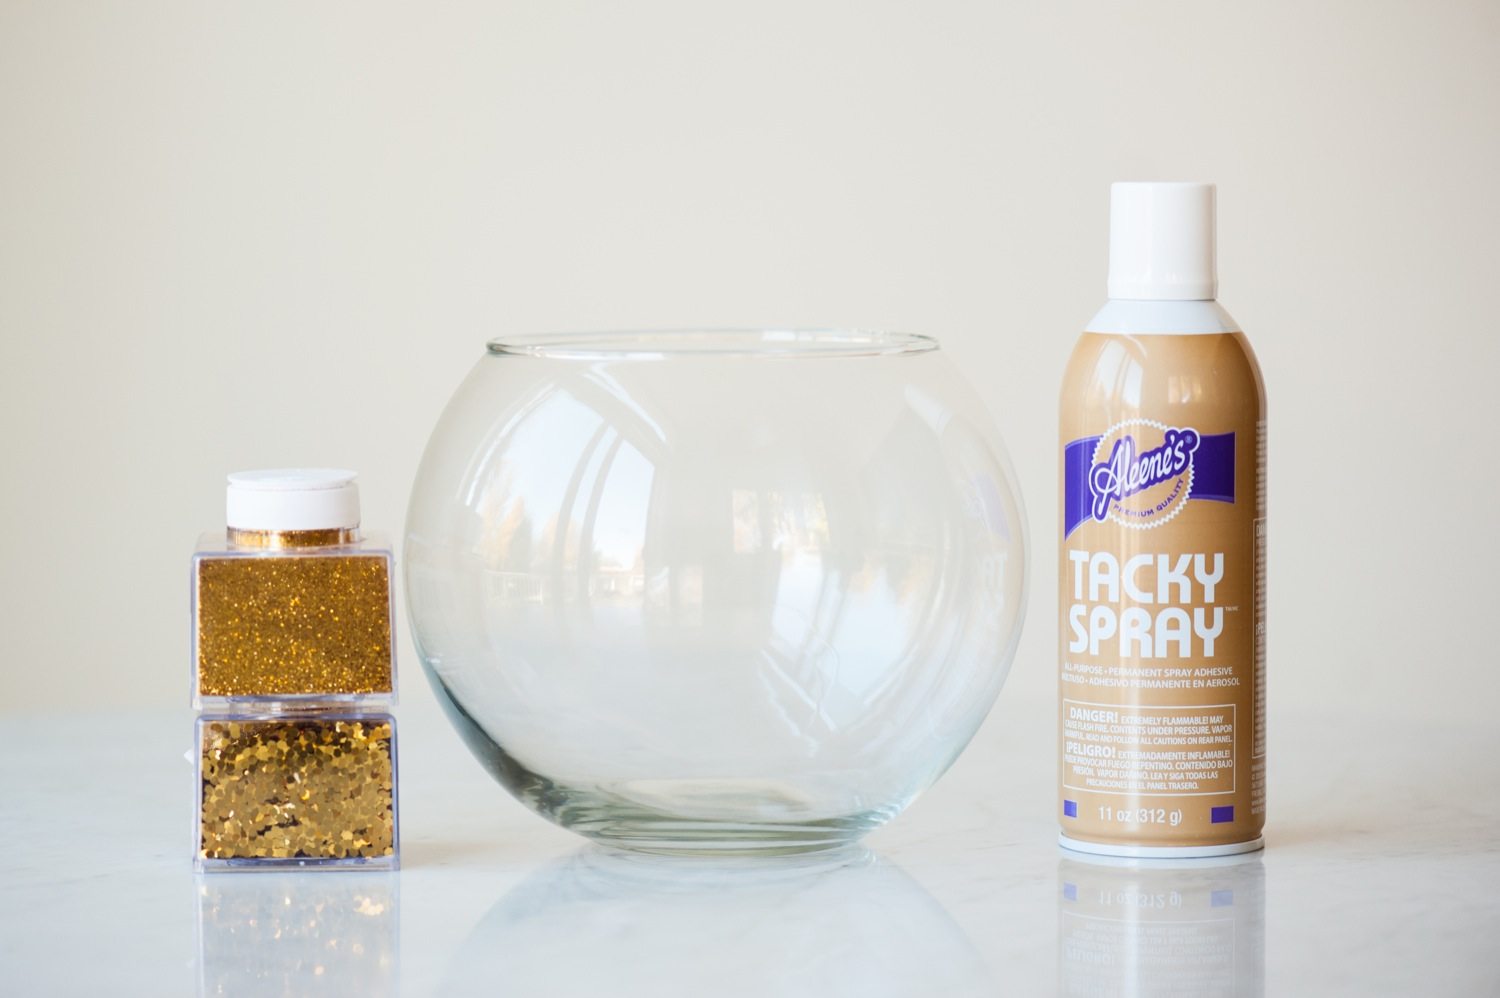
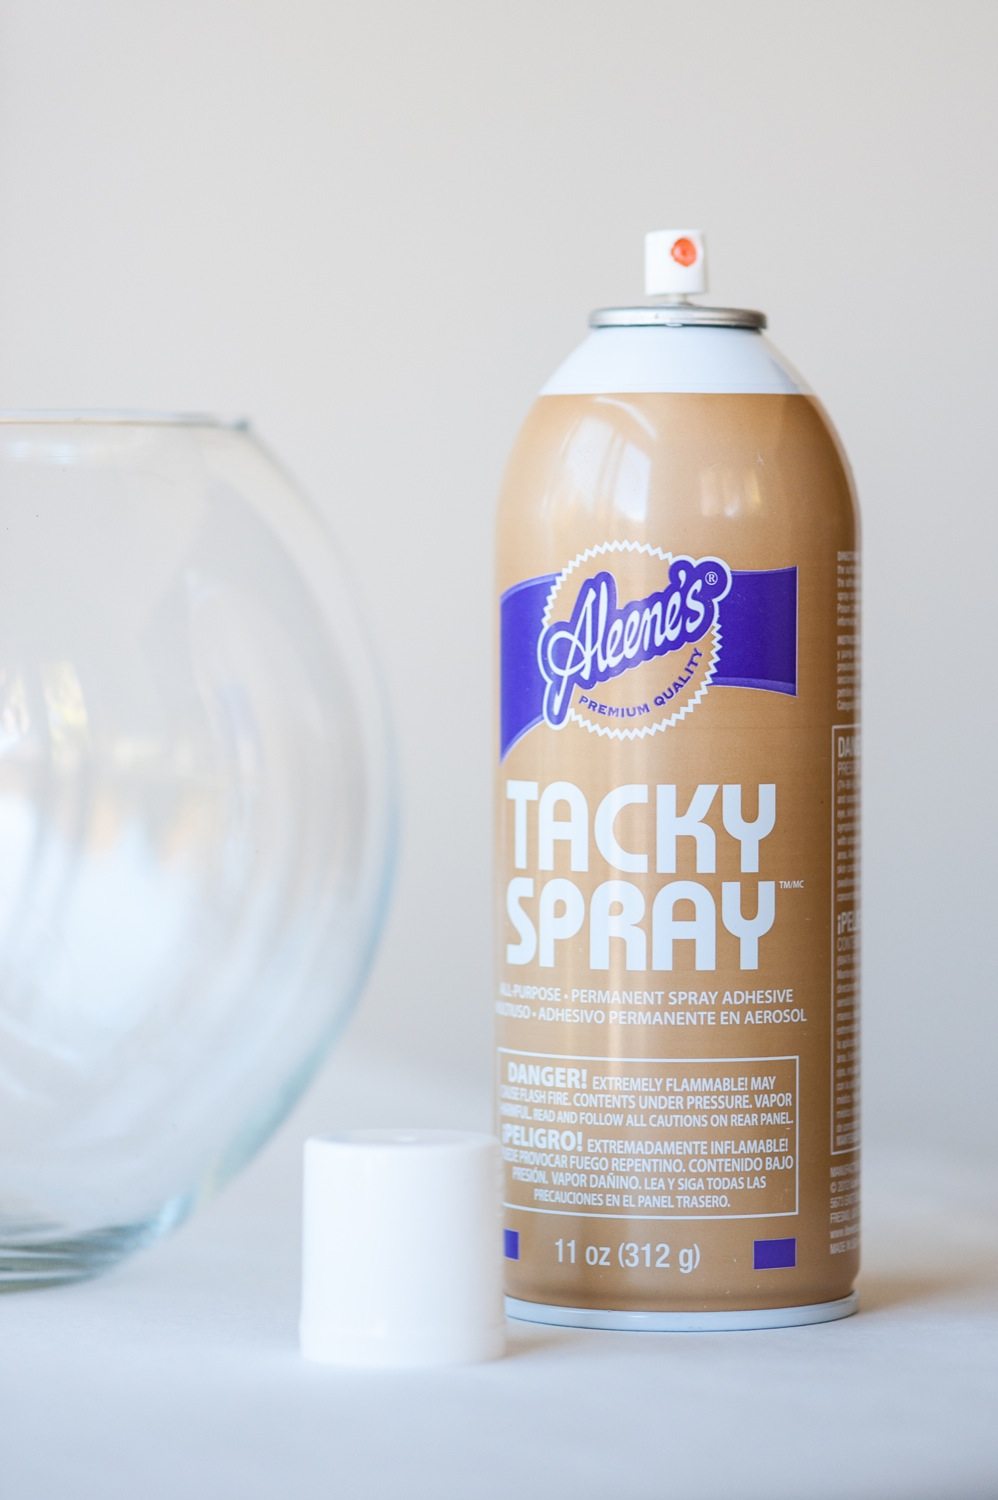
- Clear glass fishbowl vase (or similar)
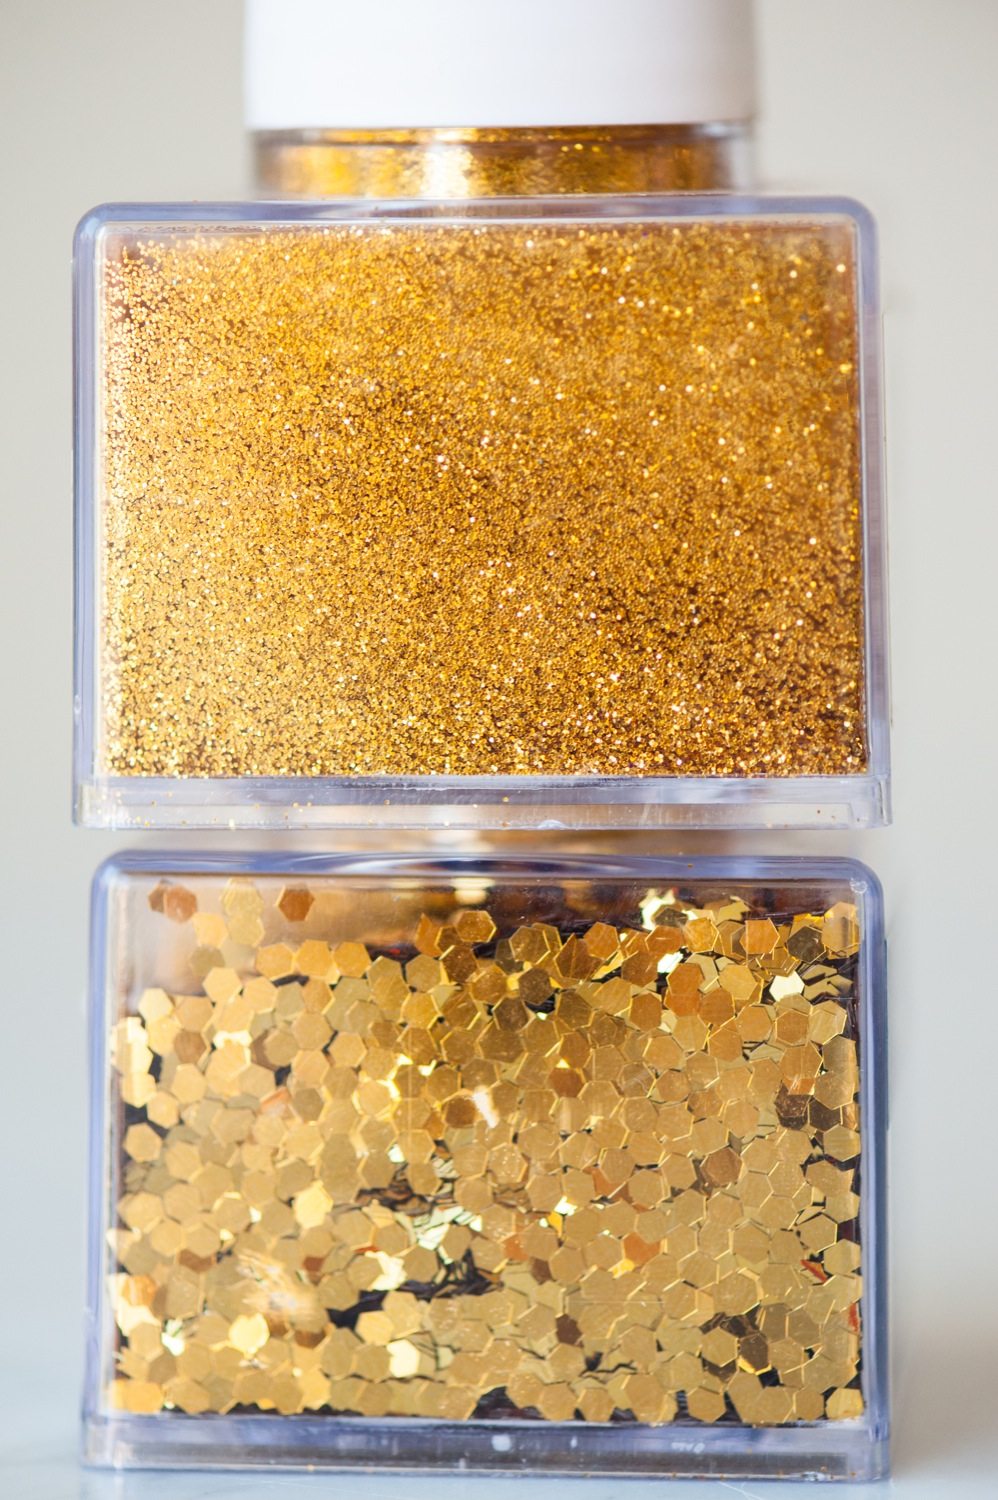
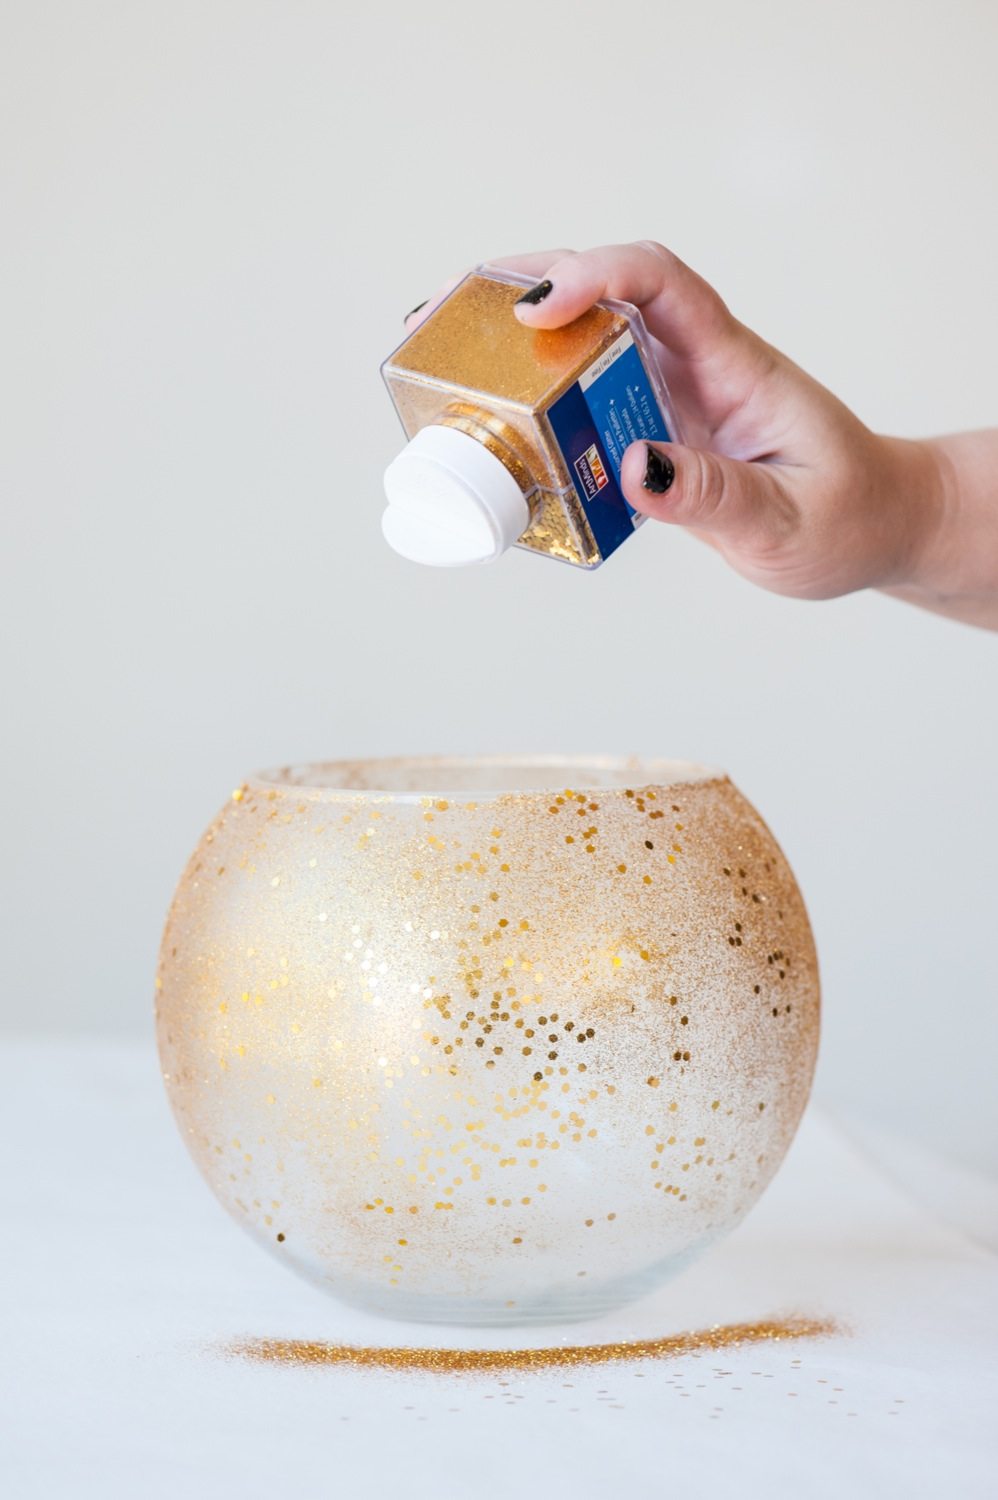
- Metallic gold glitter in two sizes
- Spray glue
- Clear glossy spray sealer
- Assorted seasonal flowers
- Scissors or floral snips
- Floral tape (optional)

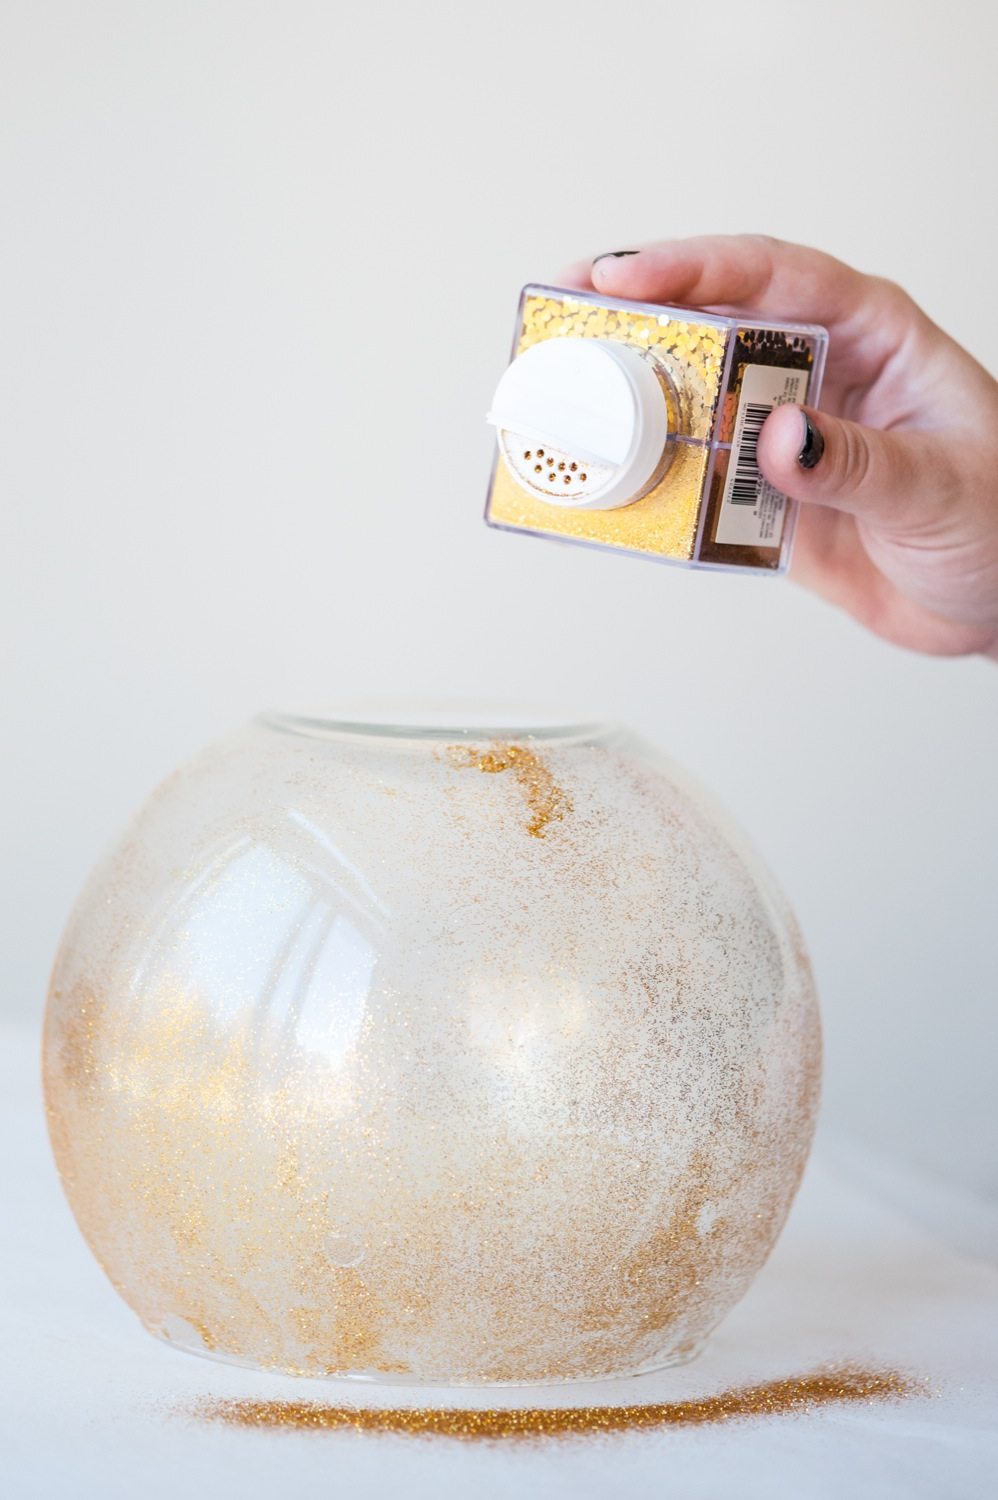
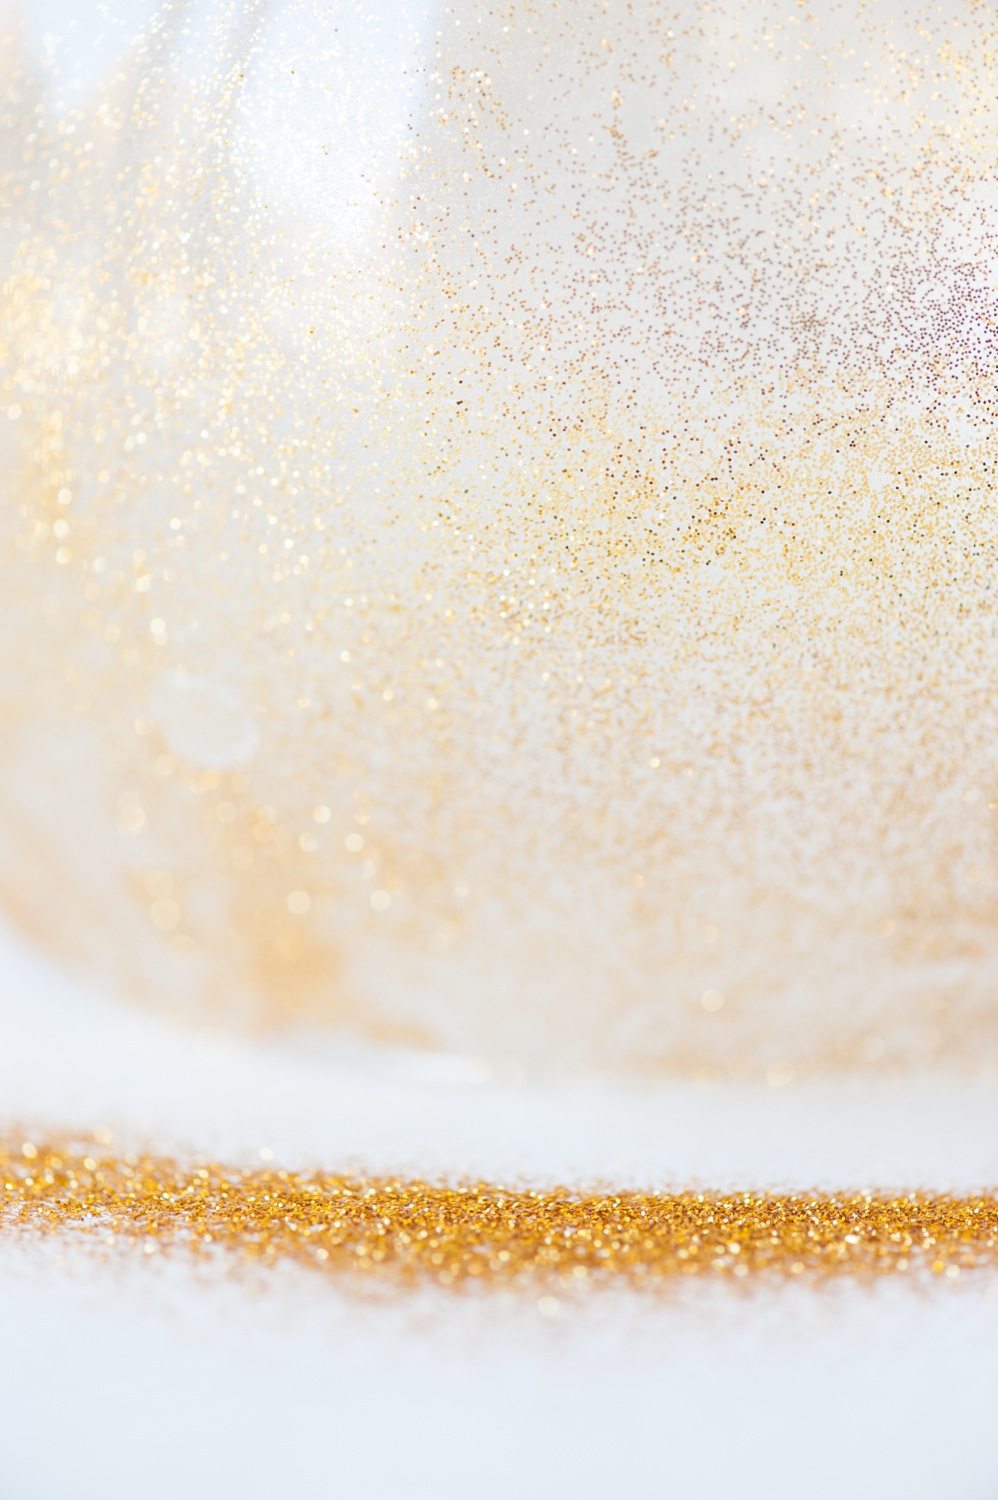
Begin with thoroughly cleaning your vase of choice and allowing it to dry completely. For this particular vase I’m loving this round fishbowl shape, but any glass vase you love or already own will work! (You can find these fishbowl vases at most craft stores if you want to recreate the same exact look.) Once dry, move to a well ventilated area (outdoors is best) and thoroughly protect your work area with newspaper or craft paper. Then use your spray glue to give the vase a thin, light coat of adhesive. I wanted my glitter concentrated at the top of the vase, so I applied the spray glue from the top down, intentionally making sure not to coat the bottom of the vase. Then it’s time to shake on the glitter! I started with a fine particle glitter making sure not to cover the glass entirely.
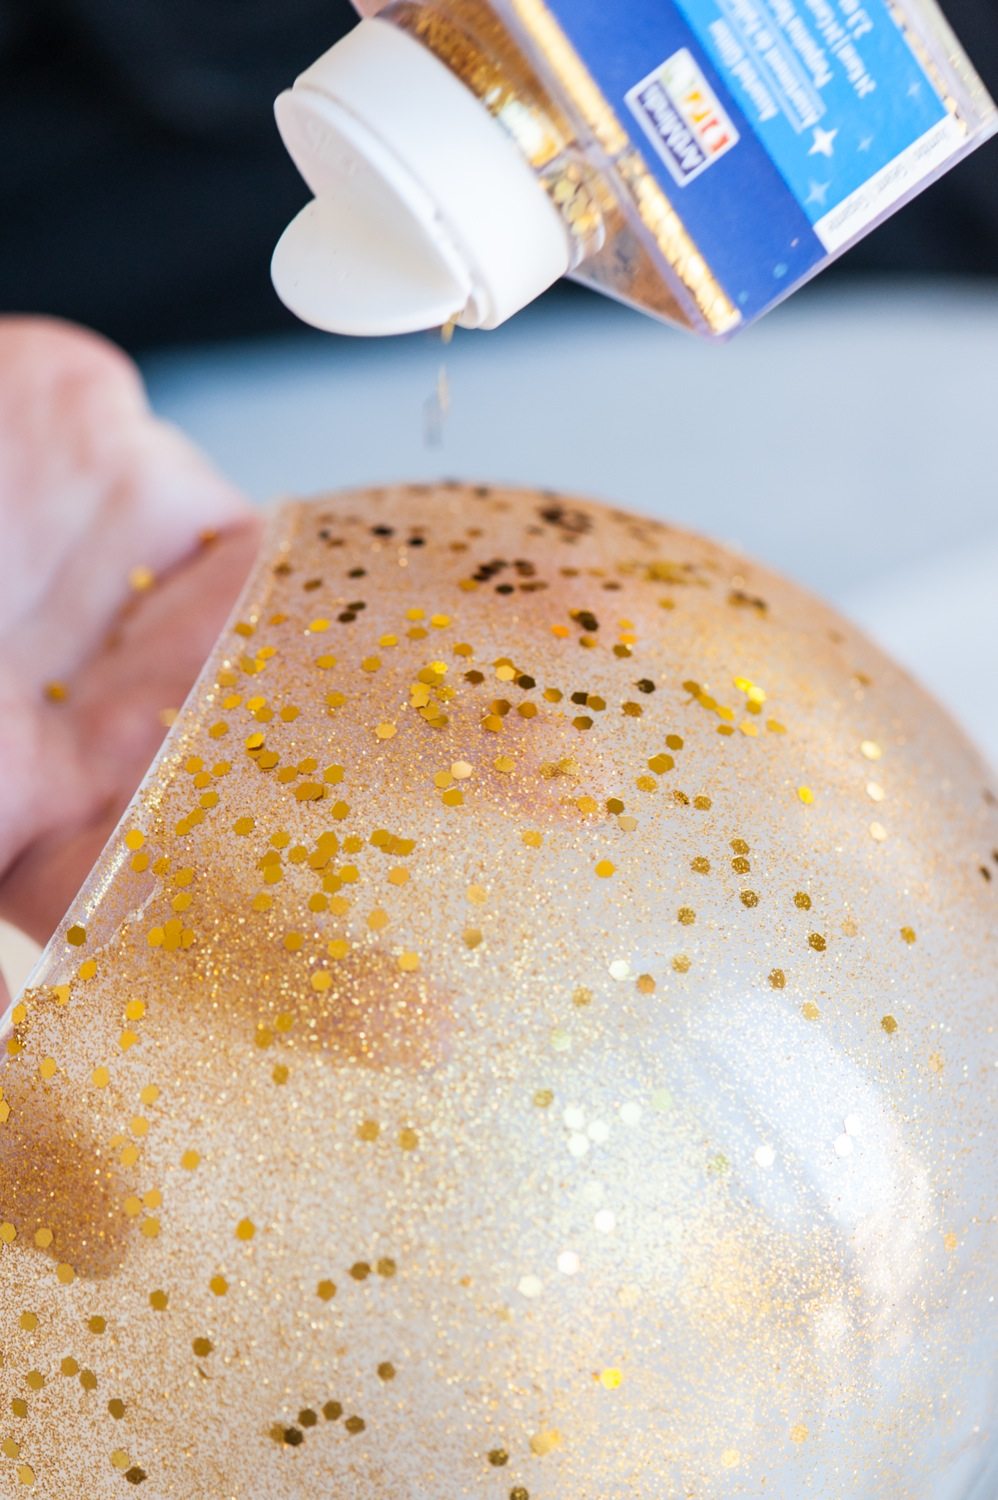
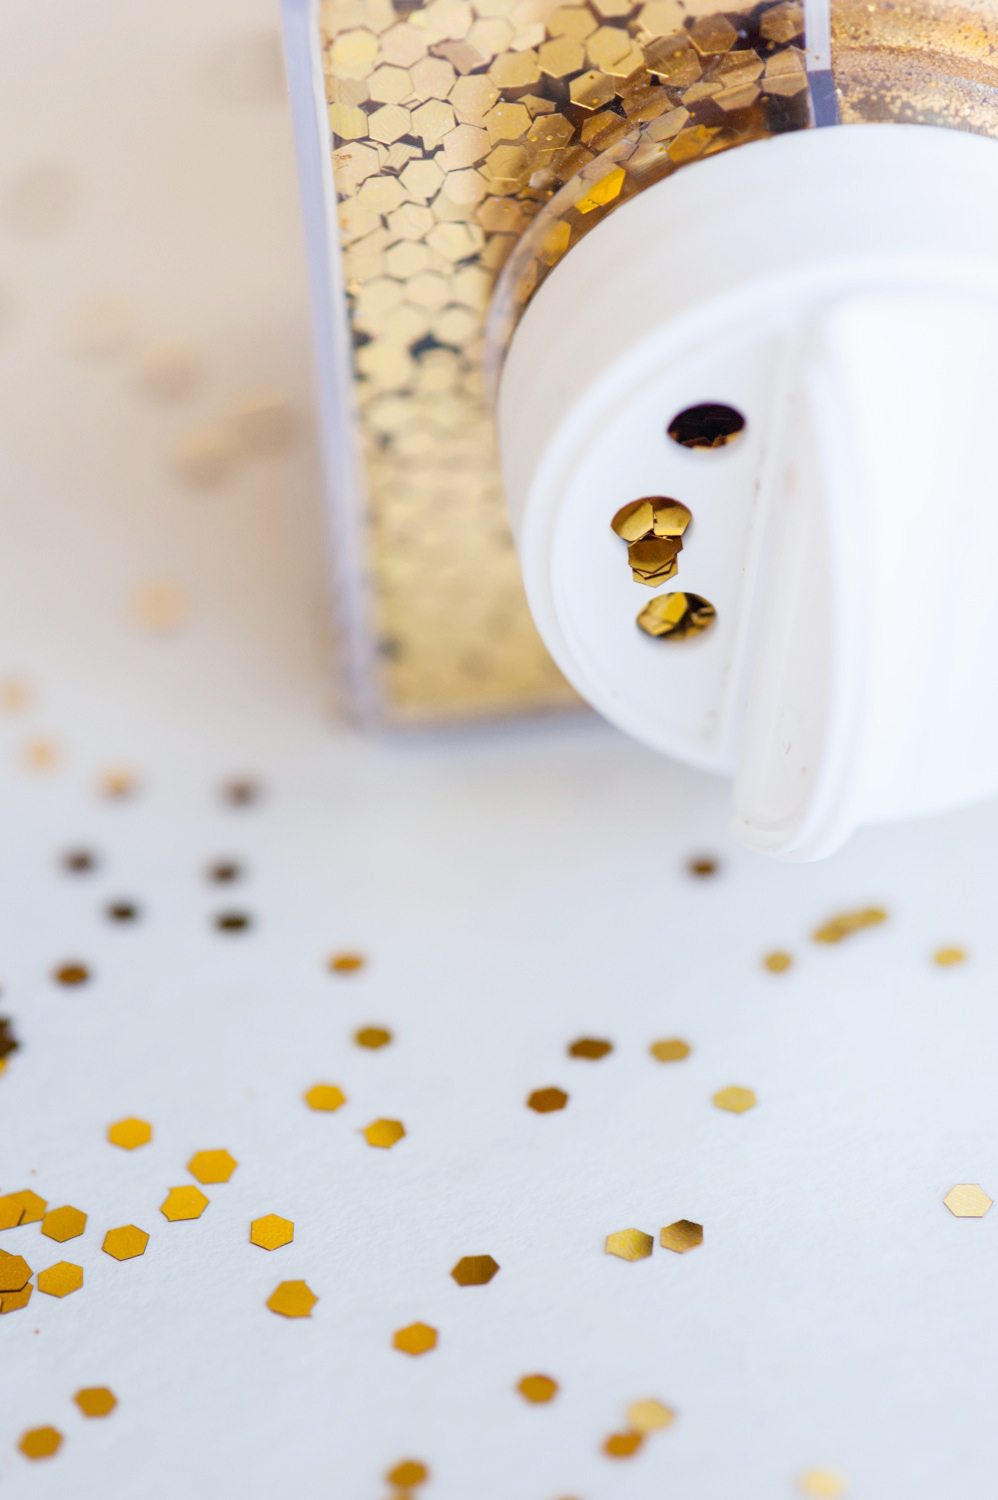

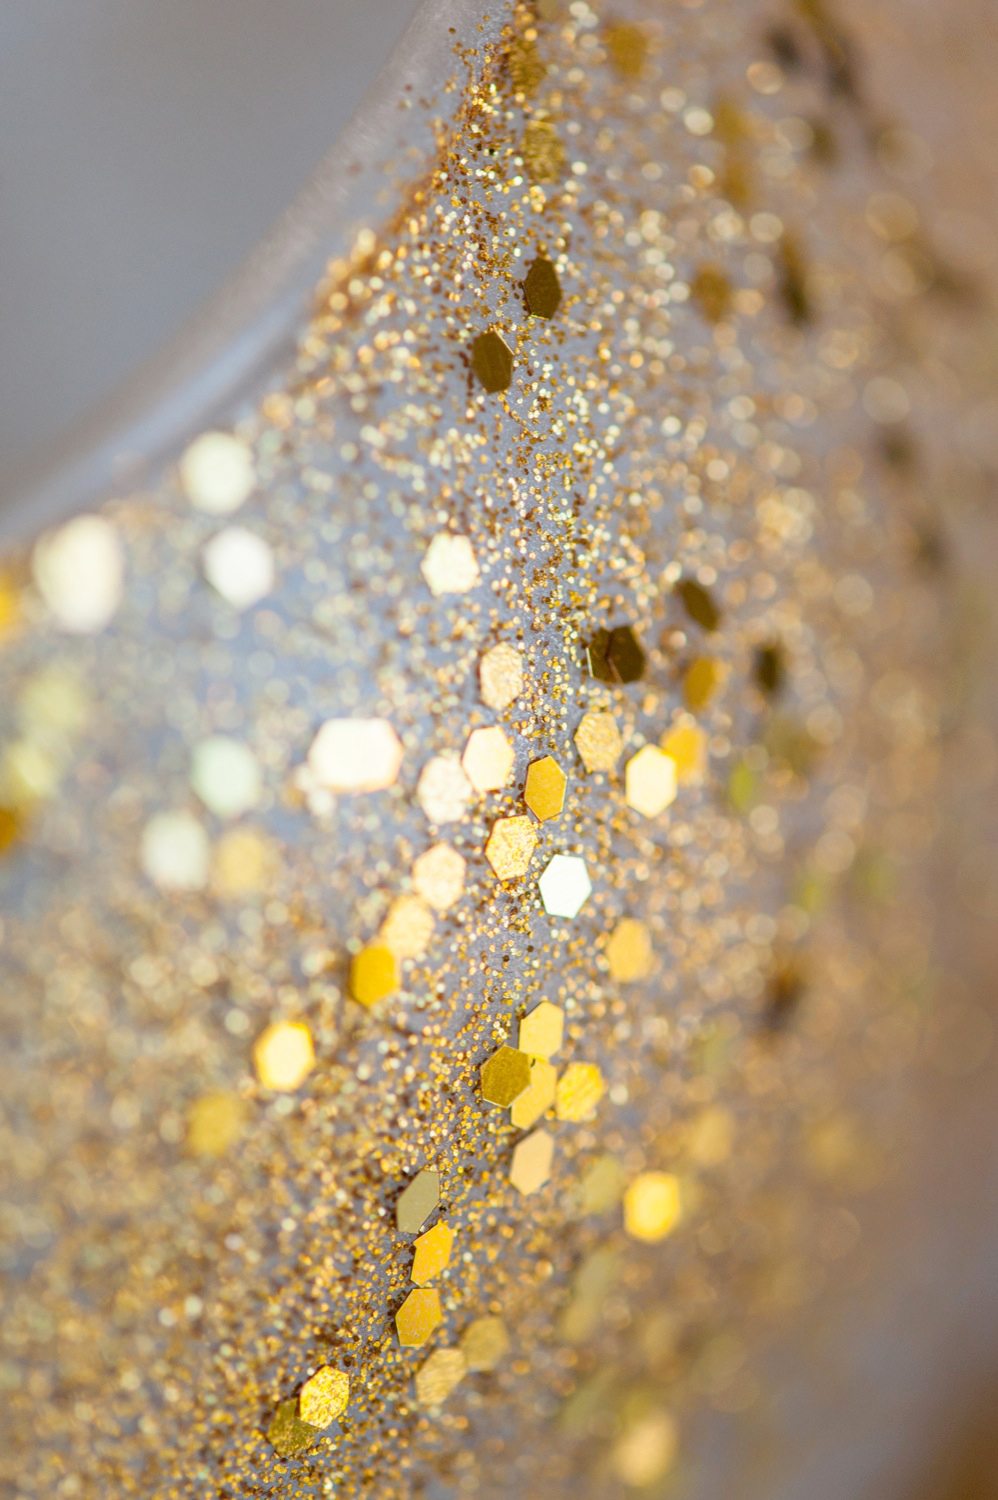
Next up, apply a second light coat of spray adhesive directly over the first layer of glitter. Then go back in with the larger glitter and shake it on liberally. You can repeat the process of adding glue and glitter until you get the desired coverage. I wanted to be able to see through the glitter somewhat, but you can do a thicker coverage if you prefer. Once you achieve the look you like, finish up with a quick coat of clear, glossy spray sealer to help lock the glitter into place and allow everything to dry for at least a few hours or overnight.
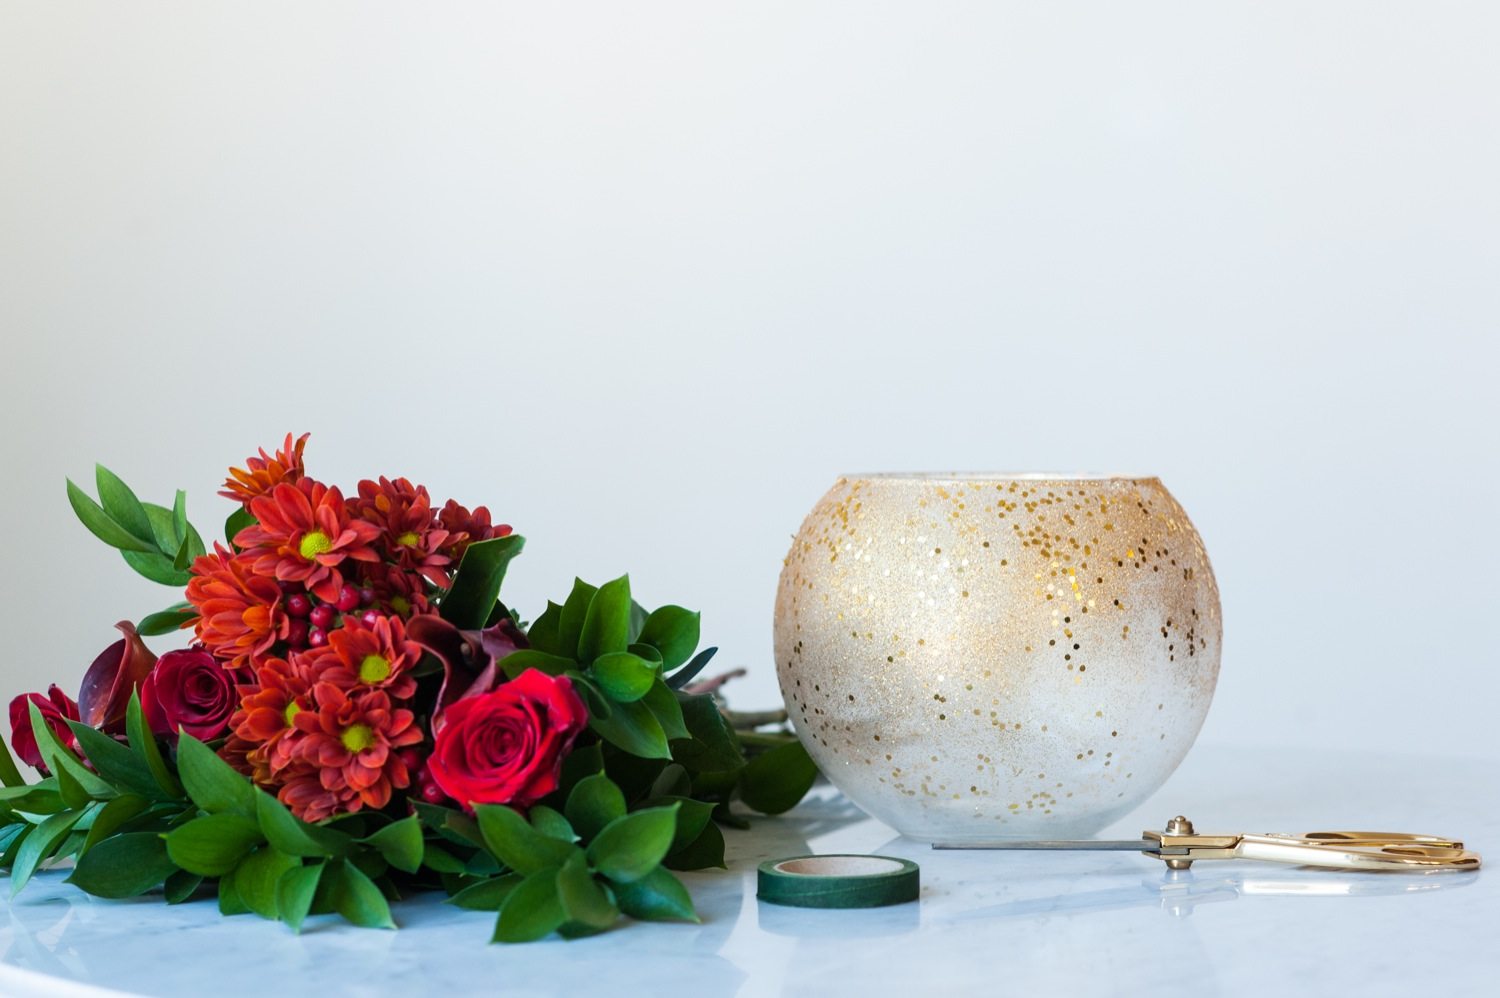
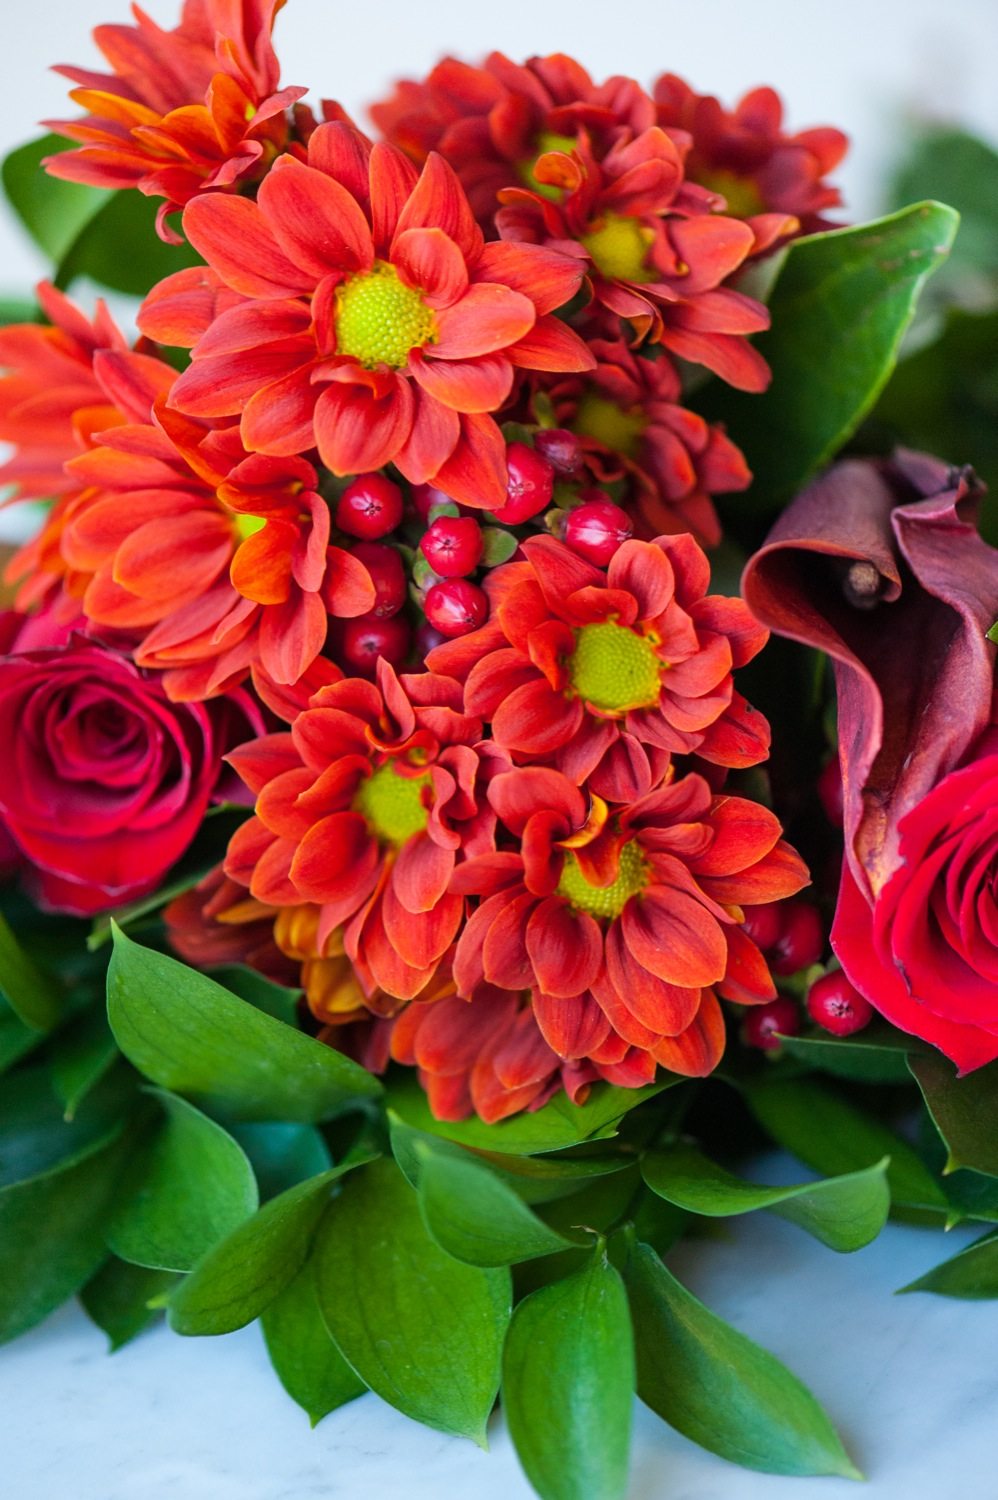
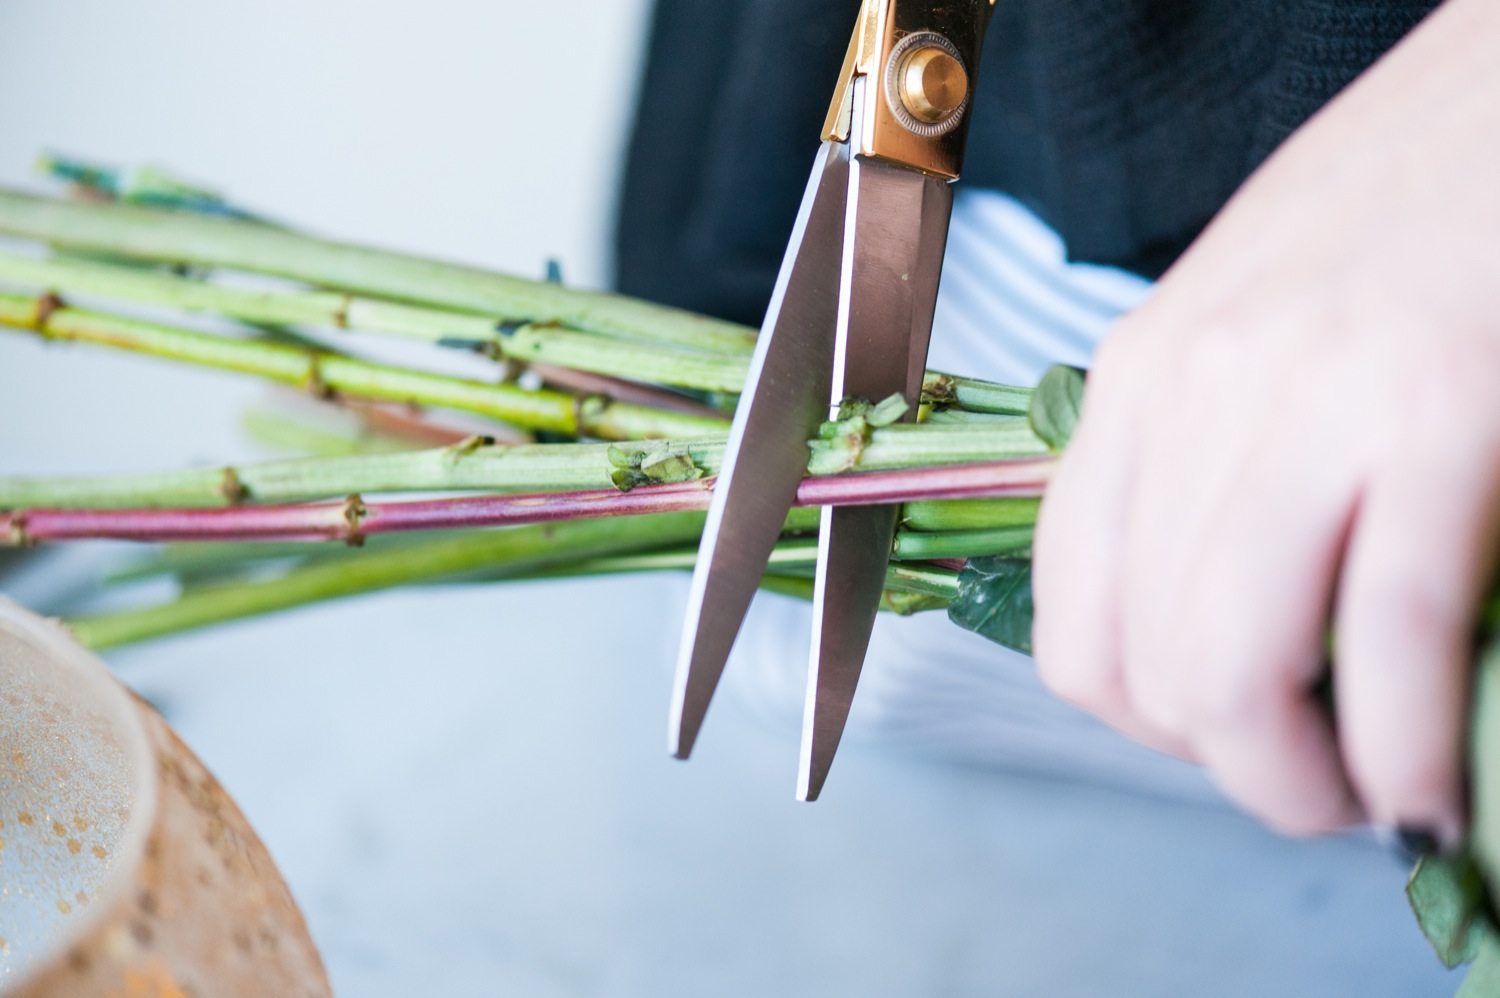
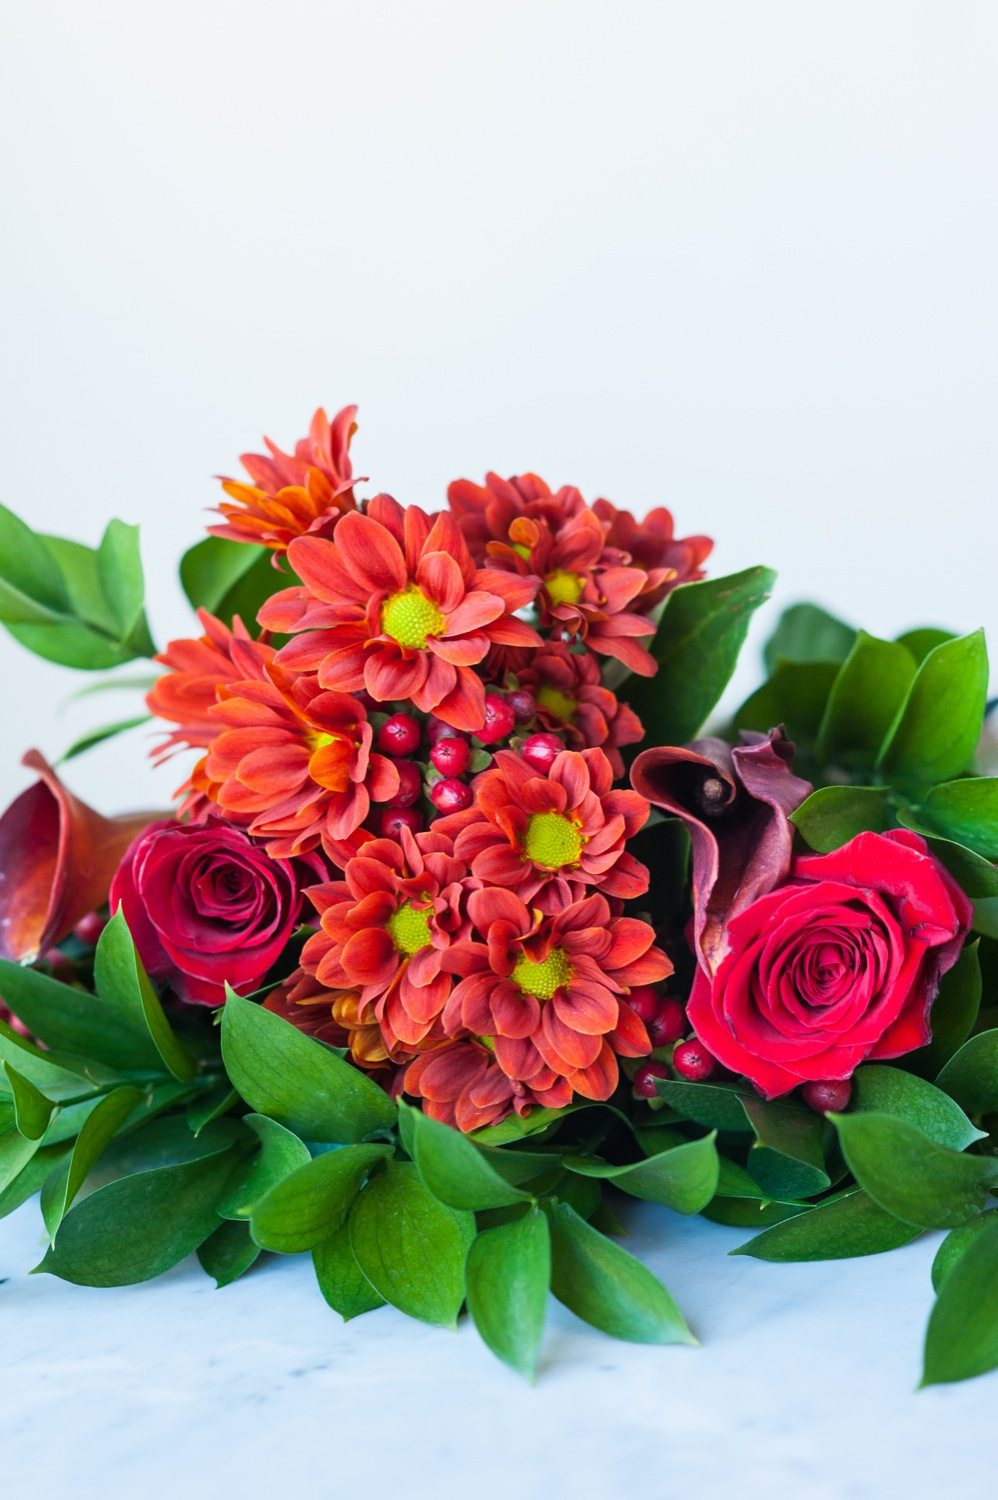

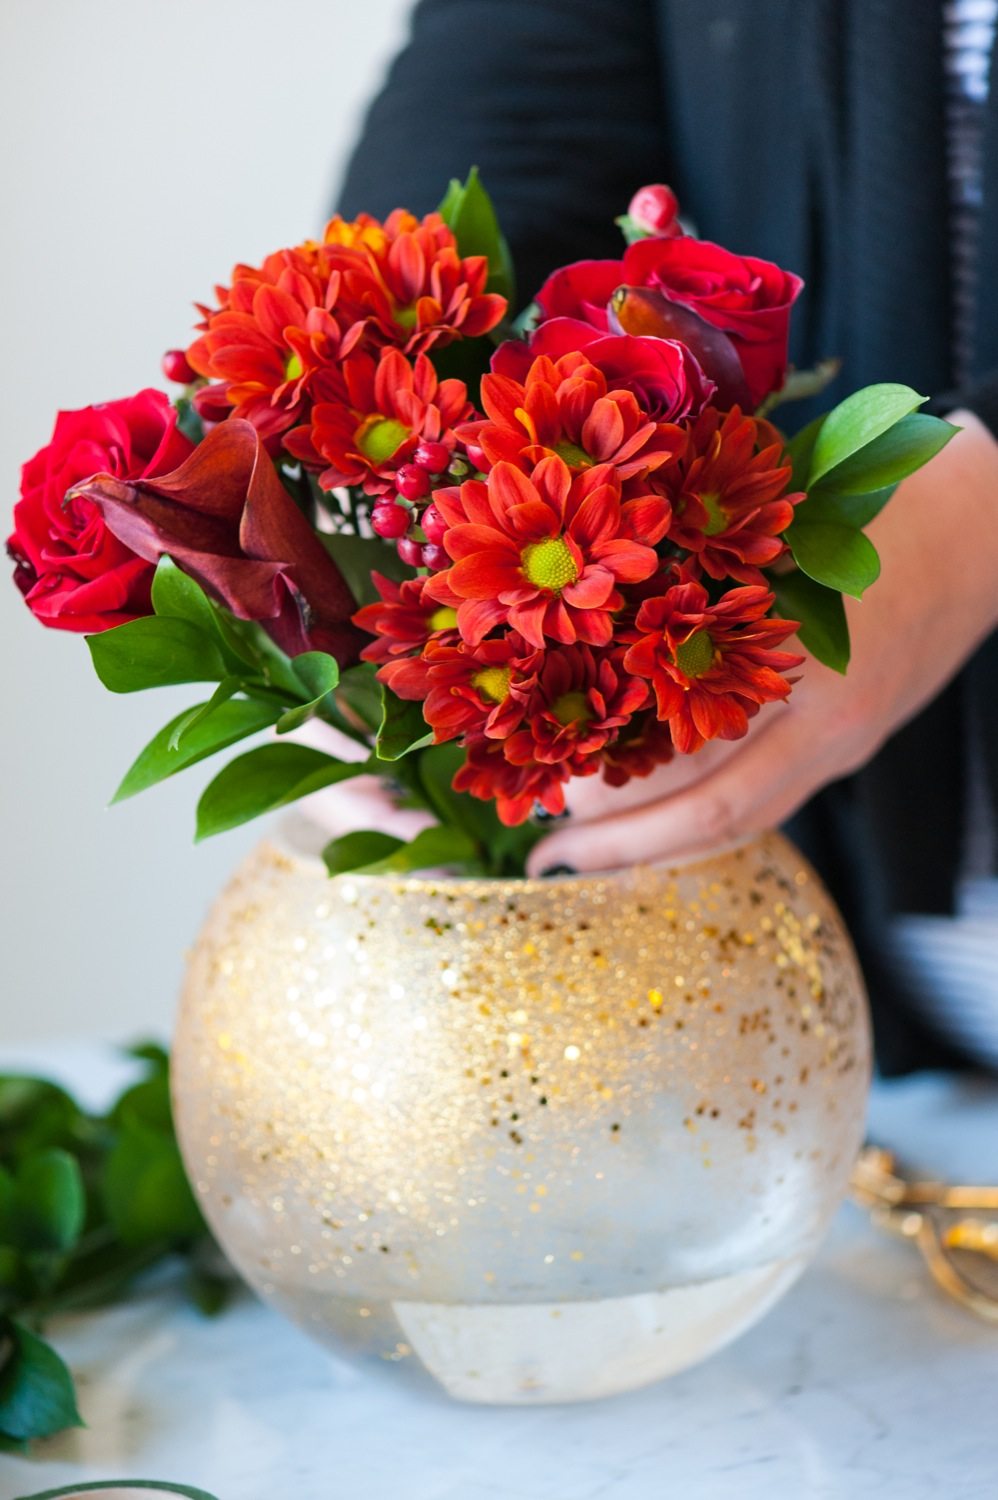
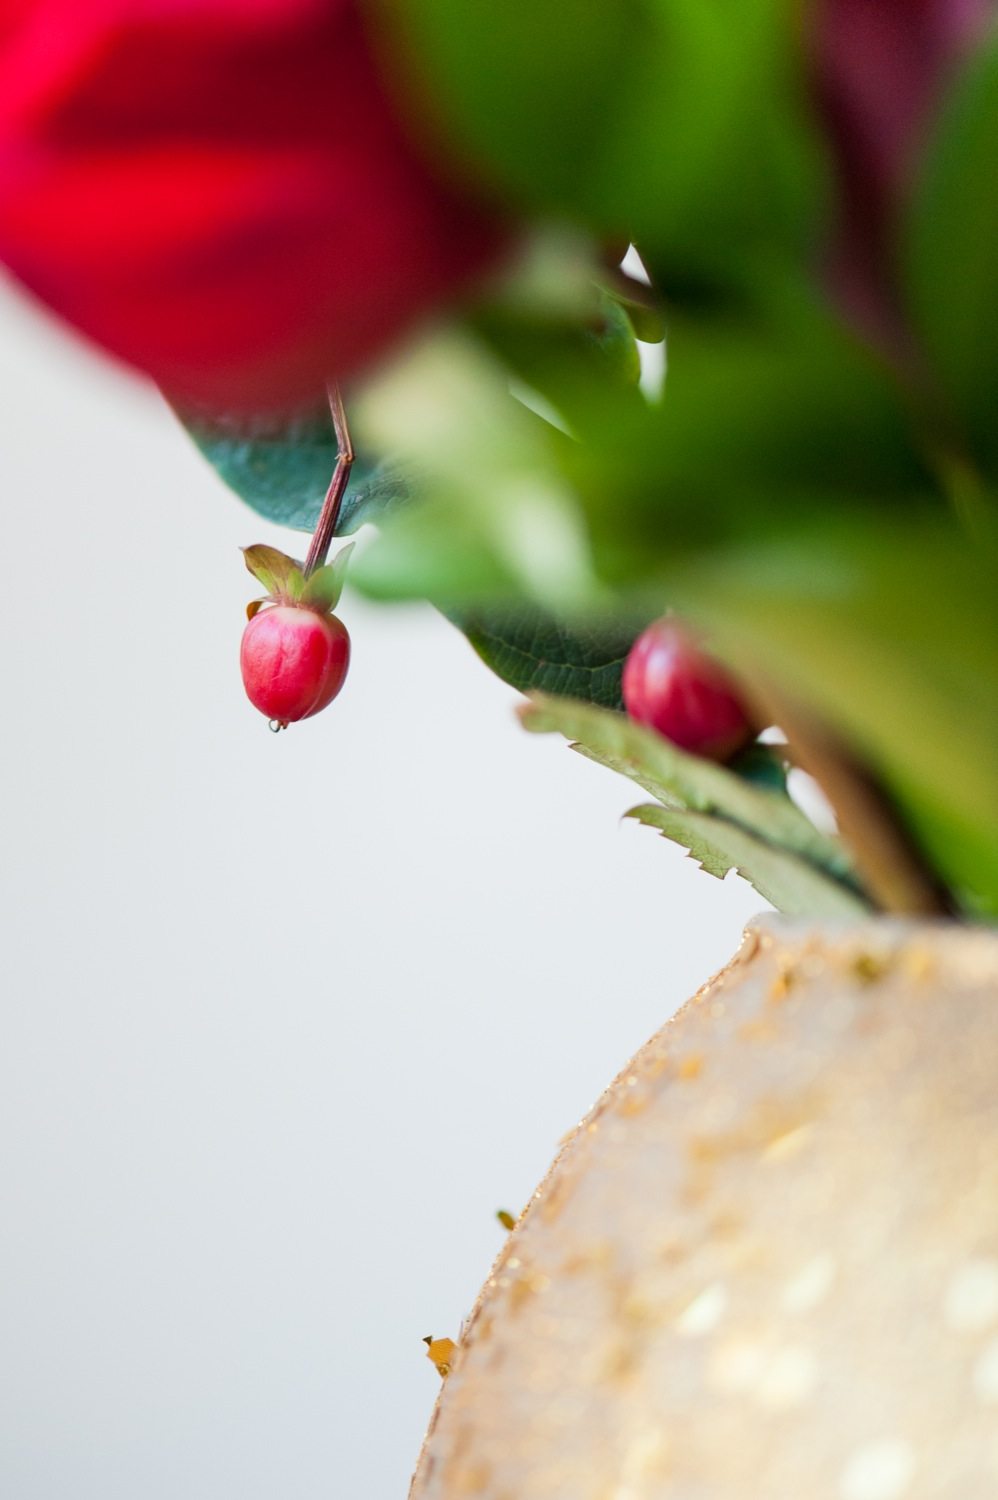
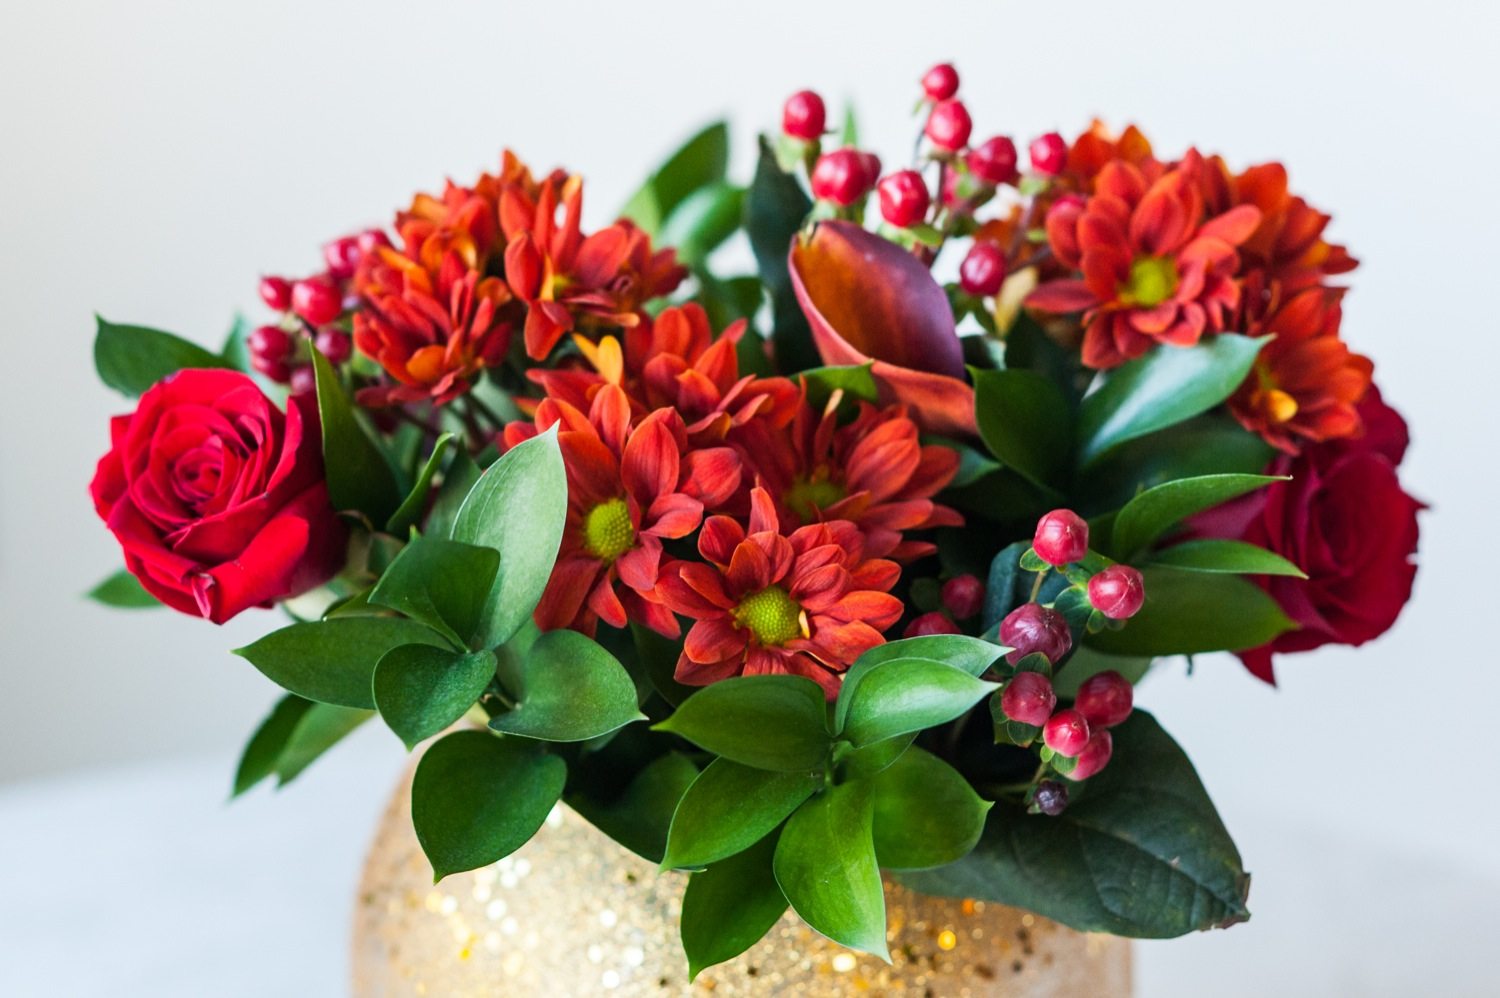
When it’s time to party, fill up your sparkling new vase with the prettiest seasonal flowers you can find! I love this pairing of red blooms, greenery and gold glitter. As is my way, I picked these flowers up at the local grocery store and grabbed a few extra packages of greens to fill everything out and make it look really festive. I simply trimmed down the flowers, placed them in the vase and then followed up by filling in with the greens. It’s as easy as it gets! When in doubt, more flowers is always the better way to go. The volume of flowers will fill everything out nicely and add structure to the arrangement so you don’t have to think too hard. So simple!

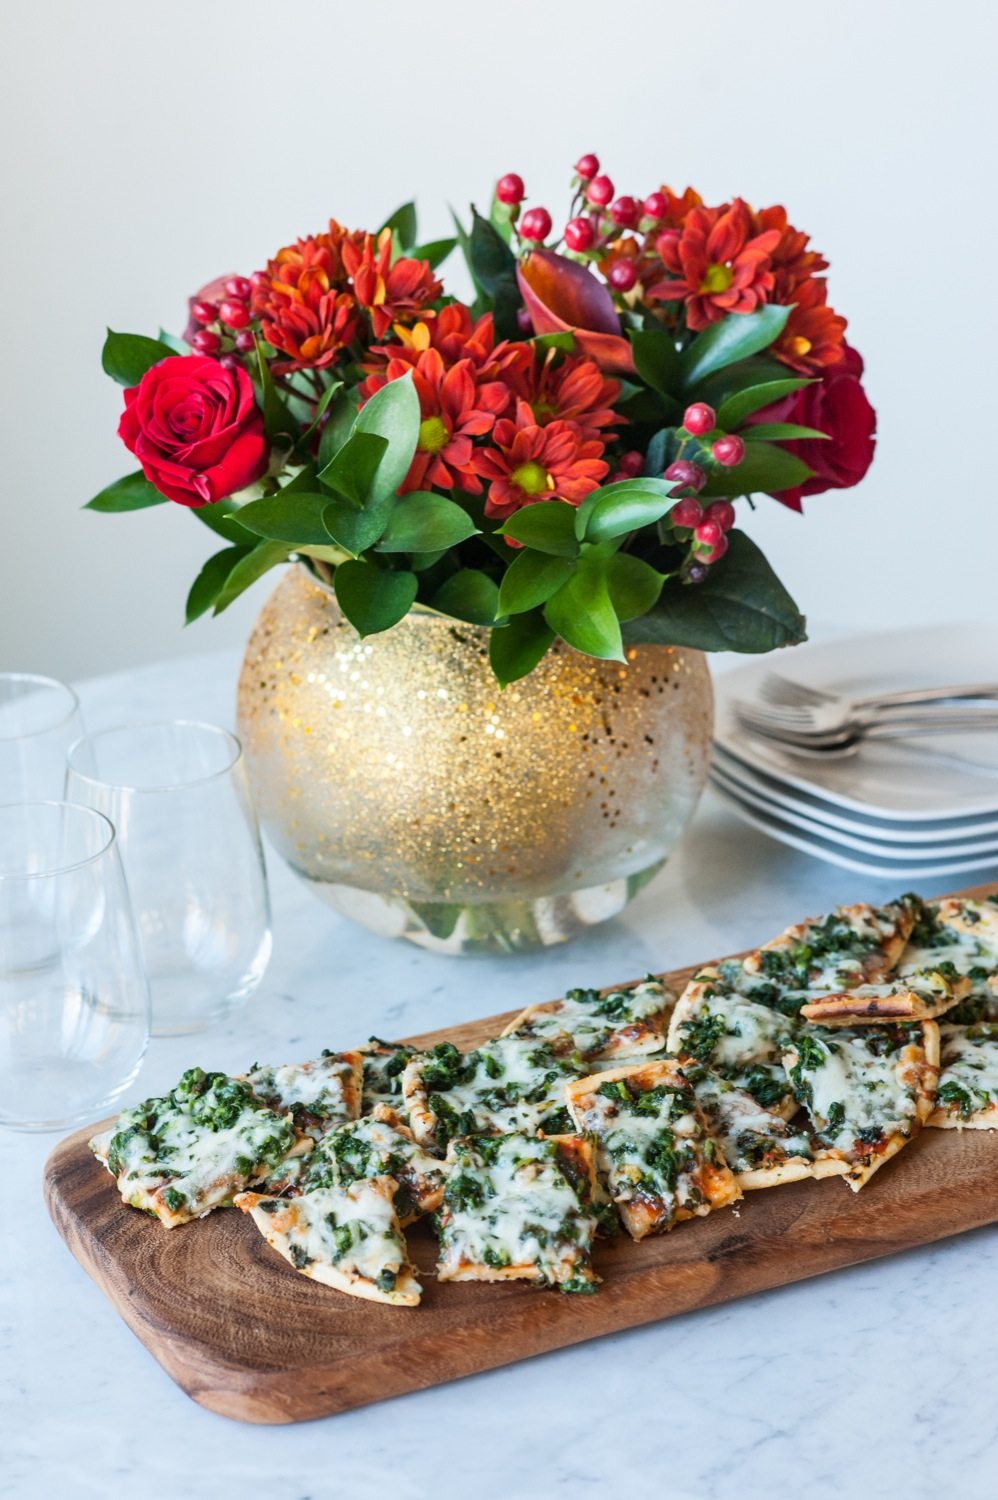
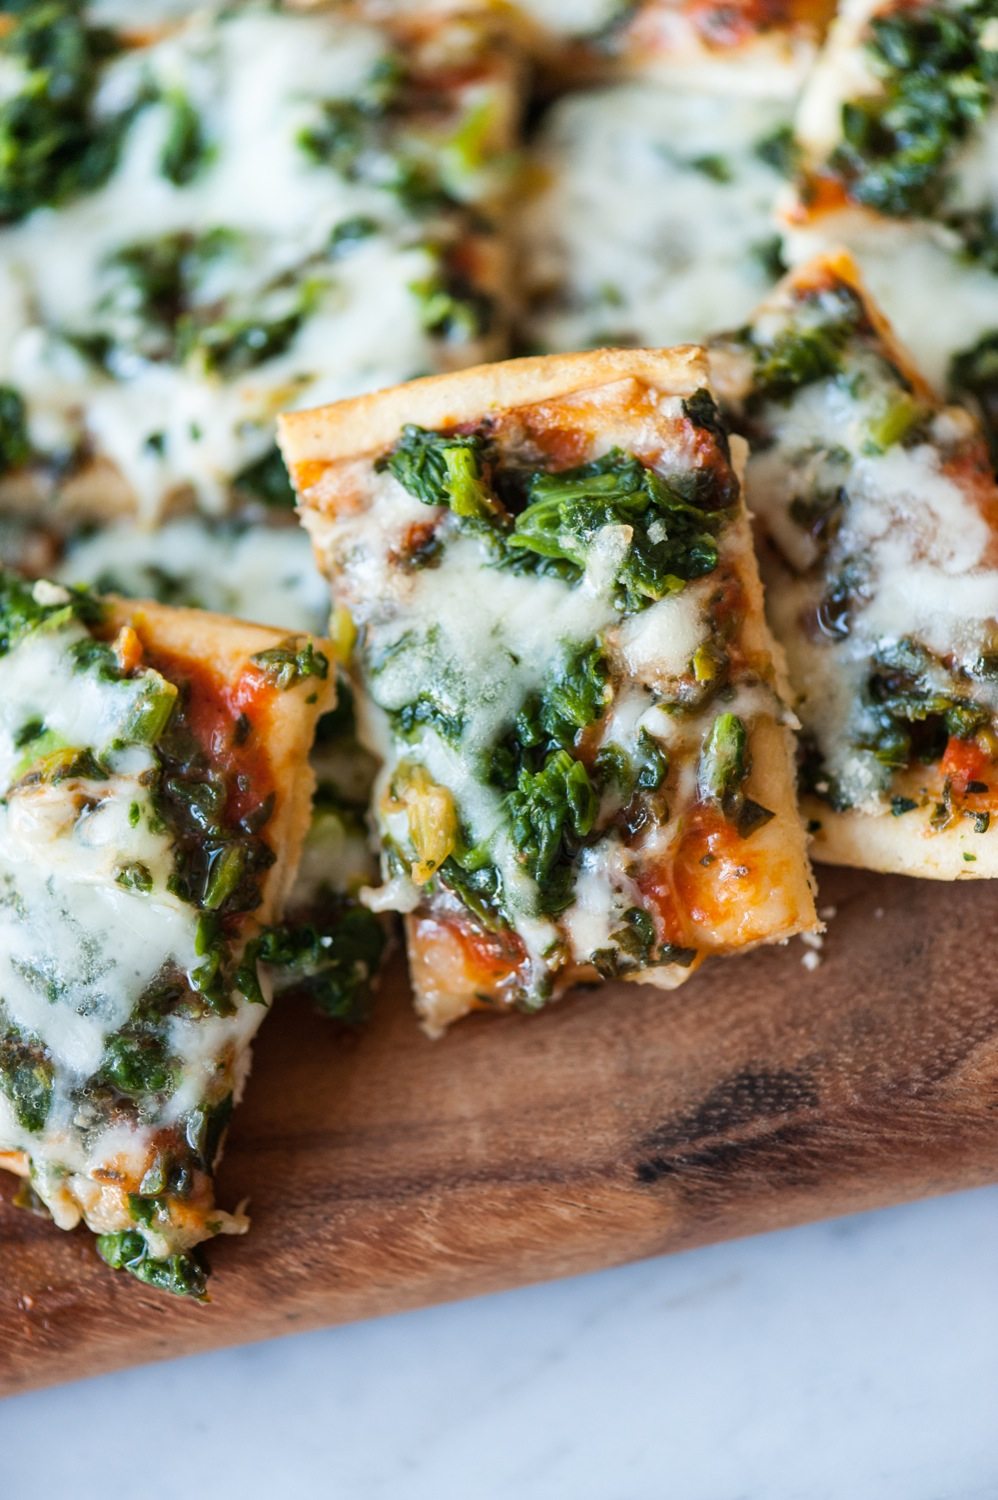
By now you have a gorgeous centerpiece, hopefully your drinks are on ice and all you have to do is pop a couple of pizzas in the oven (they bake in just 10 – 12 minutes at 425 °F) and you’re ready for guests! (Check out the store locator to find where Ristorante pizzas are sold or put in a request with the manager at your favorite store!) The thin, crispy crust of the Pizza Spinaci (and the abundance of flavorful spinach and mozzarella) make this pizza perfect for a cocktail party, but there are eight other flavors to choose from (like Quattro Formaggi, Pepperoni Pesto and Funghi) so you can find something for every palate. I like cutting it into squares and serving it up on a pretty cutting board to make it feel especially gourmet and just a little bit fancy. It’s a quick and simple extra step that will make your guests feel special, which is what holiday entertaining is all about!

Hosting holiday parties is one of my favorite things to do and it’s something that B and I look forward to all year long. If you’re in the need for quick and easy party snack ideas, definitely hit up the grocery store for a few of these pizzas. Us, the kids and all of our friends have come to love them and they’re always a crowd pleaser! Need even more delicious holiday ideas in your life? Give Dr. Oetker a follow on Facebook, Twitter and Pinterest!
![]()
![]()
[Art direction + styling by Cyd Converse | Photos by Alice G. Patterson for The Sweetest Occasion.]
This post was sponsored by Dr. Oetker USA LLC. I received compensation for this post, but all opinions are my own. Read more about our editorial policies.
Shagirlie
Thursday 2nd of June 2022
This project looks as easy as it is beautiful! I love the potential of customizing the final look, like with the shape/size of the vase and colors of the glitter and confetti.
Sweet Christmas Centerpieces Fun To Make And Great To Display – Greensboro Baths
Friday 9th of December 2016
[…] like to add some sparkle to your design. Check out the gold confetti glitter vase featured on thesweetestoccasion. To make one just like it you’ll need a clear glass fishbowl vase, metallic gold glitter in […]
Make Any Day Or Occasion Special With 19 Lovely Flower Centerpieces
Monday 14th of March 2016
[…] Tutorial via thesweetestoccasion.com […]
Cyd Converse
Thursday 7th of January 2016
Thanks, Katie! Thanks, Kari! I really love how this turned out and the gold with the flowers was so gorgeous. Hope you had a great holiday season! XOXO
Kari
Friday 18th of December 2015
What a beautiful look! I love the red and gold together! Kari