This post was sponsored by CVS Photo. Thank you for supporting
the sponsors that help make The Sweetest Occasion possible!
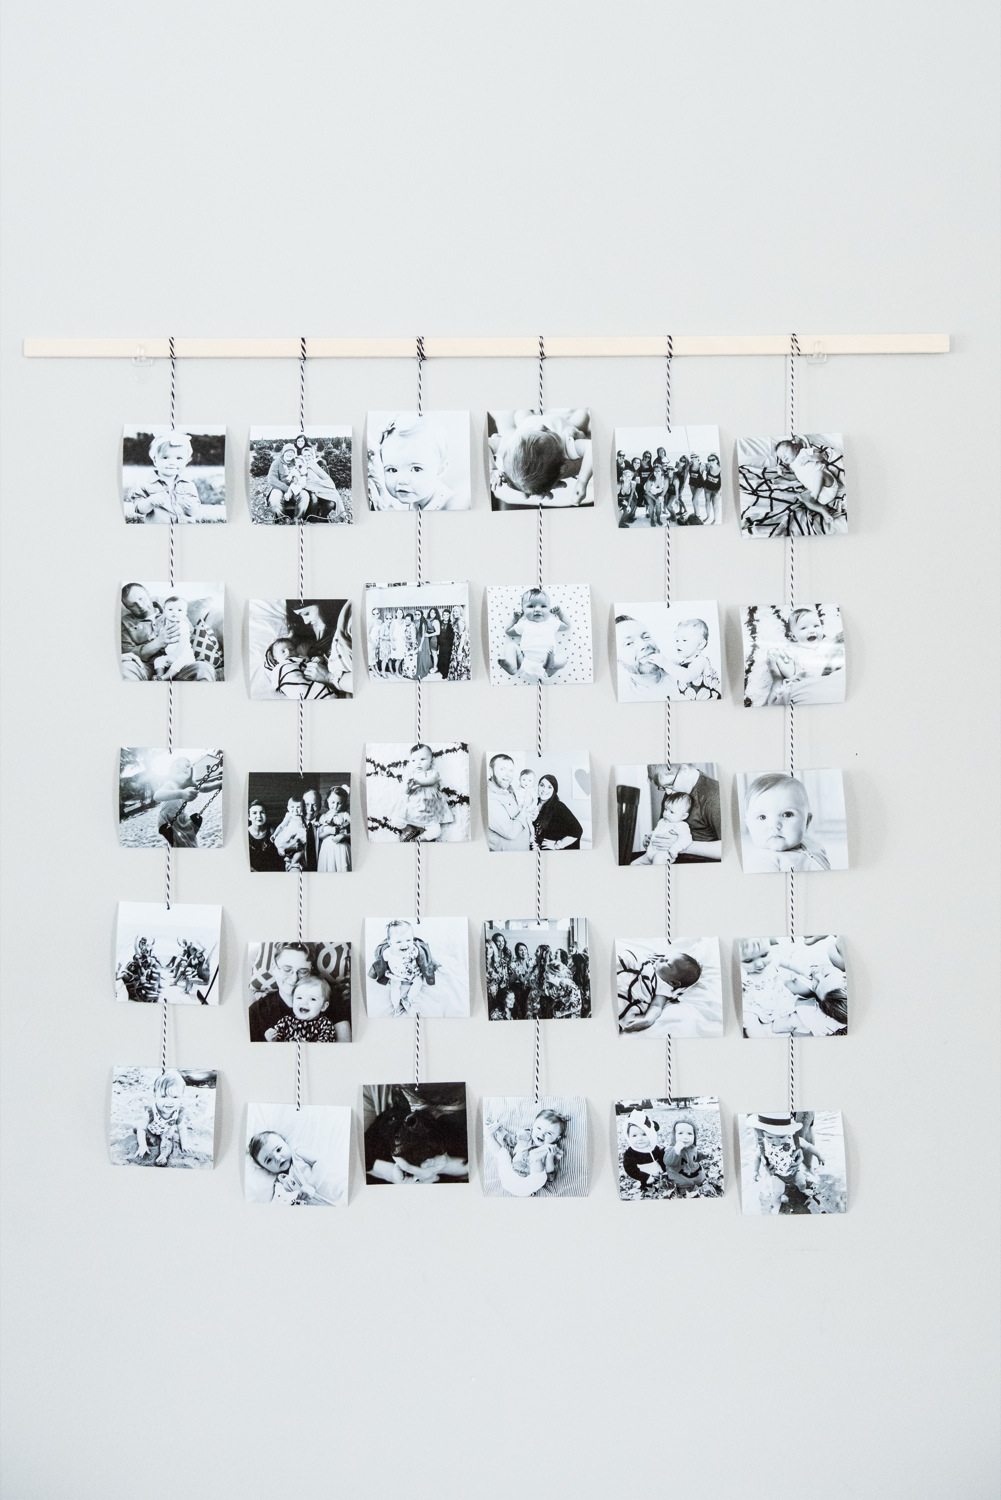
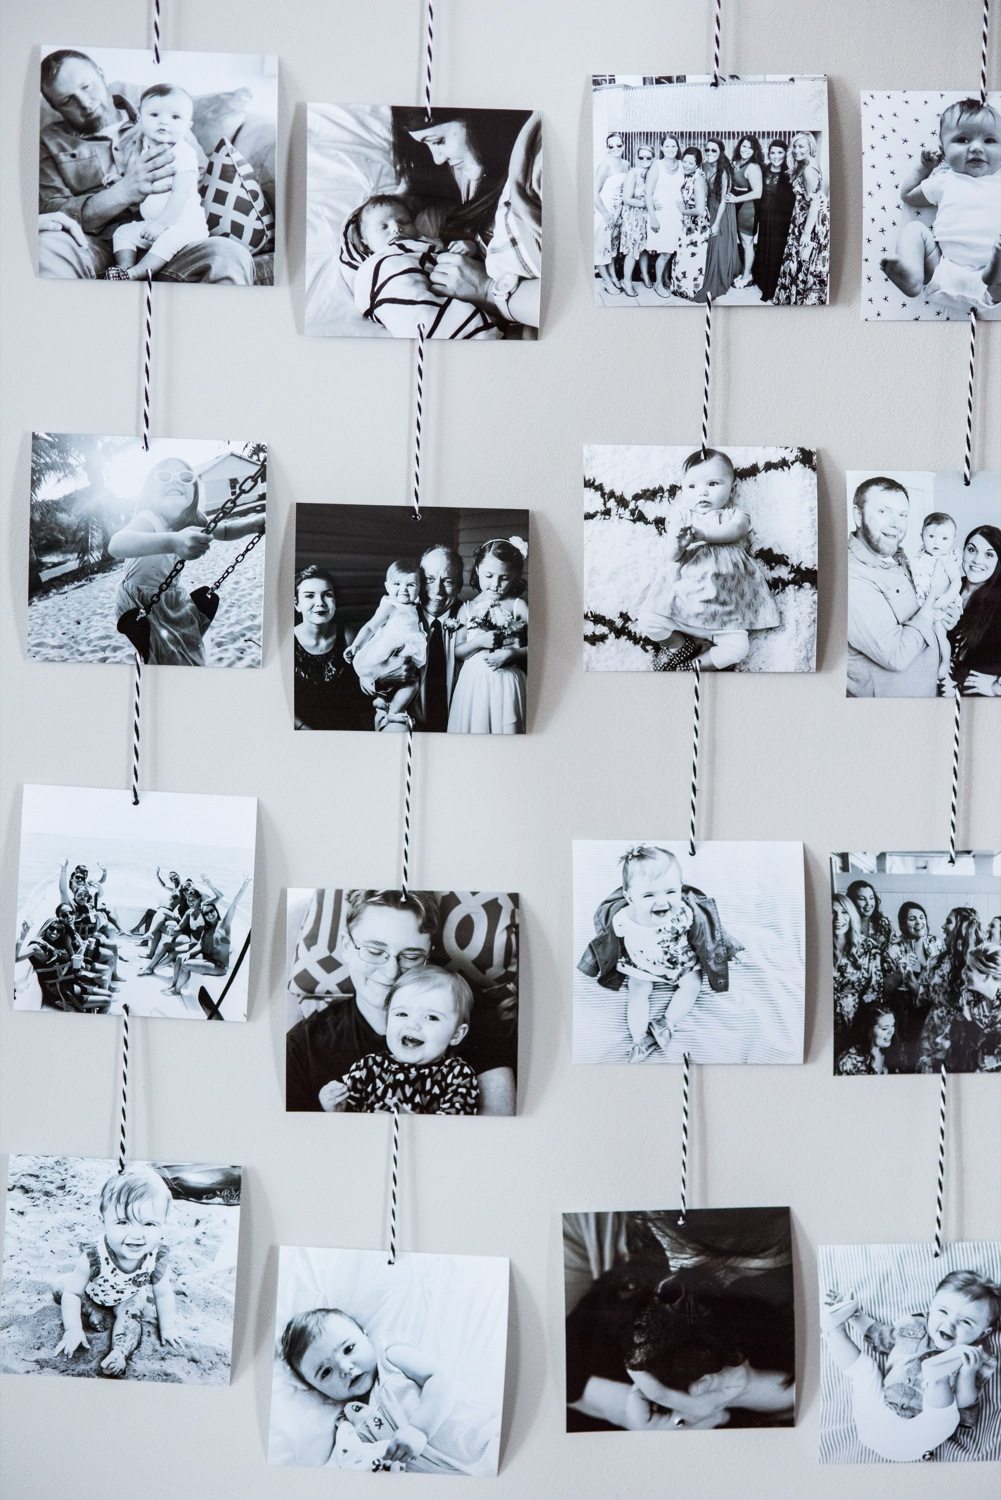
I always love giving photo gifts for Christmas, especially to my parents, siblings and close friends. This year I wanted to find a really special way to make use of the many amazing images that were captured throughout the last twelve months, instead of just texting them to people or sharing them on Facebook with family. Emerson had so many exciting firsts this year, plus my sister got married, we traveled to Key West for her bachelorette weekend and then went to Florida again for a cousin’s wedding in October. It was a really special year with a lot of beautiful memories, so I created this cool, modern family photo wall hanging in partnership with CVS Photo to toast all the reasons we had to celebrate this year. While I am honestly fully intending to keep this one for myself, I may or may not have made a slightly different version using a different mix of photos for someone in my family. (Shhhh!) It’s really easy to make using CVS’s same day photo services and the rest of the supplies can be found at your favorite local craft shop. The end result is a truly beautiful and special gift they wouldn’t want to return even if they could!

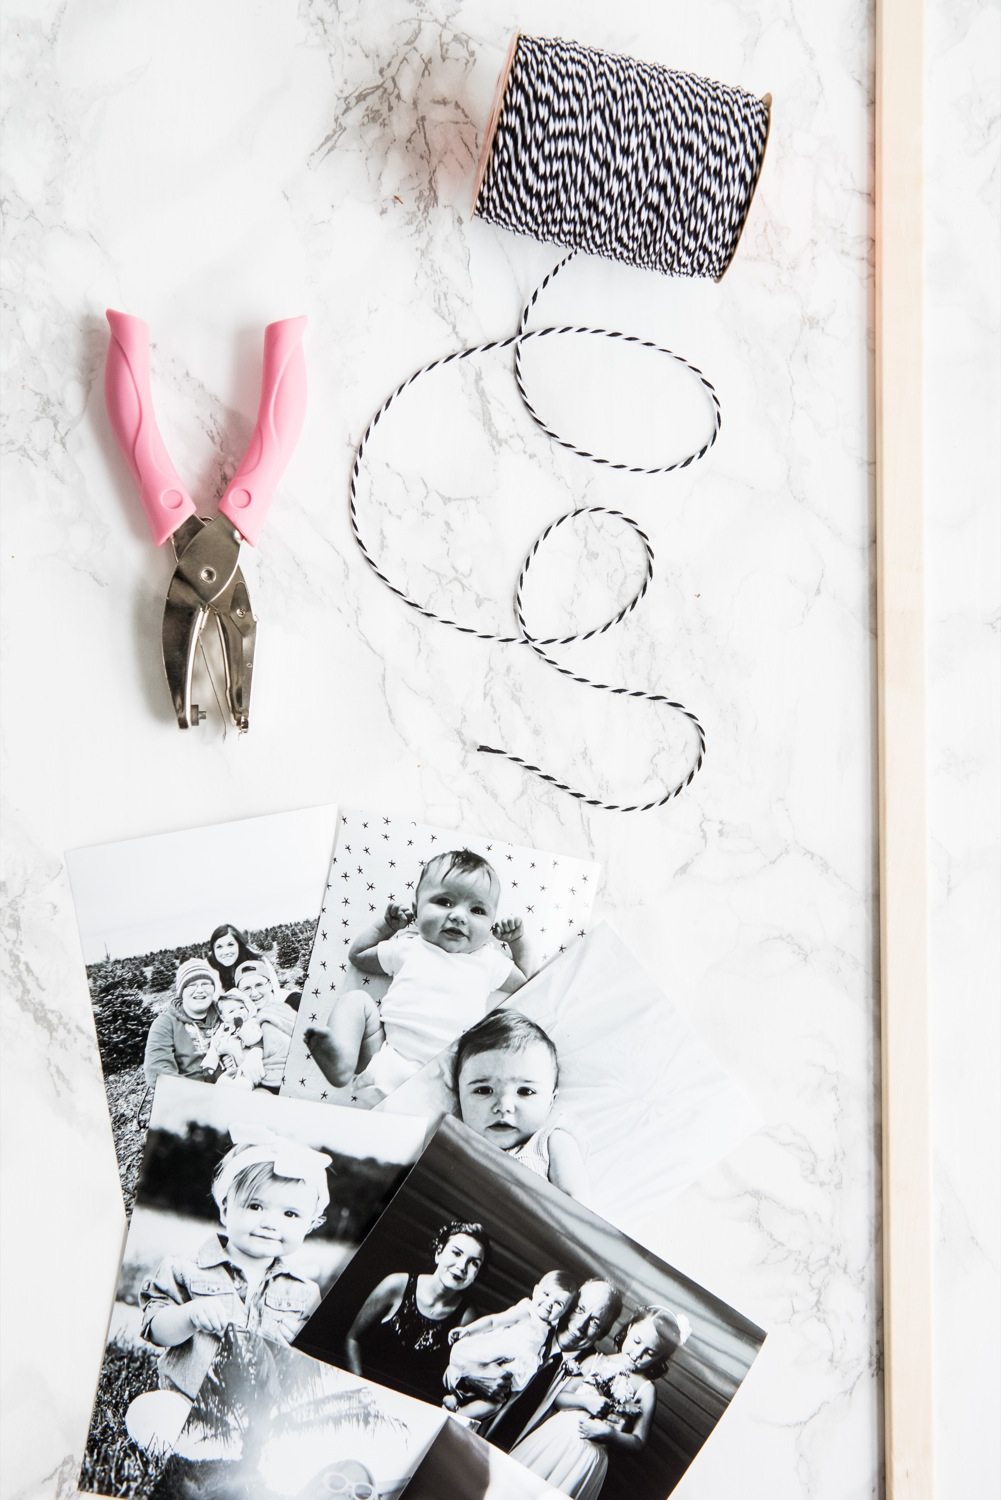
Supplies
- Photo prints from CVS.com
- Twine or string
- Small 1/8″ hole punch
- Wooden dowel or wood trim
- Removable wall hooks
- Paper cutter (optional)
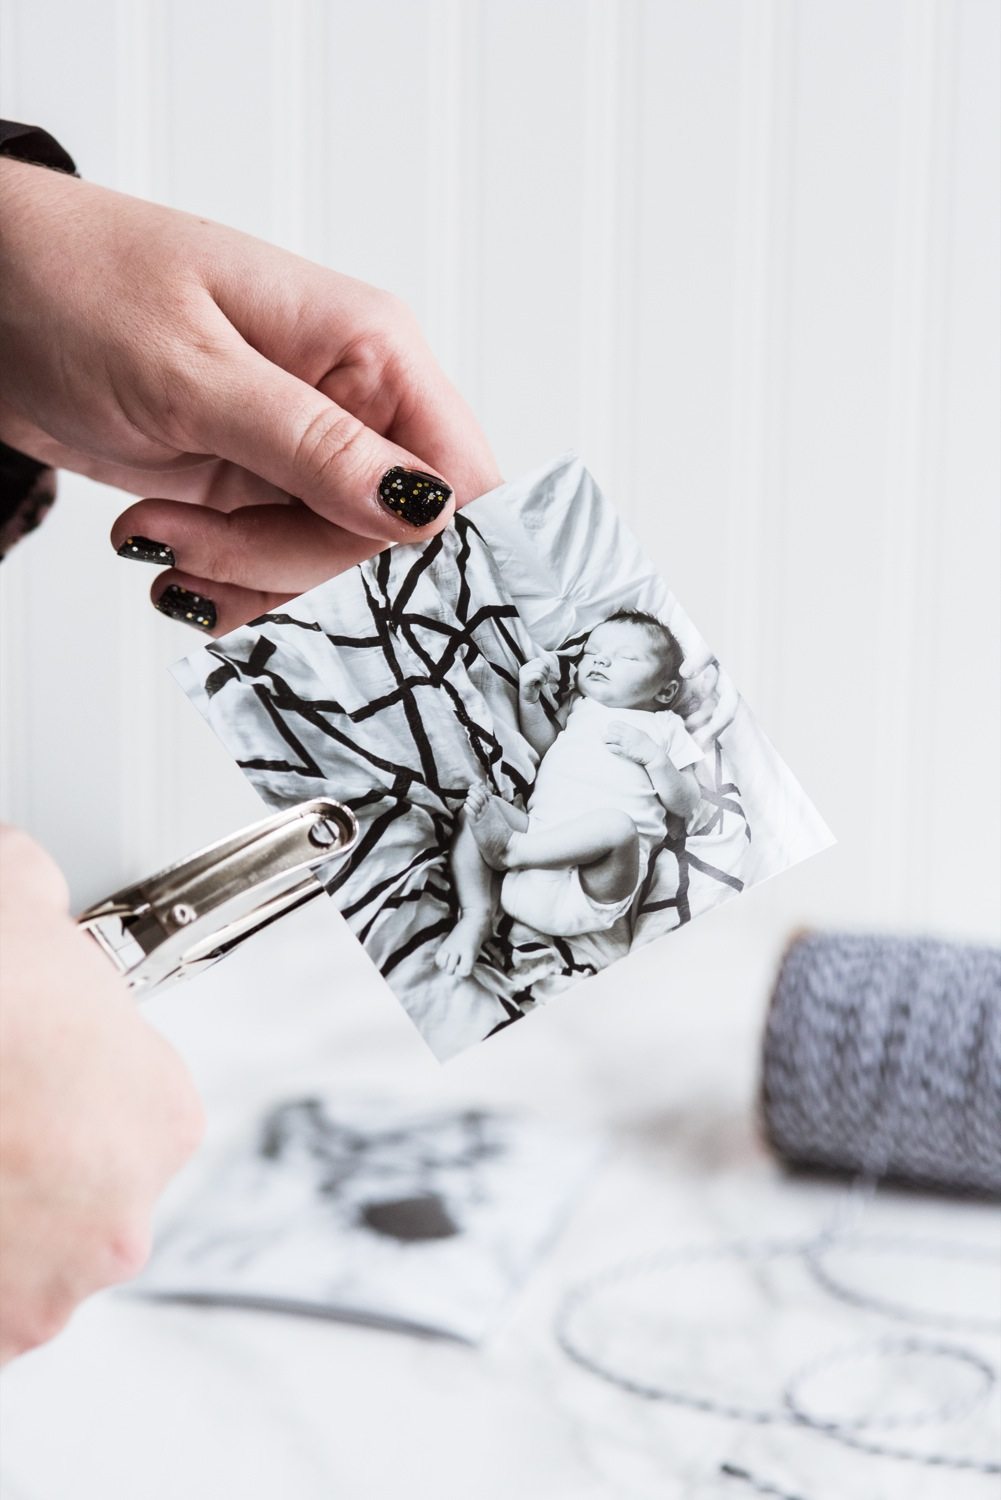


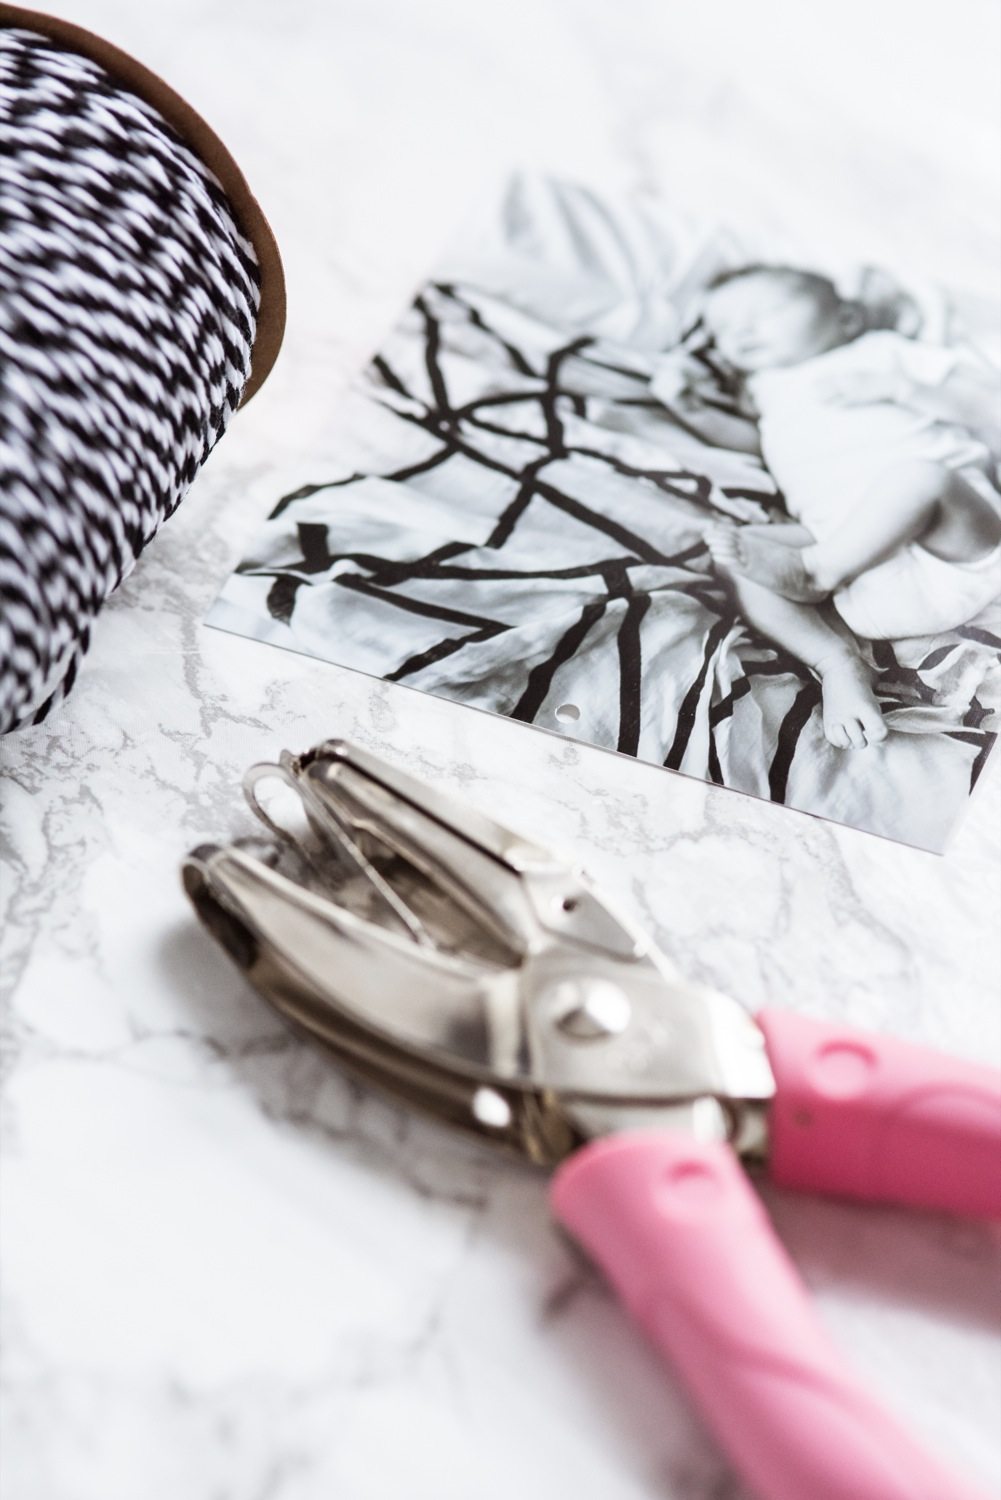
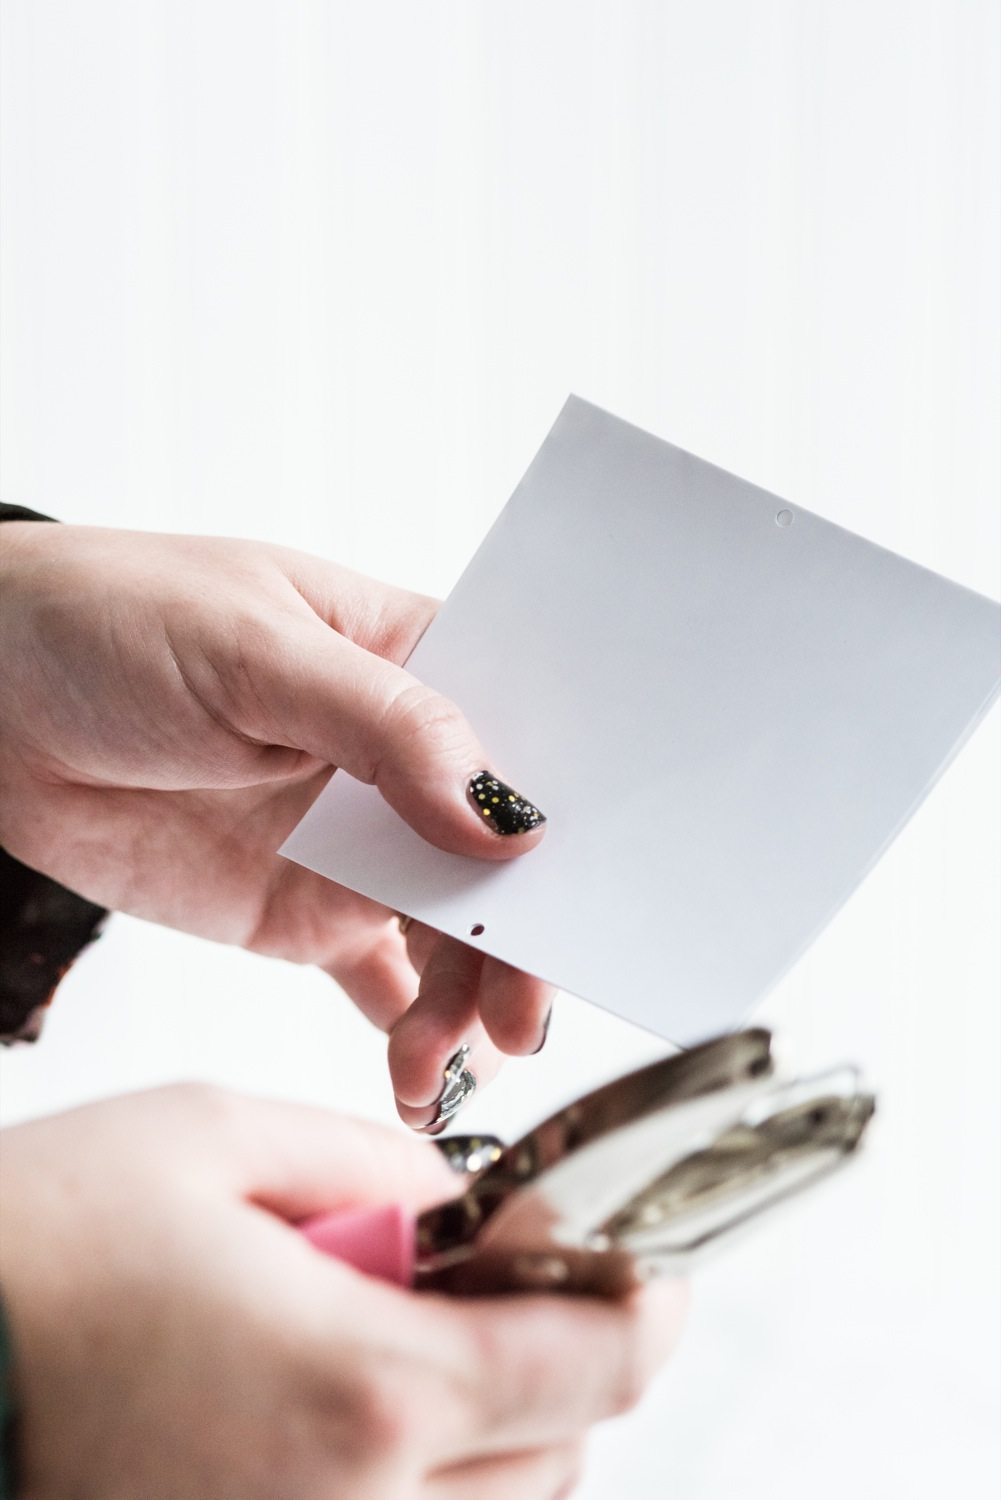
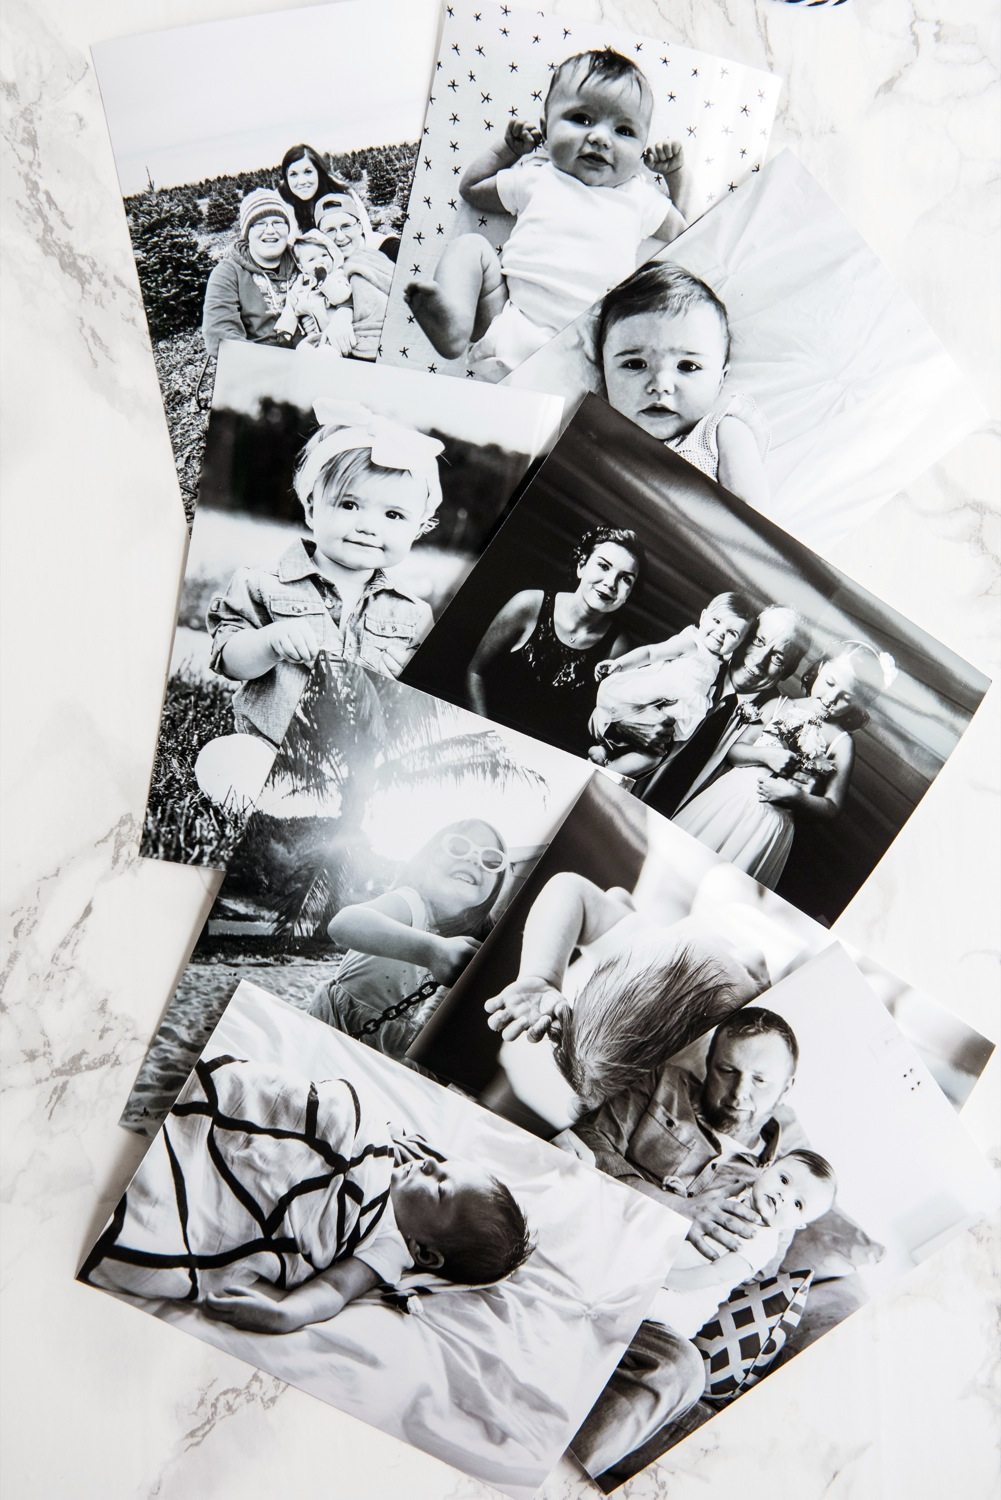
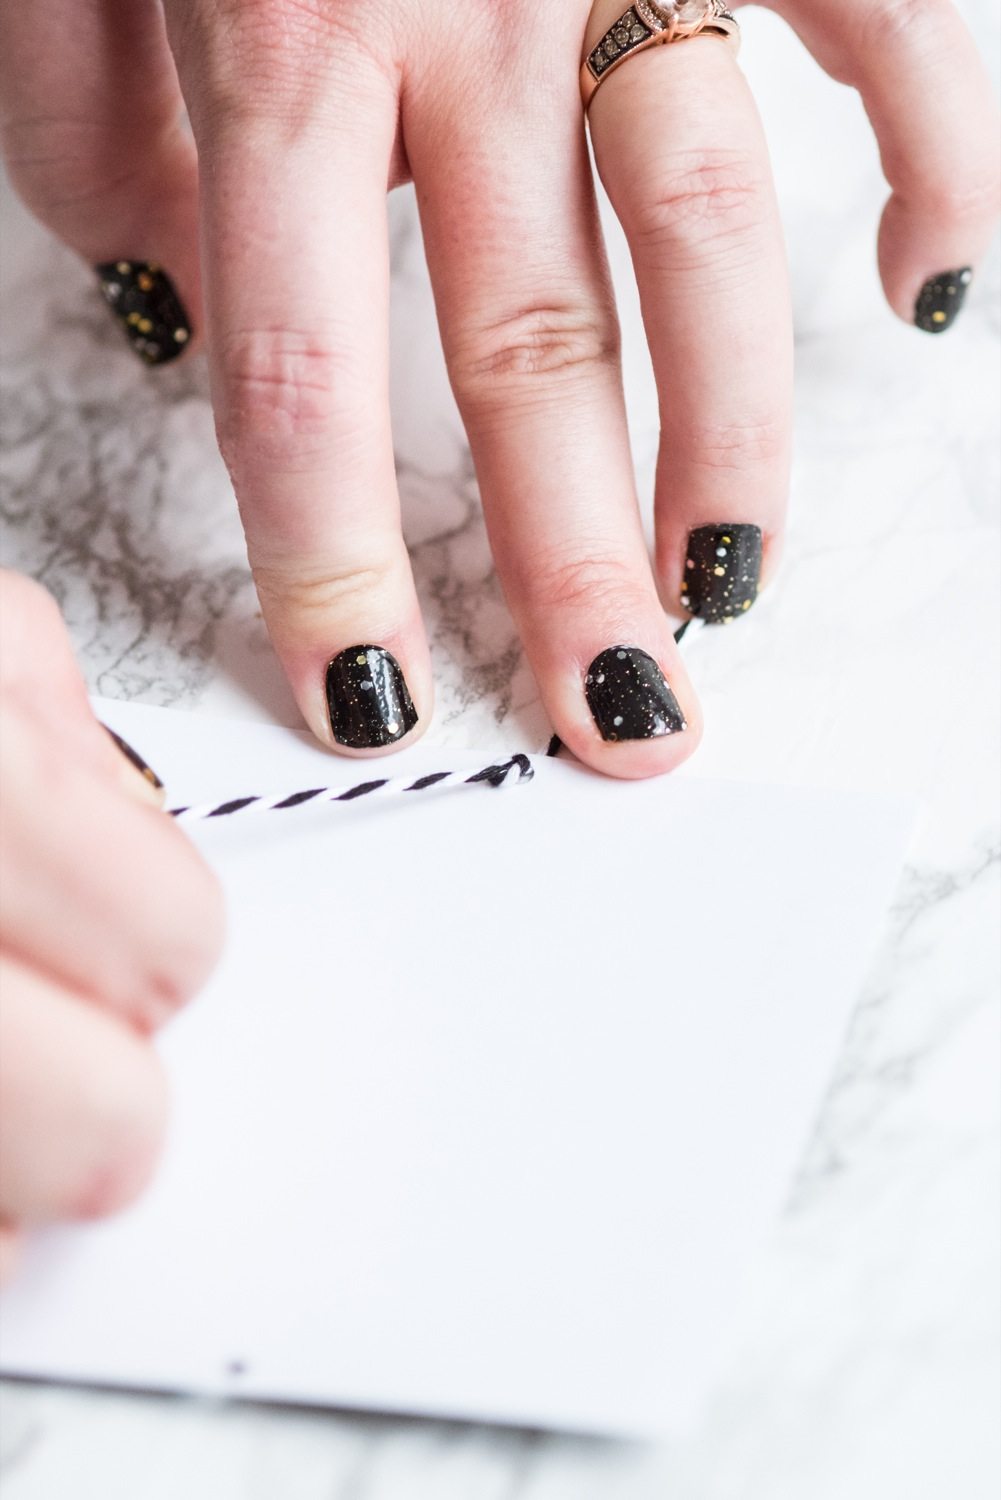
To get started, choose the photos you love most and have them printed at CVS.com. You can upload them from your computer or device, or CVS can connect to your Facebook or Instagram account to grab them. Always a sucker for black and white, I first converted all my images from color, which you can do using photo editing software or a photo editing app. That said, I do also think this would be beautiful with color images or a mix of both! You’ll have your photo prints the same day from CVS and then you can get started. I used 4×6 prints which I trimmed down to 4×4 using a paper cutter, or CVS.com offers square prints in various sizes. Alternately, you could use the 4×6 images as is, creating a cool pattern of horizontal and vertical photos. Then, using a small hole punch (mine is 1/8″), punch a hole at the top center and bottom center of each photo. Once you’ve found the center of the first photo and punched your holes, you can use that one as a template to quickly punch all the other photos by laying a second photo on top of the original one and punching through the holes to punch the second photo.
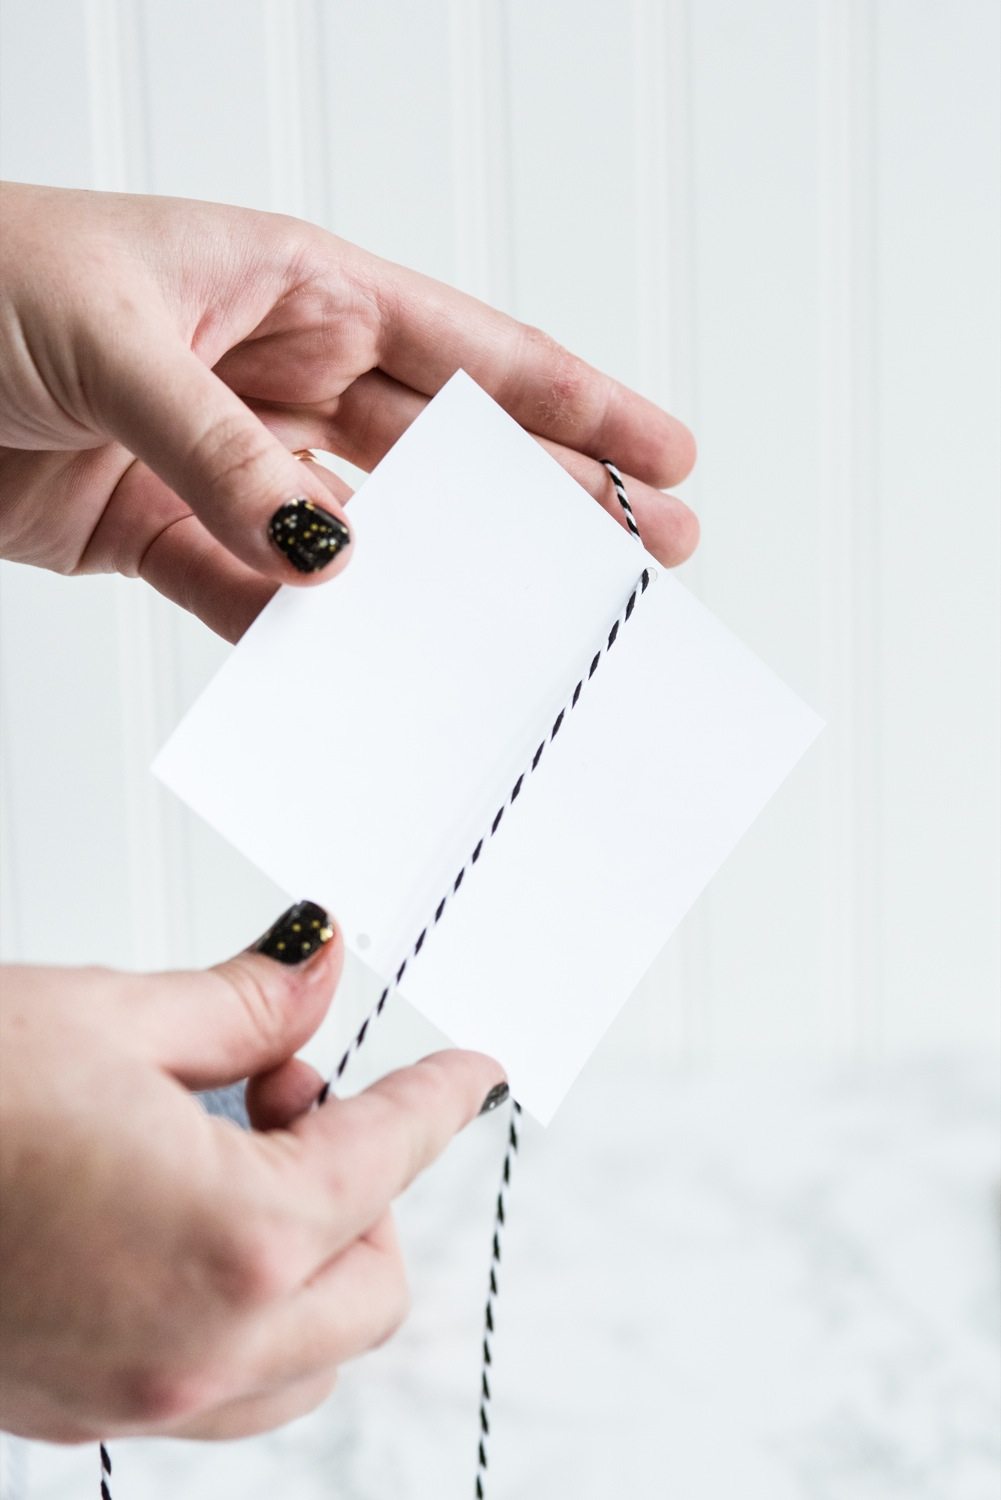

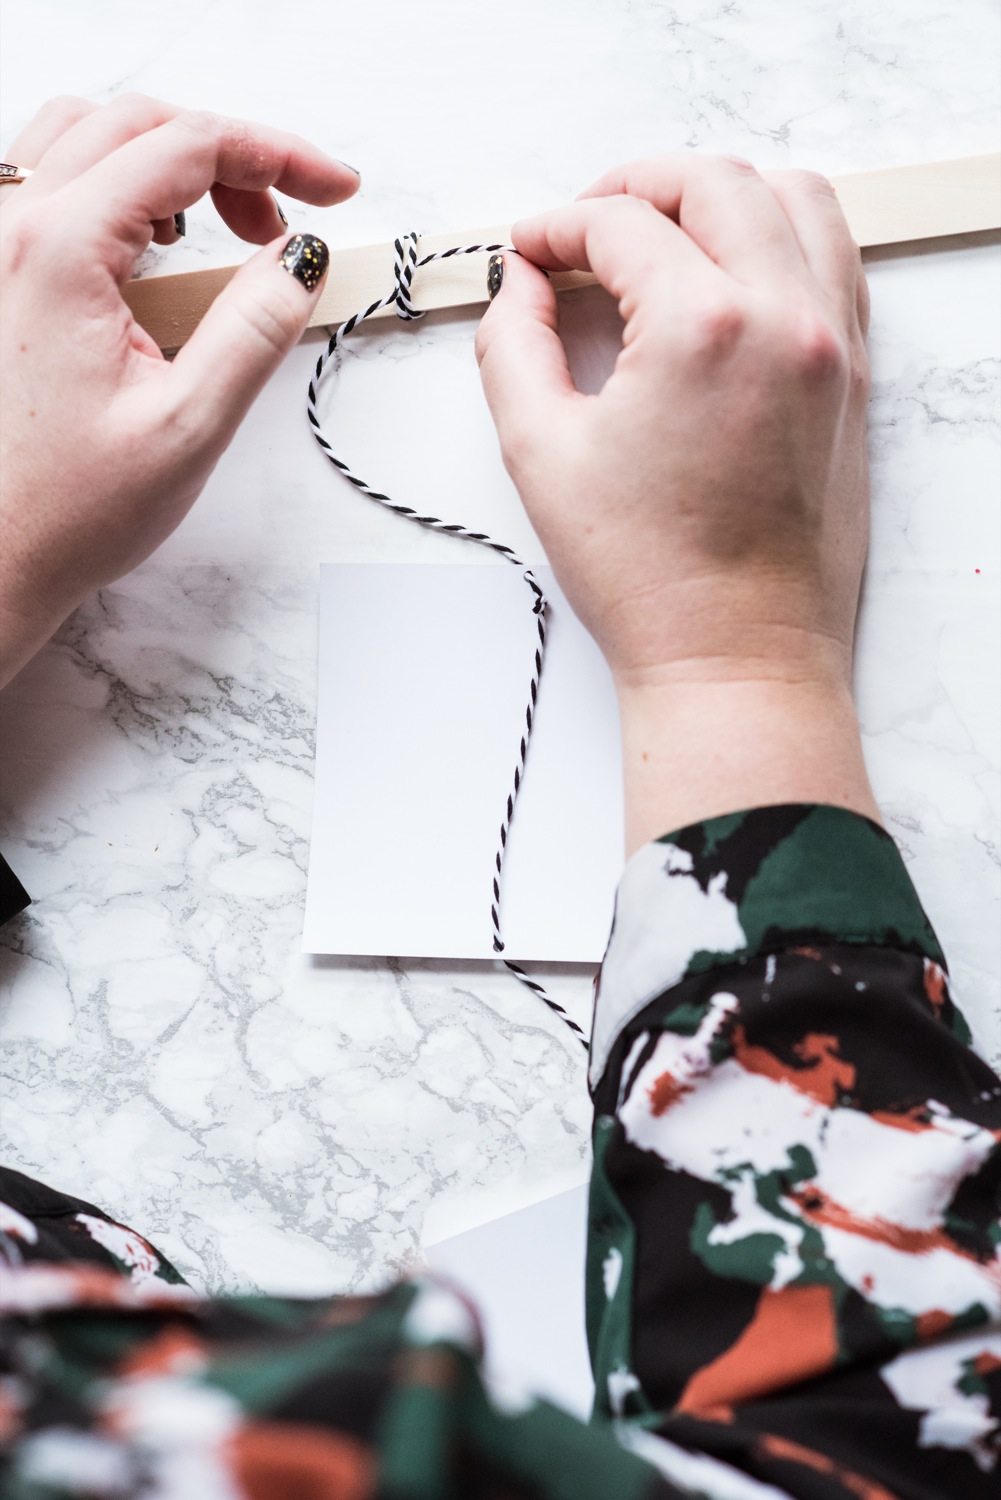
Next, string your photos together using twine or string. I cut my string to 3x the length of my wooden strip and left about 10″ at the top. Feed it through the front of the top hole of your first image and pull it through until you have your roughly 10″ of excess to alter allow me to attach it to the wooden hanger. Tie a knot to hold it in place and then feed the twine through the back of the bottom hole. There’s no need to create a second knot.
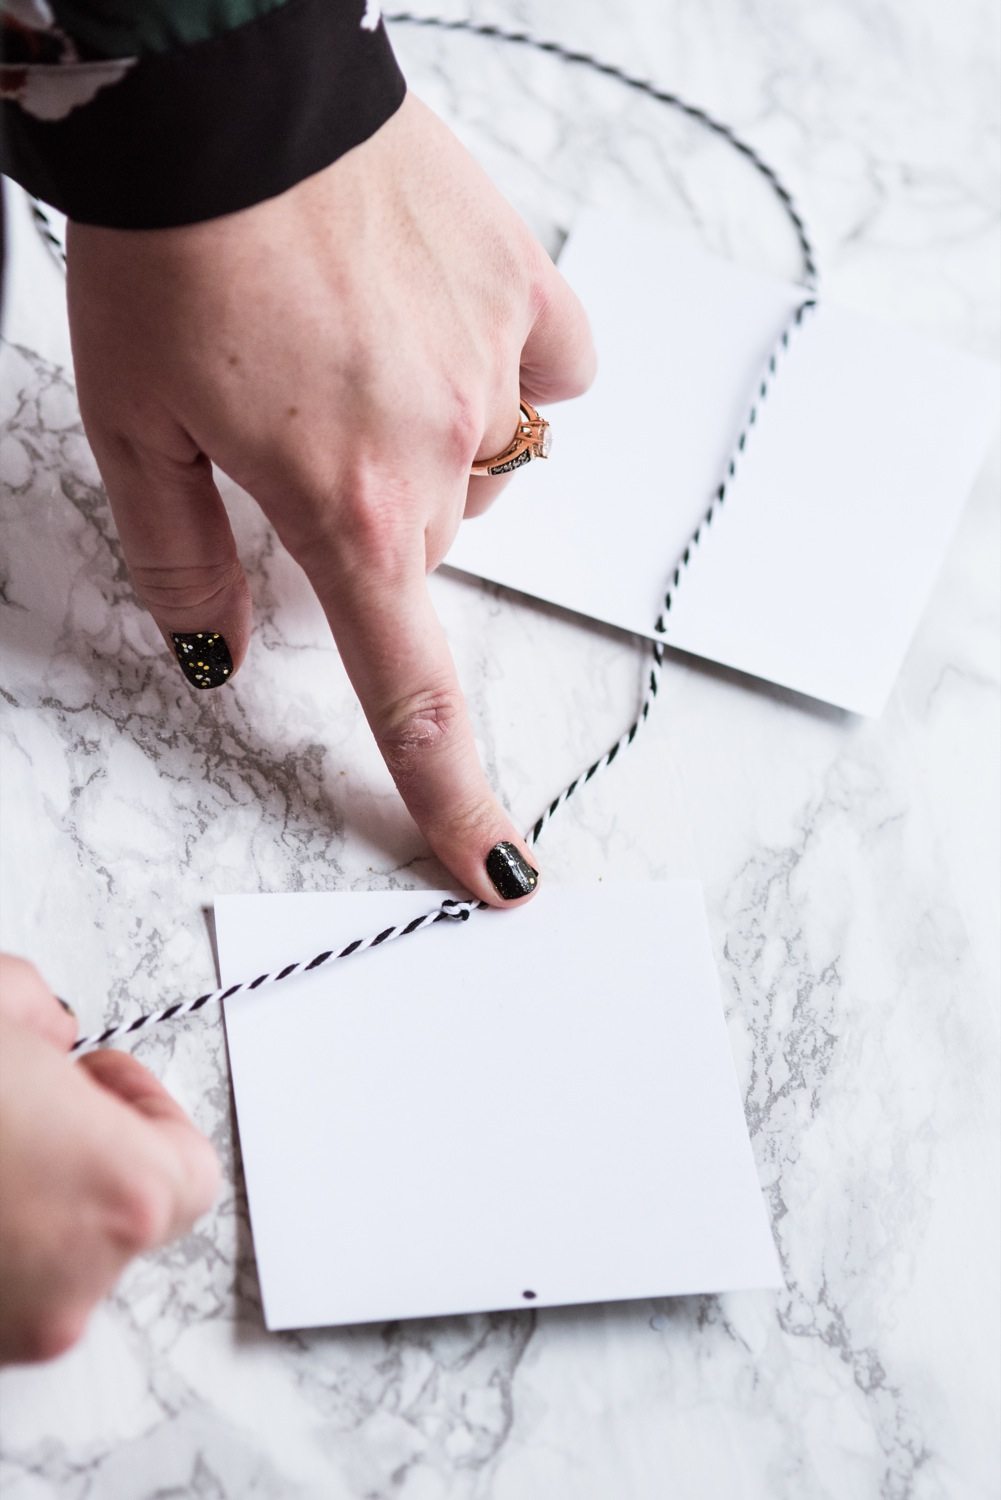
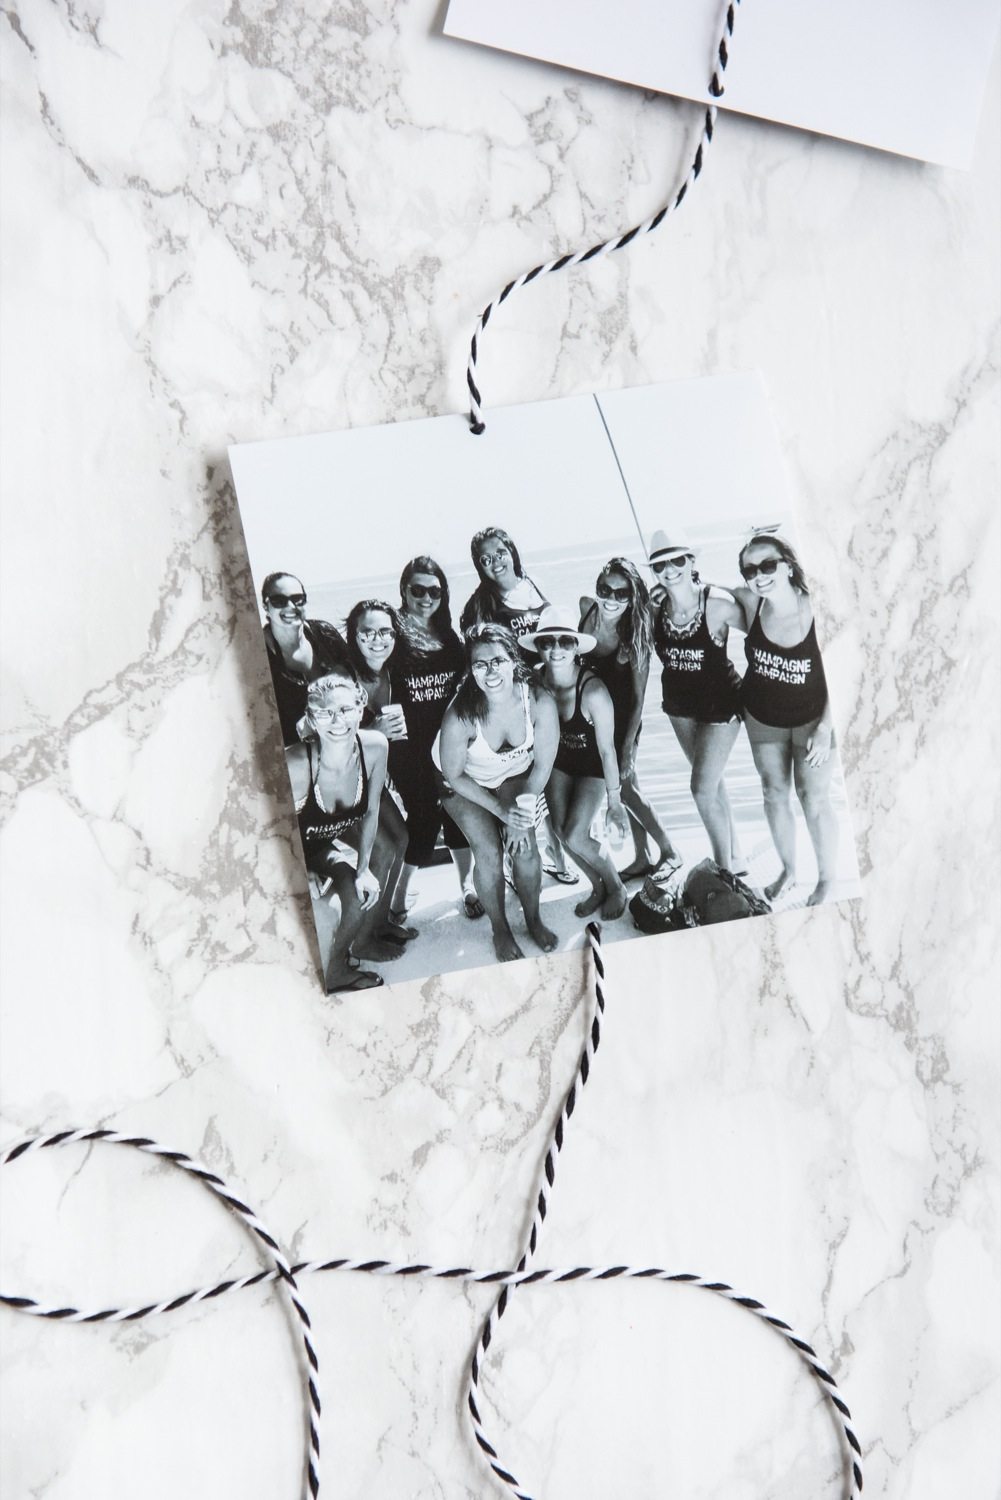
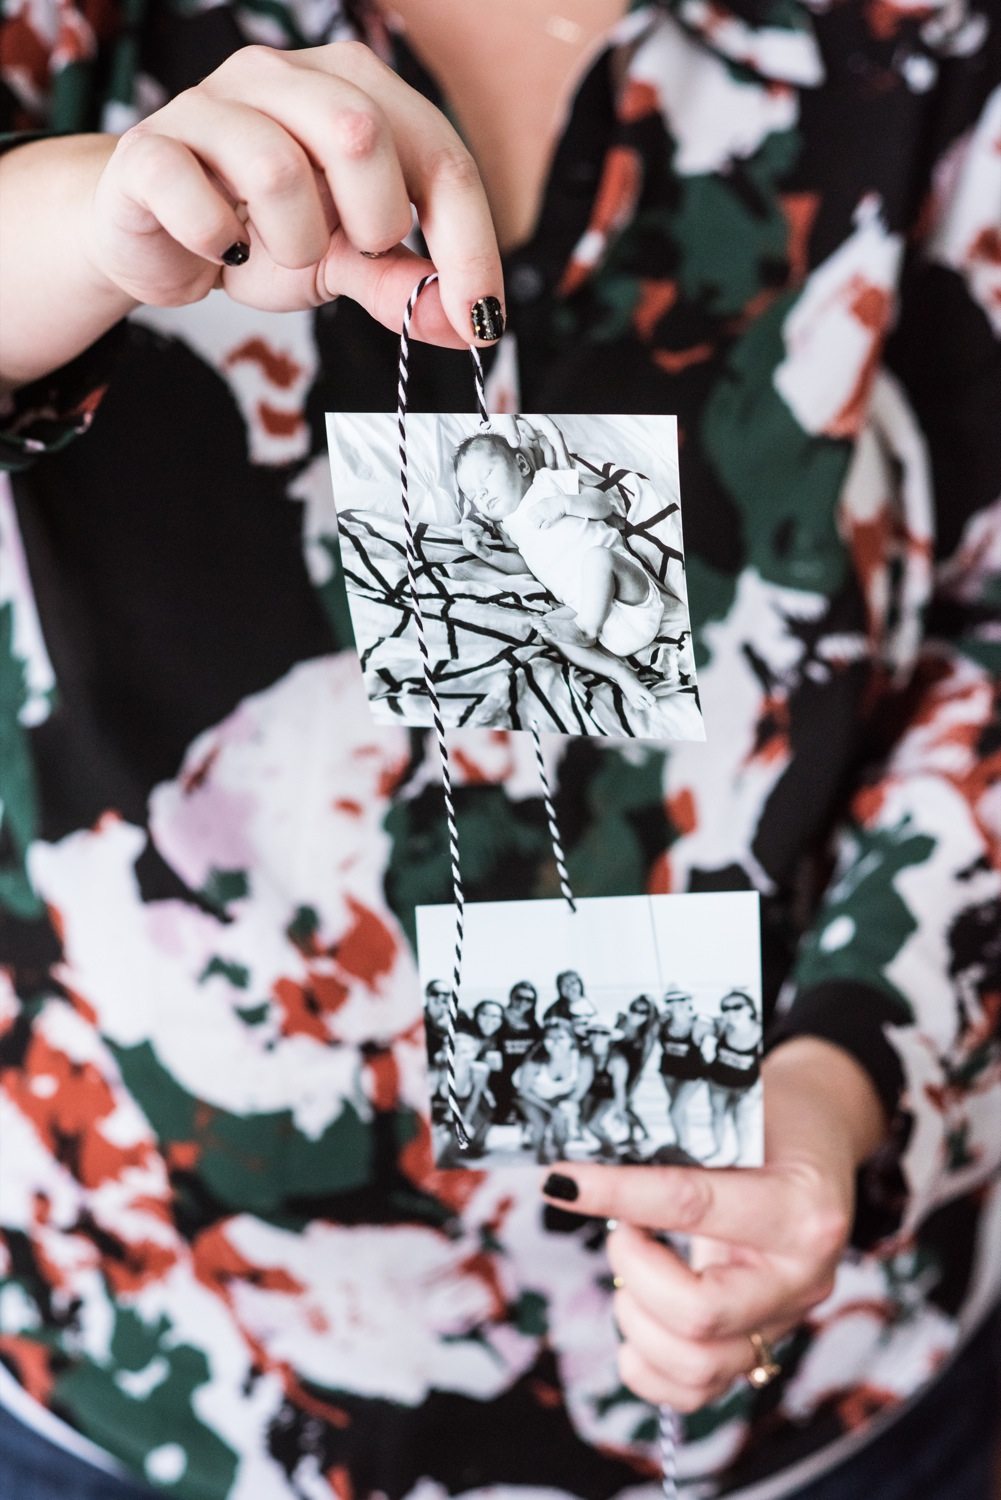
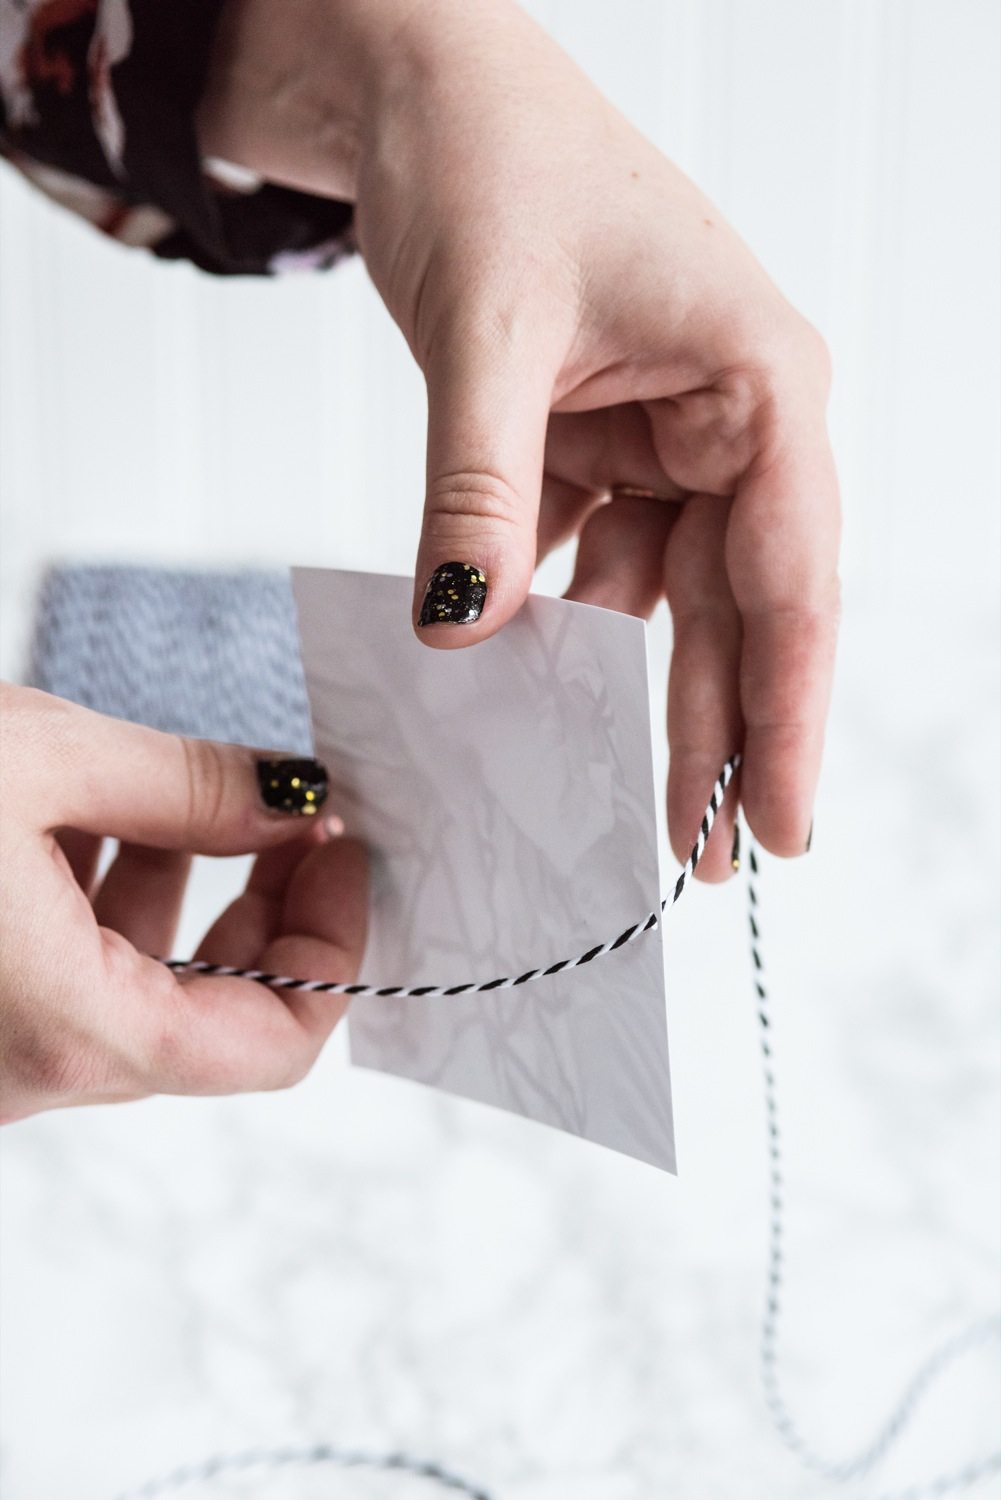
String your second image on, also feeding the twine through the front of the top hole, allowing for roughly 2 – 3″ between the two images. Create your knot, feed the twine through the back of the bottom knot of the second image and repeat. I used 30 photos total, set up as 6 strands of 5 images, but you can customize this to any size and spacing you’d like! For the bottom photo on each of the strands, I did create a second knot at the bottom hole to keep everything neat and tidy looking and to hold everything nicely in place.

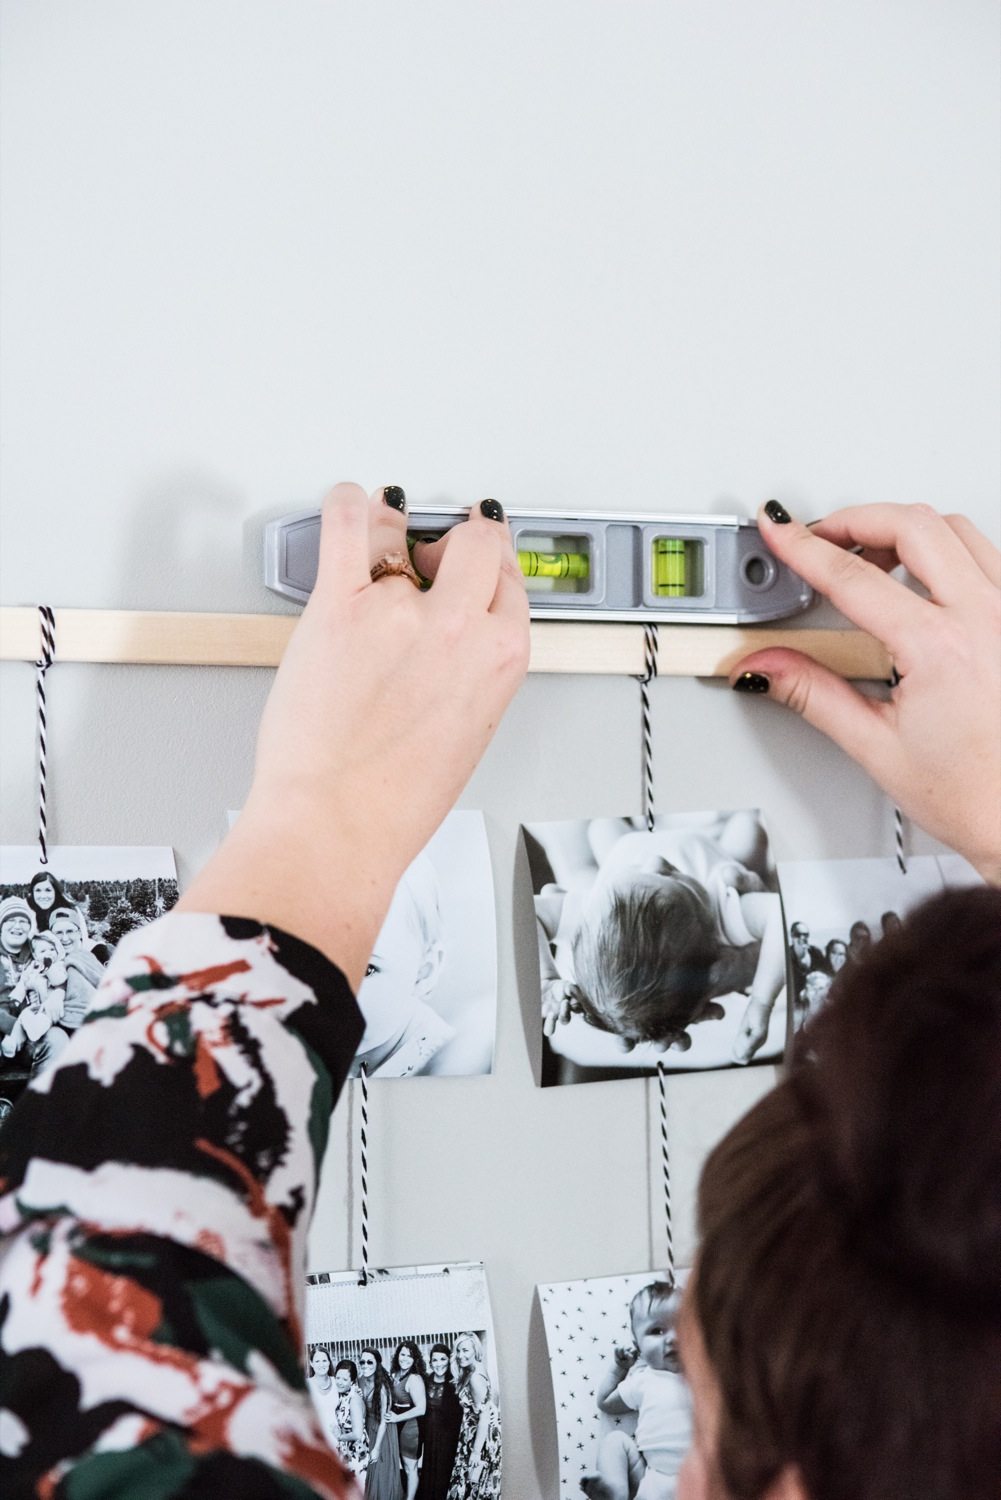
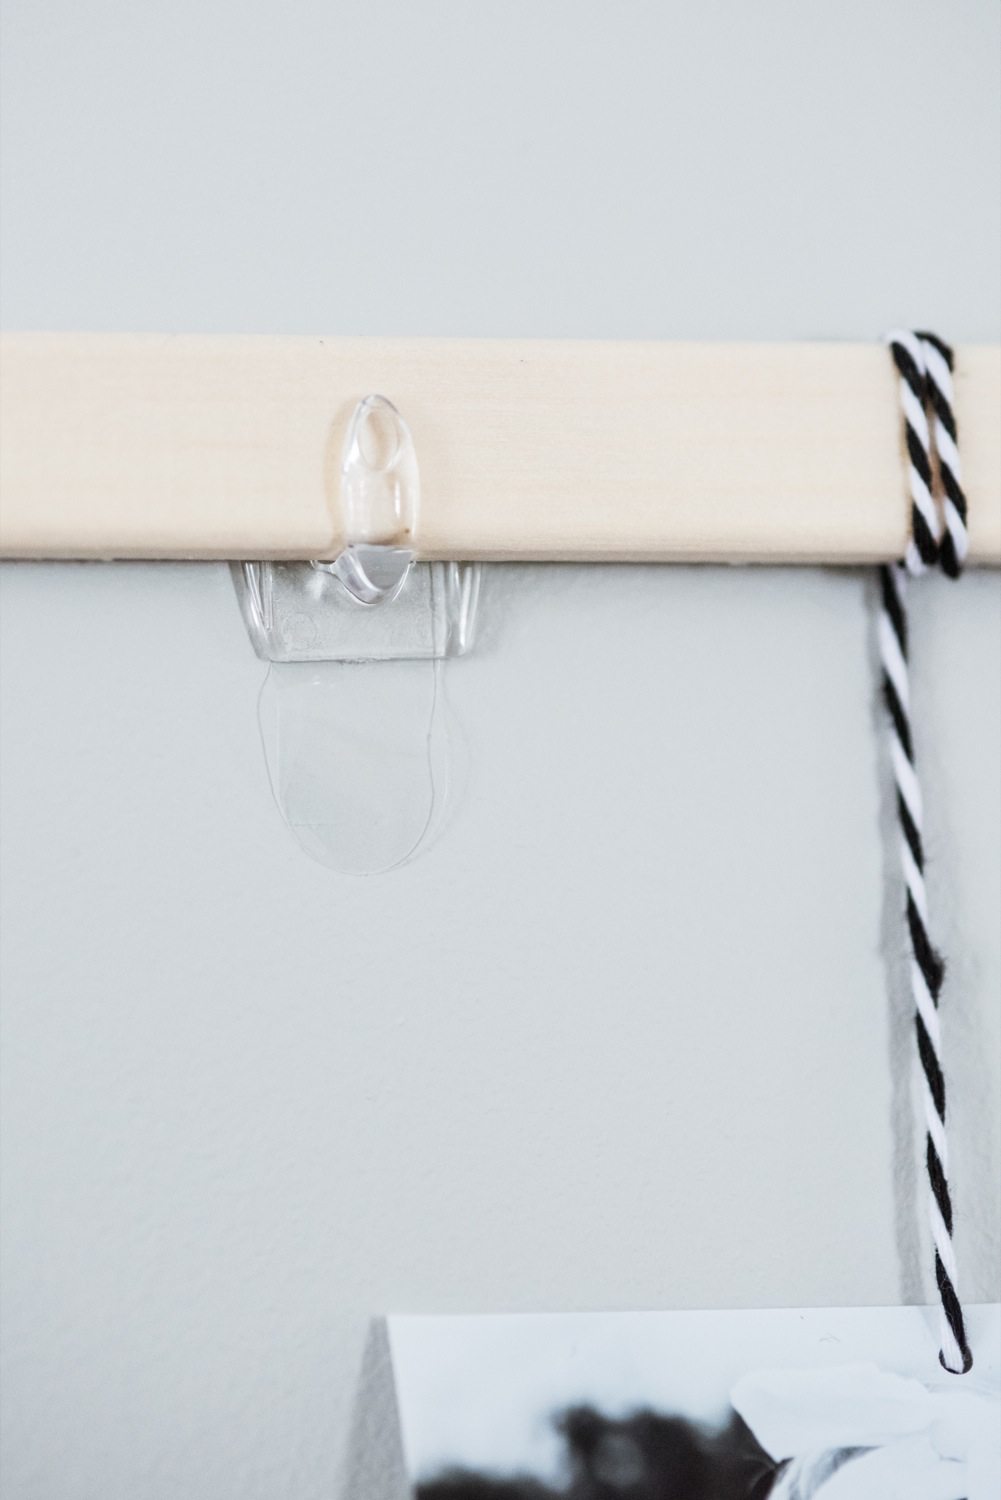
Secure each strand of photos to your wooden hanger by looping the twine around it a couple of times and then double knotting it in place. Don’t worry too much about making them all the same exact length – a little variation works well since creating a truly perfect grid would likely be impossible, so why drive yourself crazy? For my wood support I used a wooden trim piece roughly 30″ in length that is flat on one side, which I found in the wood craft aisle of my local craft shop for a few dollars. You could also use a dowel or really any kind of long, fairly thin piece of wood. To hang it on the wall I used removable clear plastic wall hooks and was able to fit the wood right into the hook to hold it in place. I used a small level to make sure it was hanging straight, but if you’re not as twitchy about such things as I am, eyeballing it will honestly work just as well!
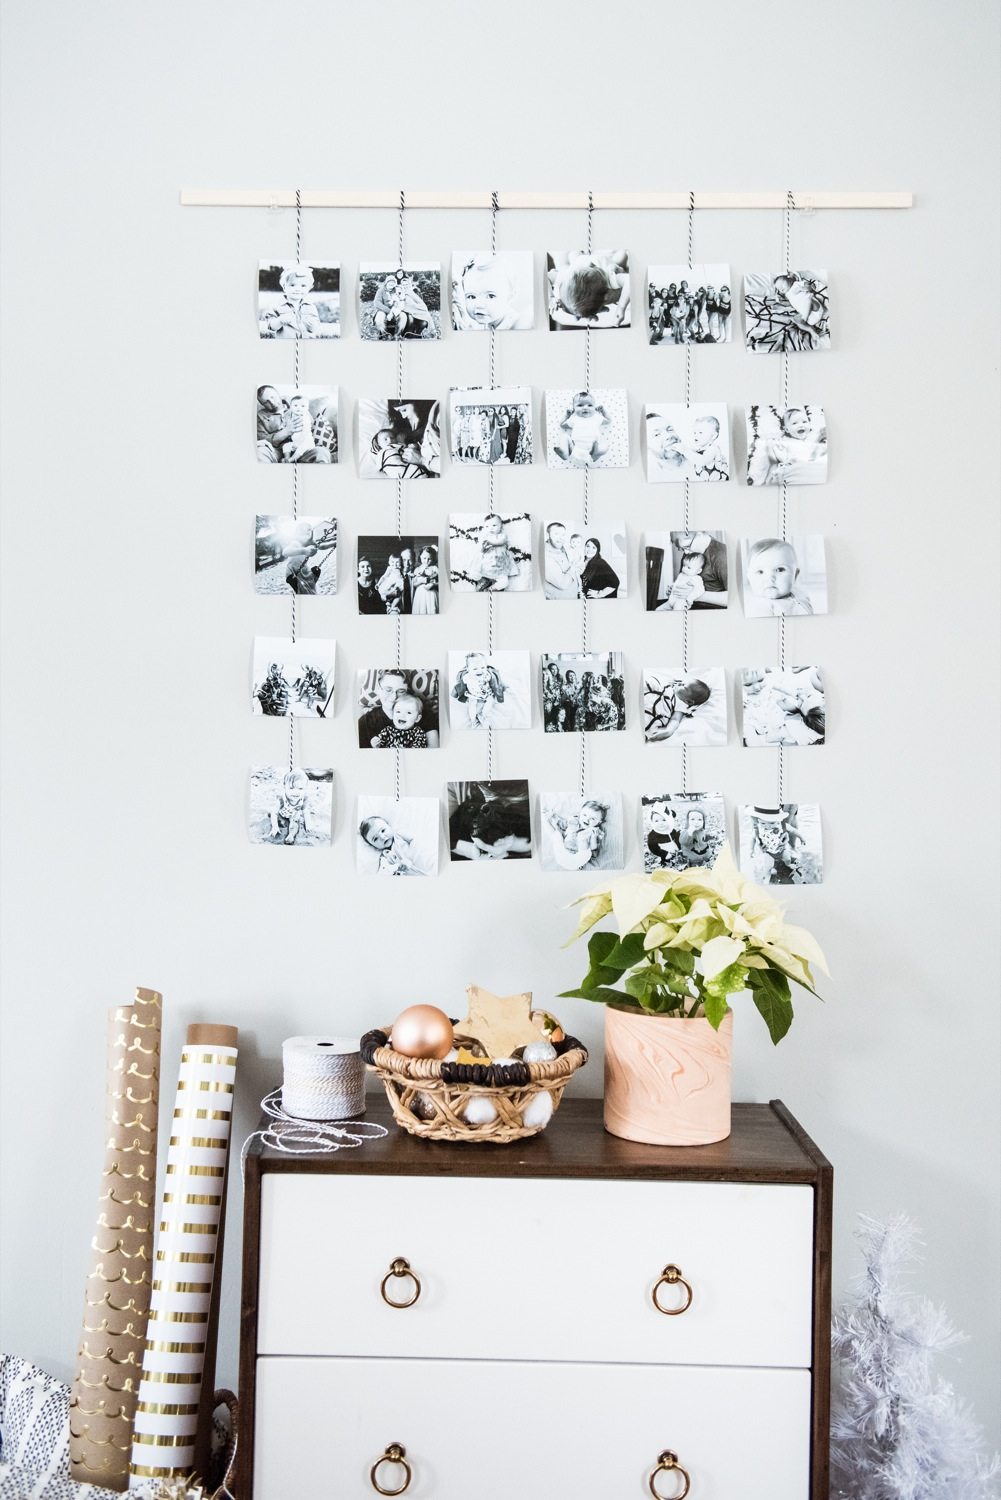
Creating this wall hanging was so much fun and I’m so excited to give it as a gift on Christmas. Homemade gifts are always my favorite and there really is no better way to gift someone with something truly personal and special than with photo memories they can cherish for years to come if you ask me. A huge thanks to CVS.com for inspiring me to make this beautiful piece and for making it so easy to bring the holidays to life in such a lovely way!
![]()
![]()
[Art direction + styling by Cyd Converse | Photos by Alice G. Patterson for The Sweetest Occasion.]
Disclosure: I’m proud to partner with CVS Pharmacy for the Bring Holidays to Life campaign. I am being sponsored by CVS Pharmacy for my posts and activities, but all opinions expressed are my own, and all product claims or program details shared should be verified at CVS.com or with the appropriate manufacturers.
Read more about our editorial policies.
Evelyn
Friday 4th of August 2017
This looks very nice! I tried it but the photos keep turning around, how do you keep them put?
Cyd Converse
Monday 7th of August 2017
Hi Evelyn! You could try a little piece of double stick tape on the back of a couple of photos on each strand to secure it closer to the wall and keep them from flipping. I've done that on a handful of mine and it was a big help!
LoriAnn
Wednesday 22nd of February 2017
Such a great idea. I fell in love with it when I saw it on your wall. And now, thanks to your fabulous detailed instructions, I can do just that!
Cyd Converse
Thursday 23rd of February 2017
LoriAnn, thanks, friend! I still how this turned out, too. :-)
Rachel Kuchenbecker
Monday 30th of January 2017
Hi there, love this idea, i have been looking for a way to display travel photos and this looks great. question, have you had any issues with the photos curling at the edges/corners? thanks, Rachel
Cyd Converse
Monday 30th of January 2017
Hi Rachel! So far it's holding up really great and the photos haven't curled at all. I'd think if they did you could take the whole hanging down and lay books or other heavy objects on the photos to flatten them back out though. I hope this helps! xoxo
Julia
Monday 19th of December 2016
This is such a great, easy DIY! I love the effect it has as one large piece, but the price I imagine is much more affordable. Thanks for sharing!
Cyd Converse
Monday 19th of December 2016
Thanks, Julia! And yes, all told it was very inexpensive to put together but it looks really chic. Ours is currently hanging in our kitchen and we love it!
Shel
Monday 19th of December 2016
I love this idea, Cyd! I should create one of these for my parents. They'd love it!
Unrelated question: What's the super cute nail polish you're wearing in your photos? I love it.
Cyd Converse
Monday 19th of December 2016
Hi Shel! Thank you so much. I think it's a perfect parents' gift! Also, the polish is actually a Sally Hansen stick-on product that I love because it's so easy and no dry time. I've posted about them before here: https://thesweetestoccasion.com/2015/10/an-easy-diy-manicure/ Enjoy! xo