


Today’s DIY tutorial revisits one of my favorite craft techniques, making the prettiest paper flowers from good ol’ inexpensive paper cupcake liners. Making these flowers is about as easy as it gets, but the end result is pretty gorgeous, even if I do say so myself. You can make them just about any color you can imagine (or any color that comes in a spray paint can anyway) and then use them as place cards, a cake topper or string them together to fashion them into the sweetest little garland. I personally think they look amazing in metallic gold, but have fun with it and make them whatever color works best for your festivities or decor!
![]()
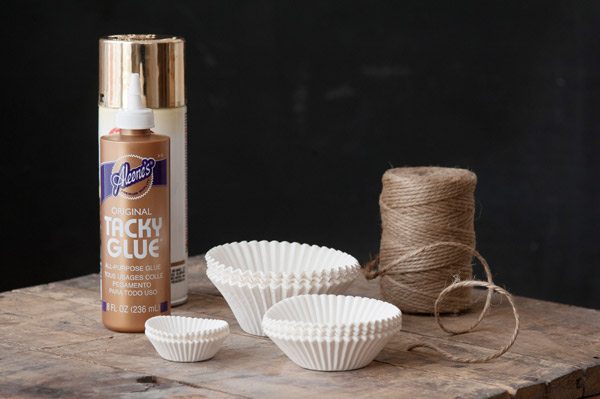
- Cupcake liners in three sizes (jumbo, standard and mini)
- Spray paint
- Tacky Glue or hot glue
- Twine or string (optional)
- Hole punch
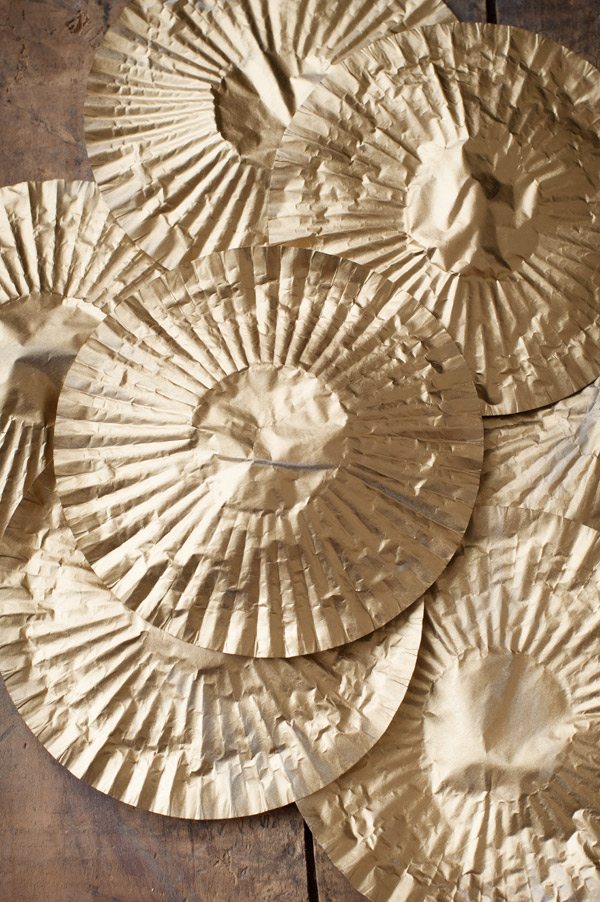
To get this party started, lay your cupcake liners flat and give them a few light coats of spray paint. As this lady always preaches, several light and thin coats are better than one thick coat. (This is particularly true when dealing with paper, for the record.) For each flower you’ll need one cupcake liner of each of the three sizes, so plan accordingly when painting. Let them dry completely.

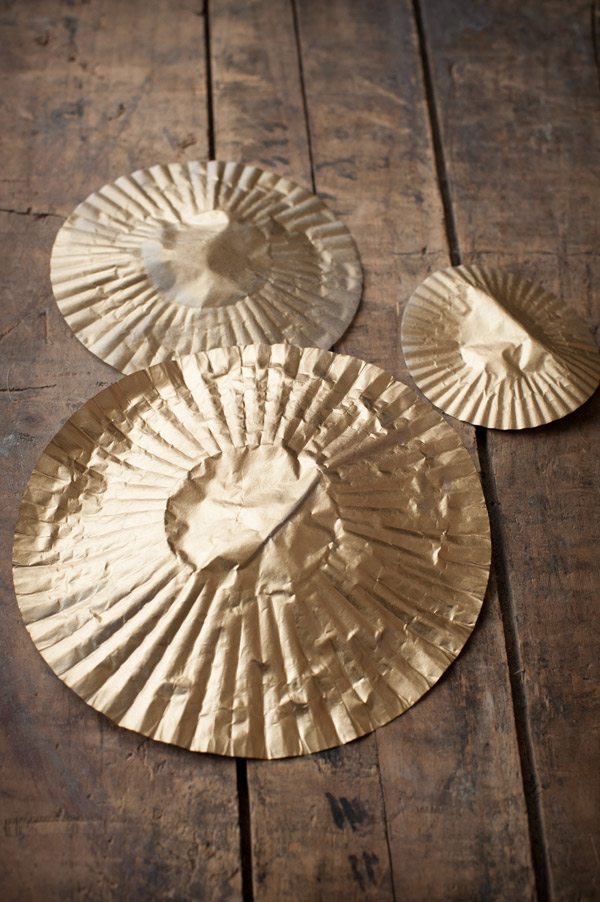


To assemble the flowers, put a dab of glue in the center of a jumbo cupcake liner, then layer a medium cupcake liner on top. Then add another dollop of glue and repeat, layering a mini cupcake liner on the top so that you’re left with a stack of liners moving from largest to smallest with the largest on the bottom.

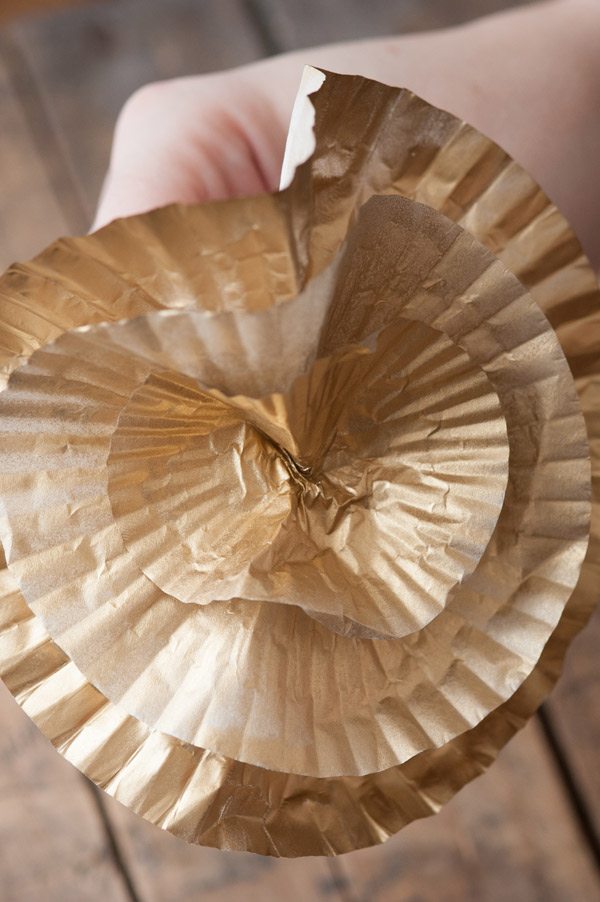
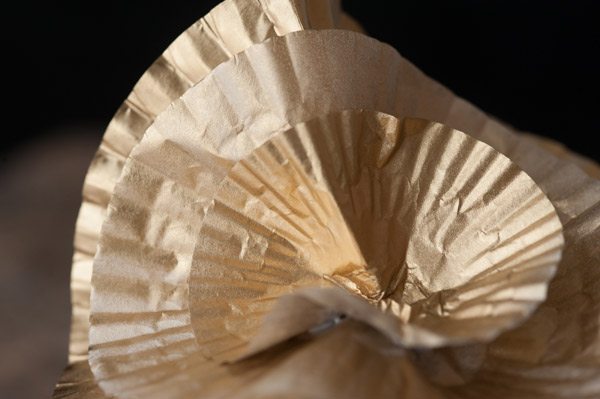
While the glue is still wet and setting up, grab your stack of liners and from the back, pinch together the centers of the liners and hold firmly for a few seconds. This creates the flower shape, effectively folding the liners to resemble petals. Allow the flowers to dry completely and then give them a good fluffing to adjust the shape as you see fit. Then you can get to work decking out everything in sight with pretty paper flowers!


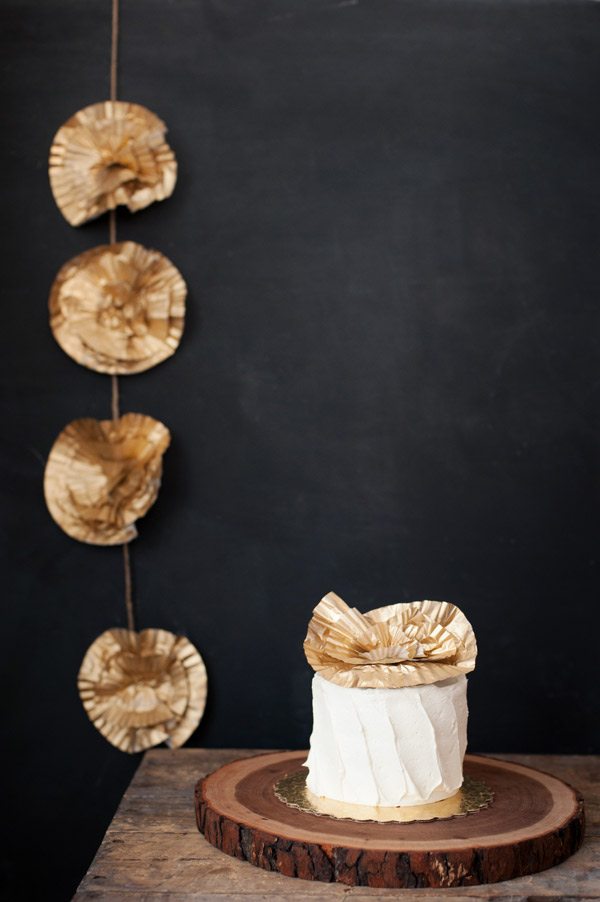
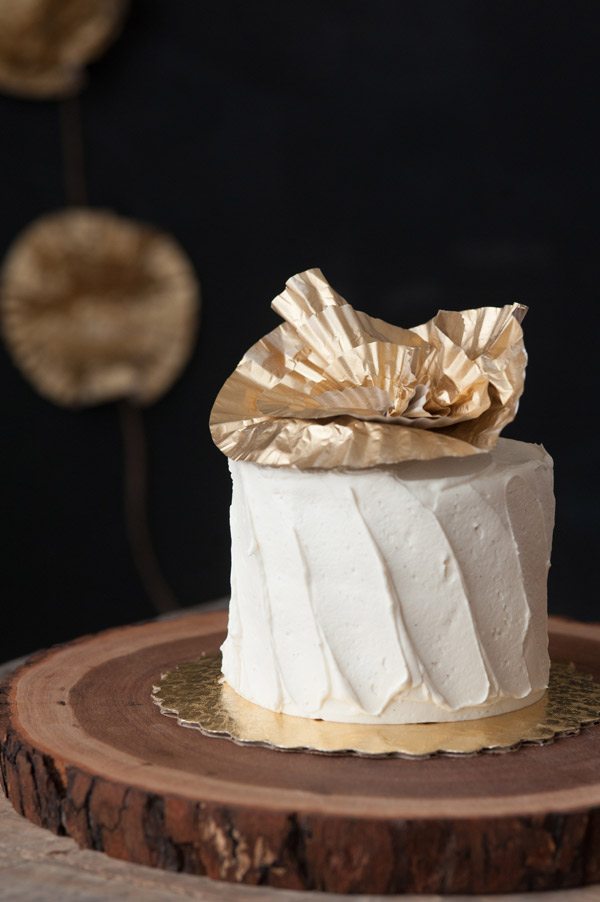
One of my favorite ways to use them is as a super easy but seriously stunning cake topper. You can use a cluster of them on a larger cake or on a tiny cake, just one will do the trick while making a big statement. Because the backs of the cupcake liners aren’t painted and are therefore are still food safe, I just stick them directly into the top of the cake. Think of them as a super chic hat on top of very cute cake. Love.


Of course, we know I love pretty garlands and these bad boys are killer when transformed into a garland, too. All you need to make it happen is a hole punch and some twine or string. Punch a hole into the back of the flower and thread through your twine or string through the back of the flower. I spaced my flowers a few inches apart and kind of particularly love the mix of the metallic gold and the jute twine, but ribbon would also be lovely!


Don’t you just love these? I do, I do! Don’t forget – share with me if you recreate one of my DIY projects so I can get super excited. Catch me over on Instagram and use the hashtag #thesweetestdiy so I can take a peek!
![]()
[Art direction + styling by Cyd Converse | Photos by Alice G. Patterson for The Sweetest Occasion.]
The fine print: Please link with love! As with all of our posts, DIY projects featured on The Sweetest Occasion may not be copied, distributed or reproduced without express written permission. Love and links are always appreciated! If you’d like to share a maximum of 1 – 2 images from this post, please link to this post directly for the DIY tutorial and do not include the instructions in your own post. Thanks so much! xoxo


 Back to Top
How beautiful! This detail is beautiful for weddings with rustic theme.
Yes, Sara! Such huge impact but really simple and cheap. Love it!
Thanks, Rebecca! I’d love to see how they turn out – they’re so fun and super pretty! xoxo
I love love love how quick, easy and inexpensive these are! Love the gold!
LOVE these! So whimsical & fun! Gonna try them at my sister’s upcoming baby shower!!!! <3