


This post was sponsored by Luna Bazaar. Thank you for supporting the sponsors that so generously help The Sweetest Occasion keep on keepin’ on!
Luna Bazaar has been one of the most loyal sponsors of The Sweetest Occasion in recent years and I know you guys have heard me wax poetic about their incredible selection of wedding and party decorations before. From tissue paper pom poms to honeycomb balls, paper lanterns, favor bags, and more, they have a huge collection of colorful party wares. Which is why I am so excited to be teaming up with them today to bring you a quick and easy DIY idea for a backdrop perfect for your next celebration.


Supplies –
- Assorted tissue paper pom poms (I used an assortment of 20″, 15″ and 10″ poms)
- Double stick non-permanent adhesive (Such as double stick tape, 3M Command Strips or Glue Dots)


Begin by unwrapping each of your pom poms, being sure to leave the white ribbon tied around the center of each. Then it’s a simple process of pulling apart the layers of tissue, working from one side to the other. Once all the layers are separated, give them a good fluffing with your finger tips to get the pom poms look nice and full and symmetrical. It might take a bit of working with the poms, but soon you’ll have them all ready to go!

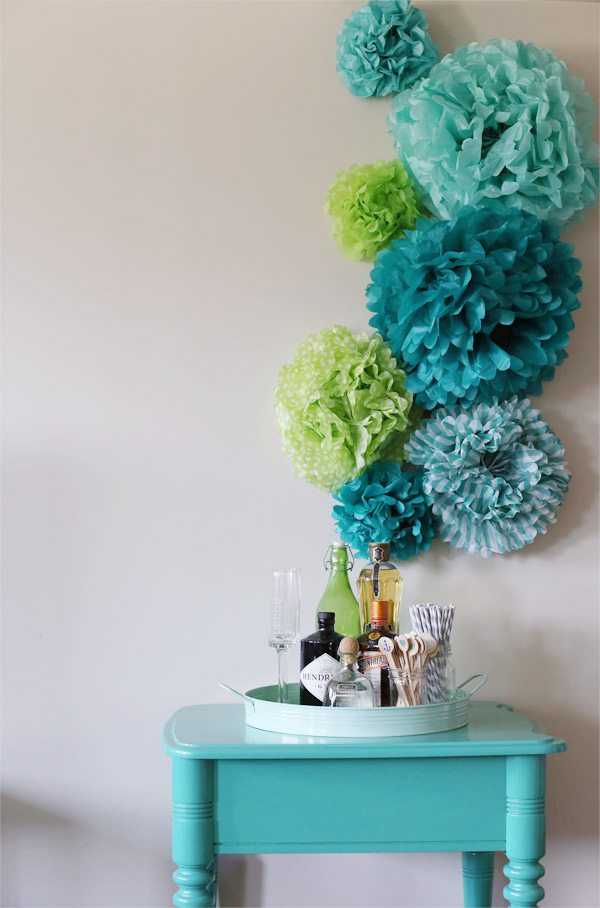
Next up, determine where you’re hanging your pom poms. I chose to hang mine over a small bar table, which would be a great focal point at any kind of dinner party or birthday bash you might be hosting at home. For a larger scale event such as a wedding, this would be great as a photobooth backdrop, behind the cake table or dessert buffet, or as a ceremony backdrop. (Be sure to buy more pom poms if you’re working with a larger space!)


After you know where you want to hang your poms, it’s as easy as it gets! Starting with the larger of your poms, simply attach your double stick adhesive to the back of your pom pom and then directly to the wall. (This is why it’s key to use a non-permanent adhesive so it’s not damaging to the walls!) I worked with the largest poms, then added the next smaller size and finally filled in with the smallest pom poms, creating a fun asymmetrical shape. You can reposition as you go along and just play with it until you have an arrangement that you love. It’s that easy!


And there you have it, friends! A super simple and yet extraordinarily festive backdrop for your next shindig. I personally kind of love it and want to create a permanent tissue paper pom pom installation in our home. For more of the awesomeness that is Luna Bazaar, pop over to check out their collection of tissue paper pom poms, paper lanterns, and honeycomb decorations!
![]()
[Photos + styling by Cyd Converse for The Sweetest Occasion.]
This post was sponsored by Luna Bazaar. Read more about our editorial policies.


 Back to Top
So pretty! Love the striped and dotty tissue papers. Need to keep an eye out for those
Super cute! Love the colors, Cyd.