


This post was sponsored by Dr. Oetker Ristorante Pizza. Thank you for supporting
the sponsors that help make The Sweetest Occasion possible!
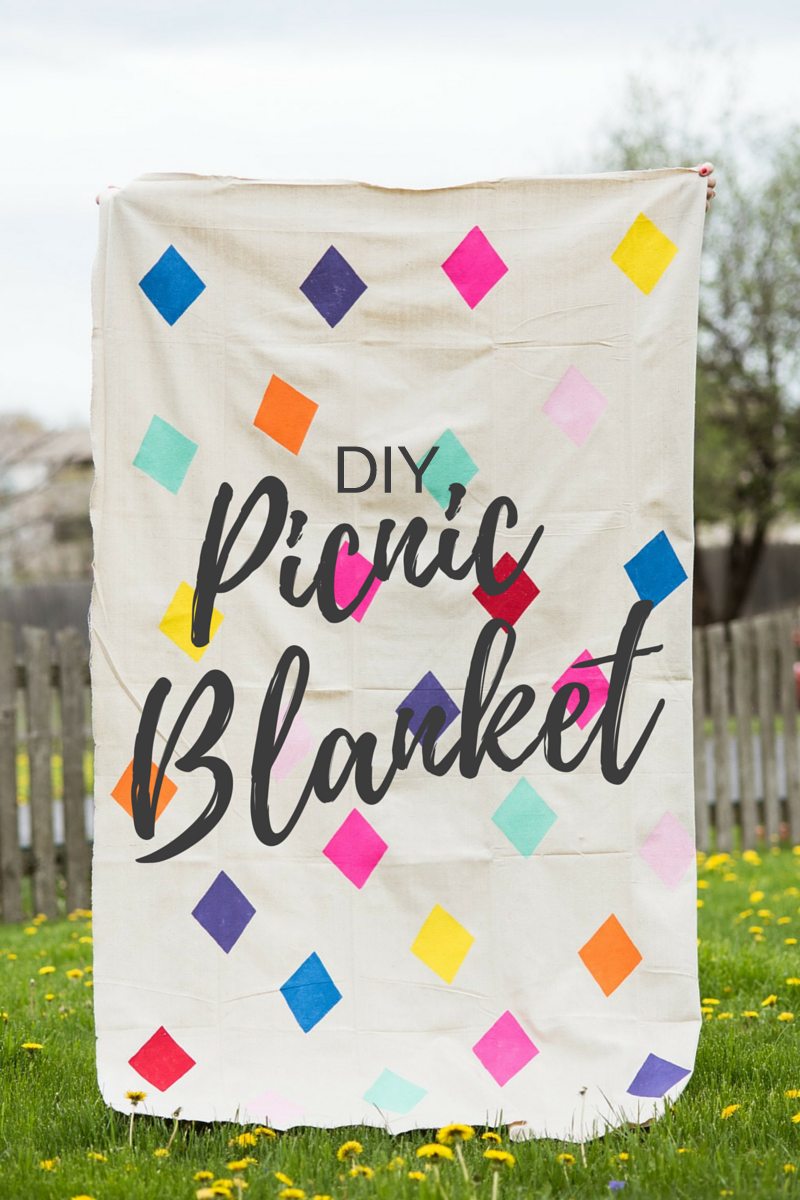
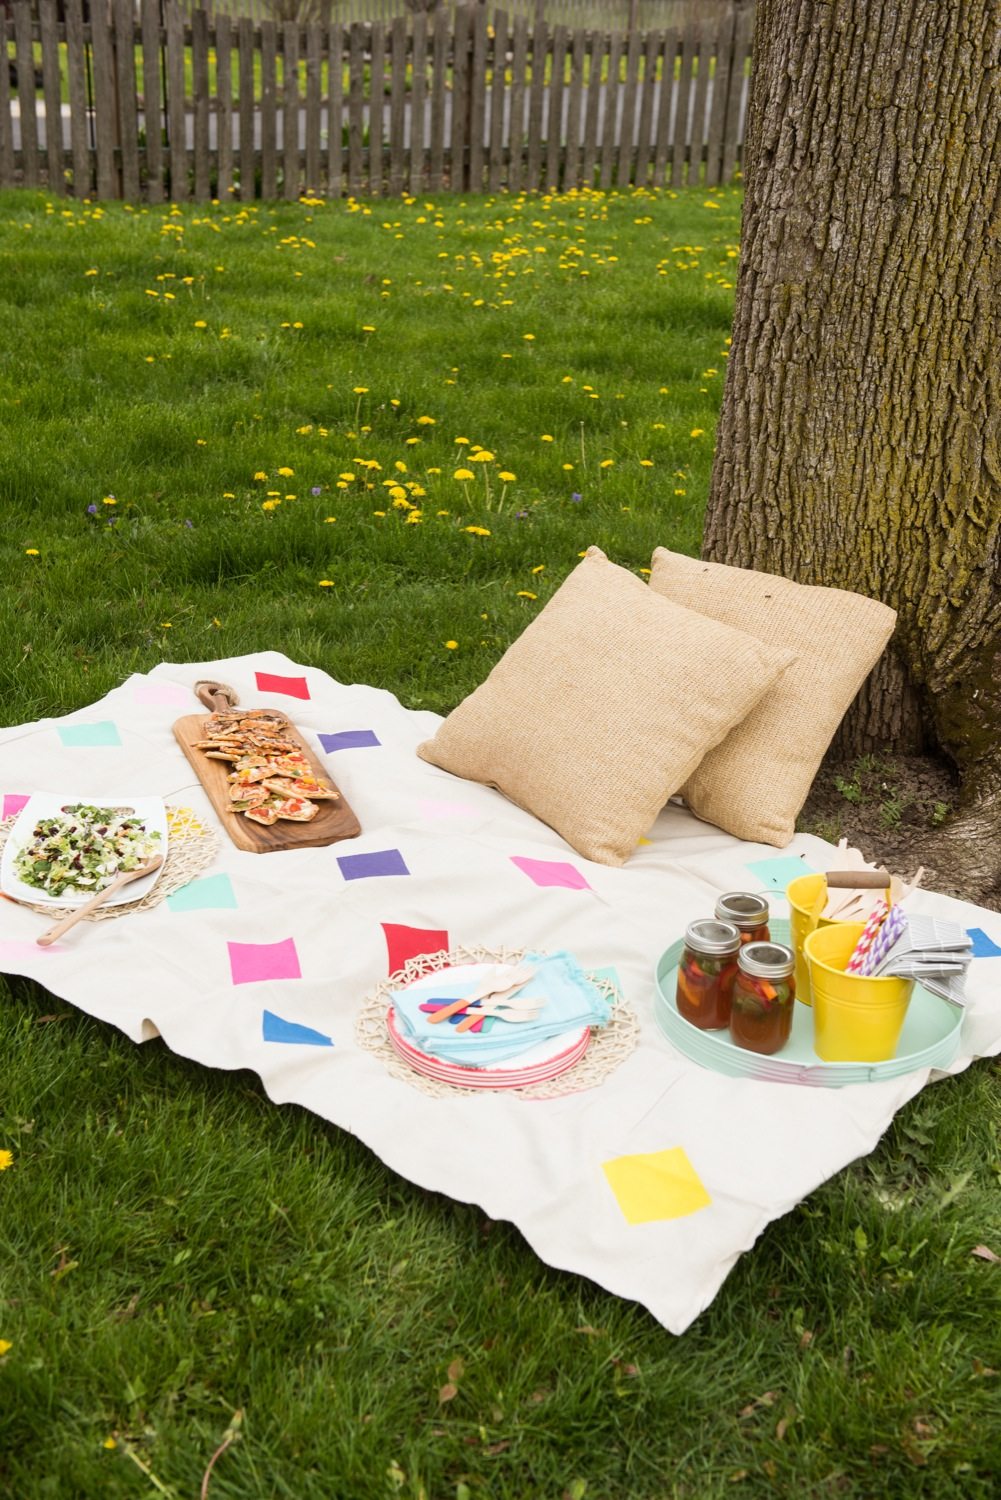
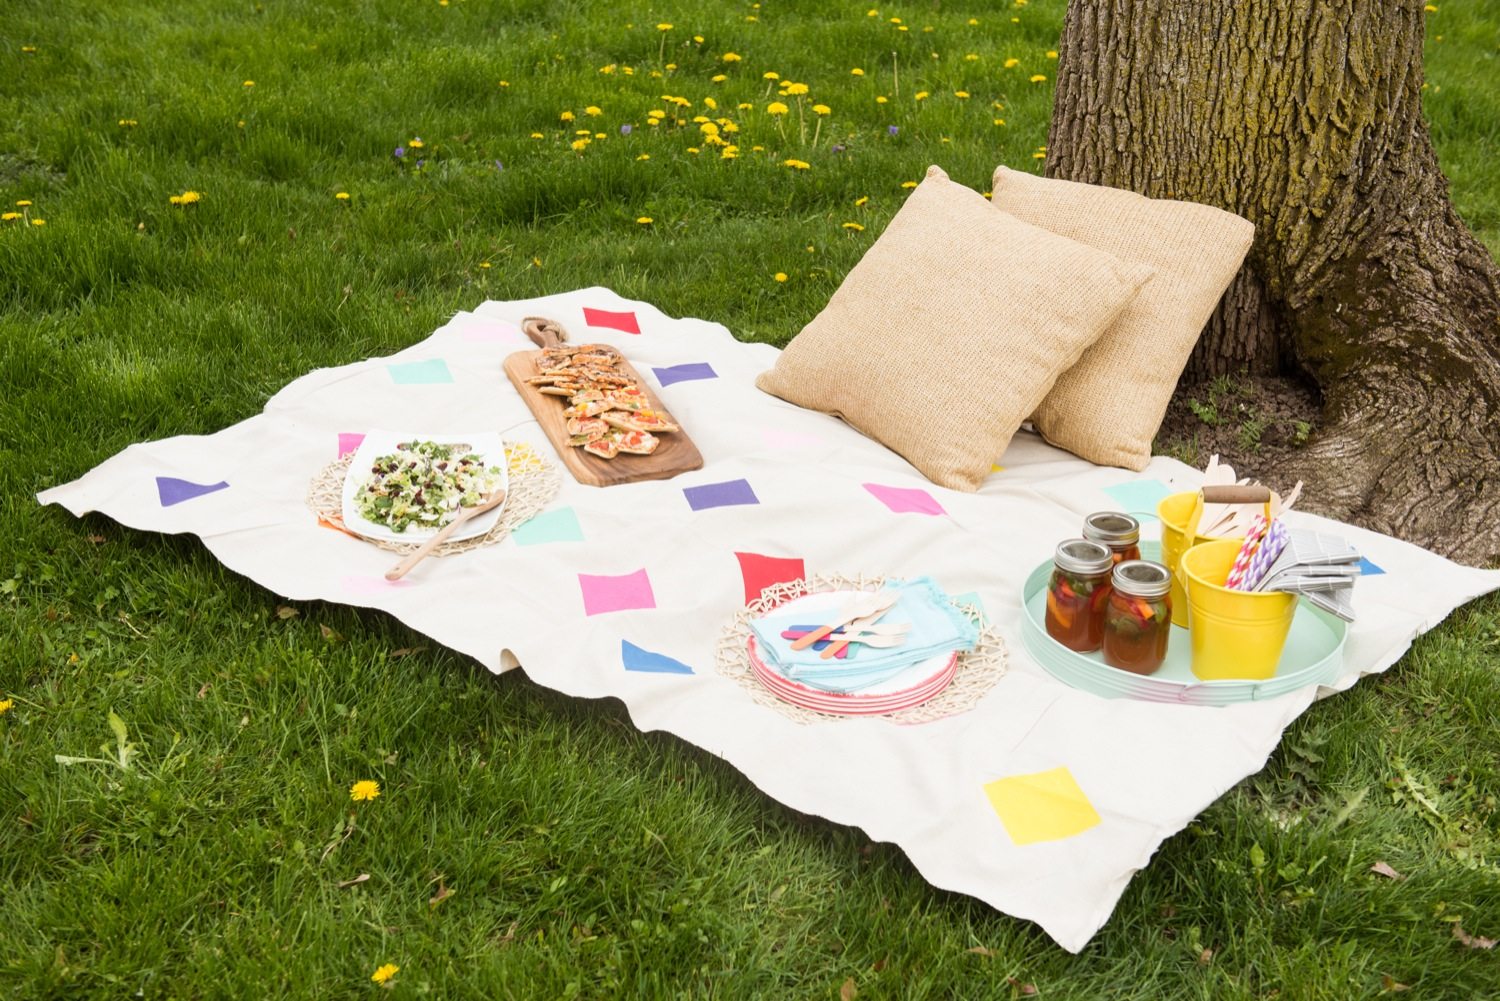
Most of you know by now that I am crazy for a picnic. I’m pretty sure around this time every year, I spend a lot of time professing my love for any kind of picnic situation. As far as I’m concerned, our summers here are far too short not to make the most of every sunny day by dining outside as frequently as possible. (Ask Bob. I am constantly saying, “Let’s eat outside tonight!”) In the spirit of summer, I’ve once again teamed up with my friends at Dr. Oetker Ristorante Pizza to bring you this colorful DIY geometric picnic blanket tutorial! With a cute picnic blanket in tow and your favorite Ristorante pizza fresh from the oven, you’re ready to host a backyard picnic in a flash.

SUPPLIES
- Painter’s drop cloth
- Freezer paper
- Metal straight edge
- Craft knife and/or scissors
- Paint brushes
- Craft paint
- Cardboard or card stock
- Iron
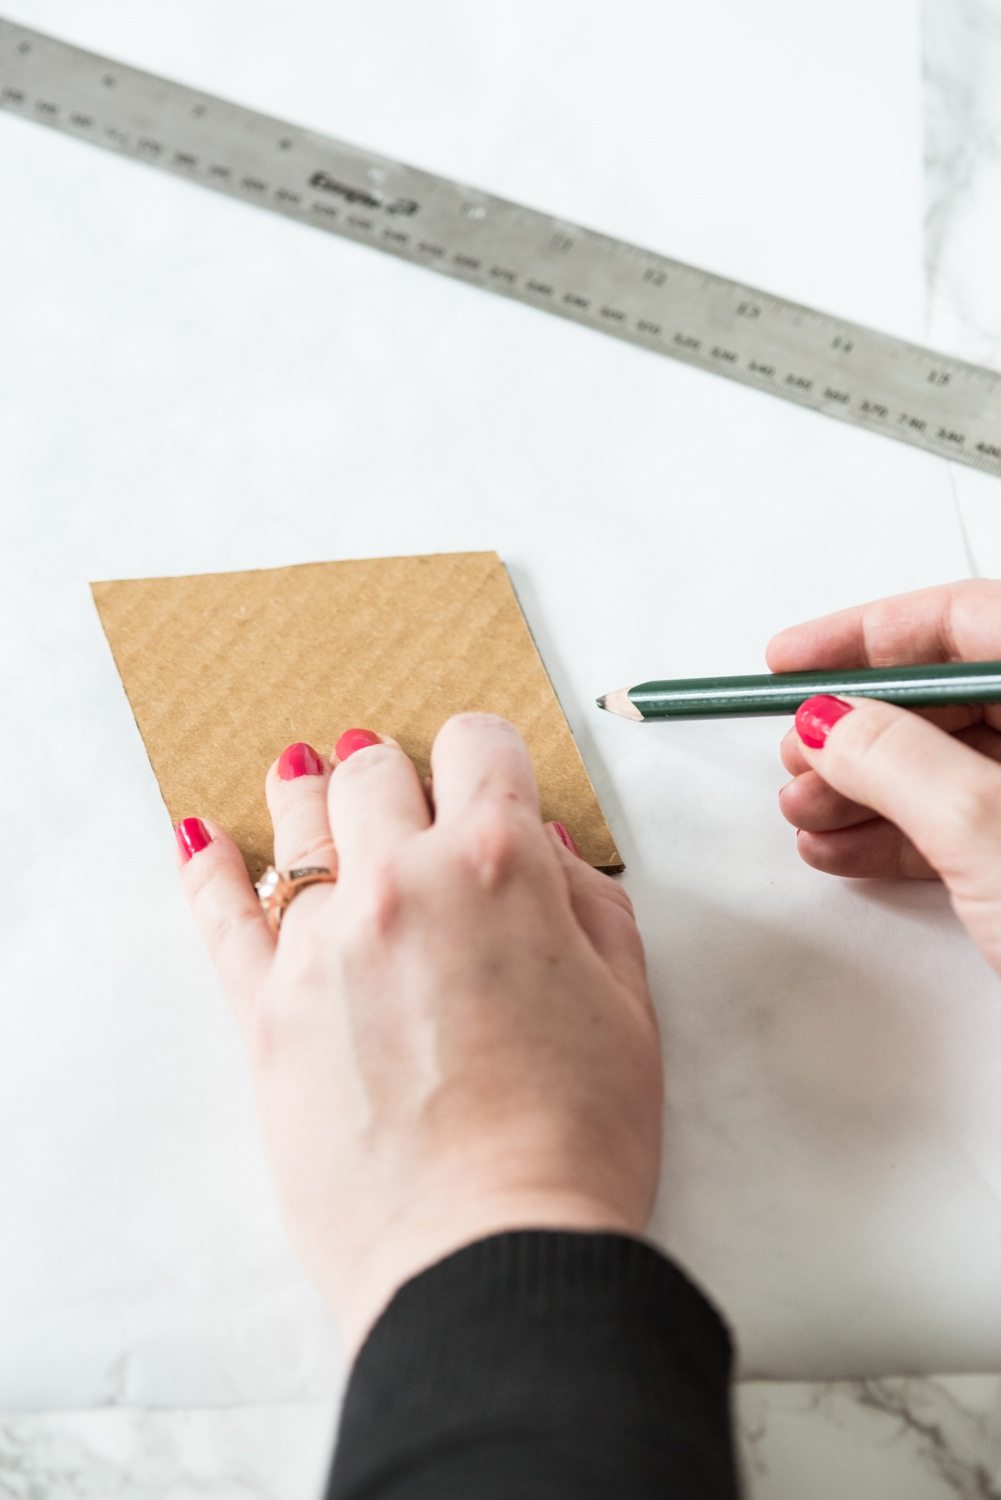
Begin by deciding what shape you’d like for your geometric pattern. I opted for this simple diamond shape and then cut it out of cardboard, but you could easily do squares or circles if you prefer. Then, use your cardboard cutout and a pencil to trace the shape onto the paper side of a sheet of freezer paper. You’ll need one traced diamond for every diamond you’d like to appear on your blanket, which will all depend on the size blanket you want and how dense of a pattern you’re looking to achieve. (So in a nutshell, if your blanket has 30 diamonds, you’ll need to trace the cardboard cutout 30 times onto your freezer paper.)

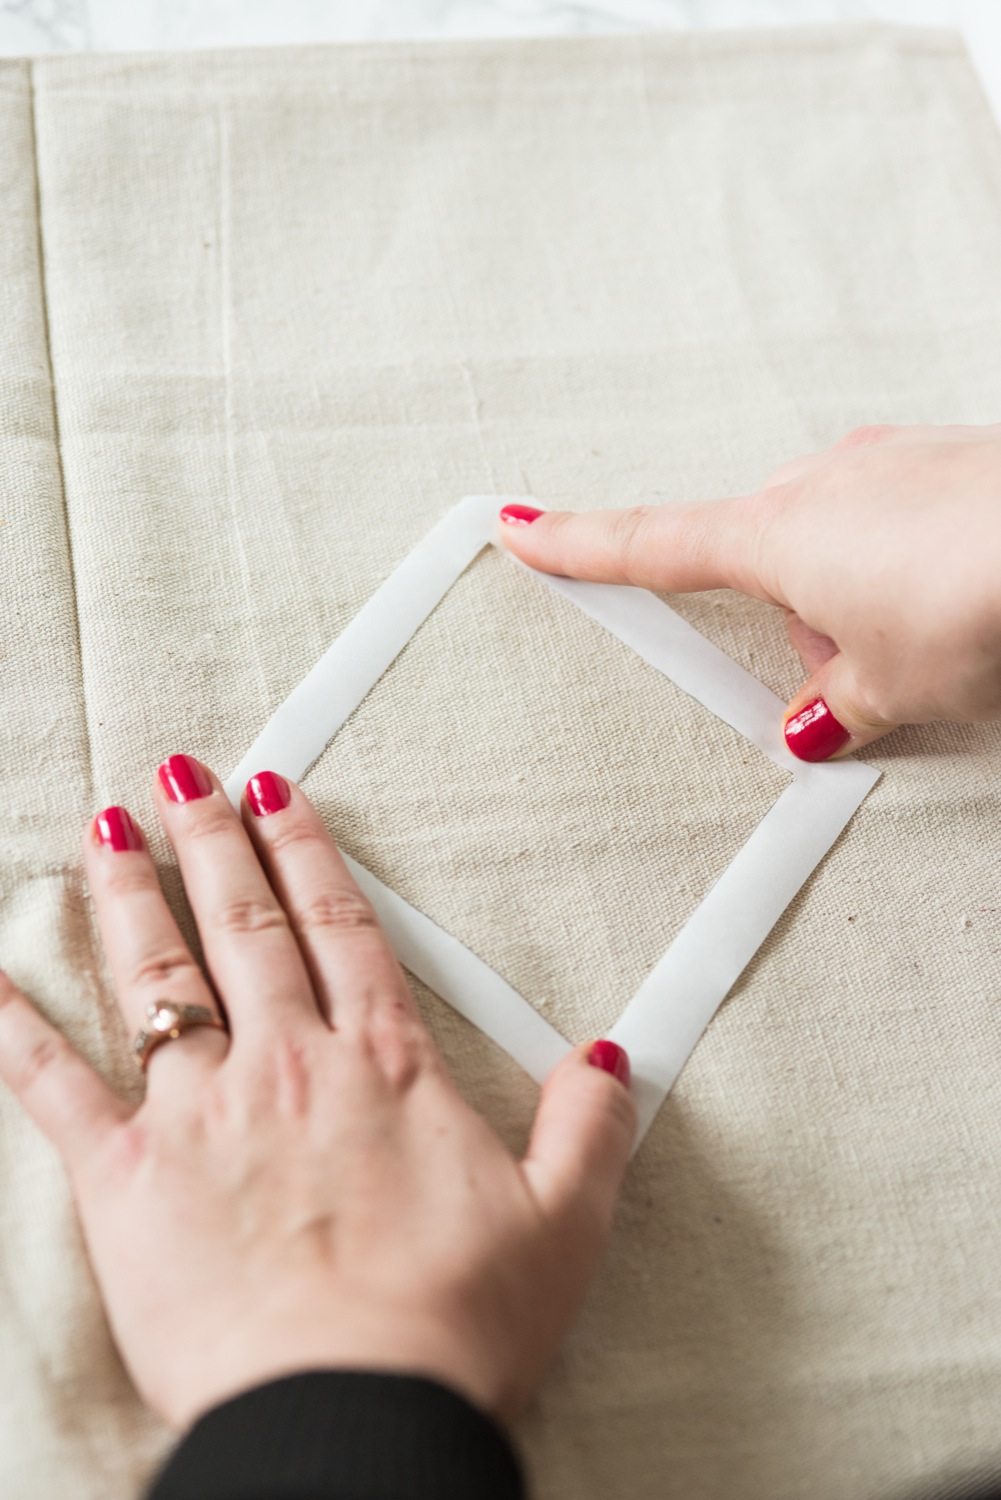
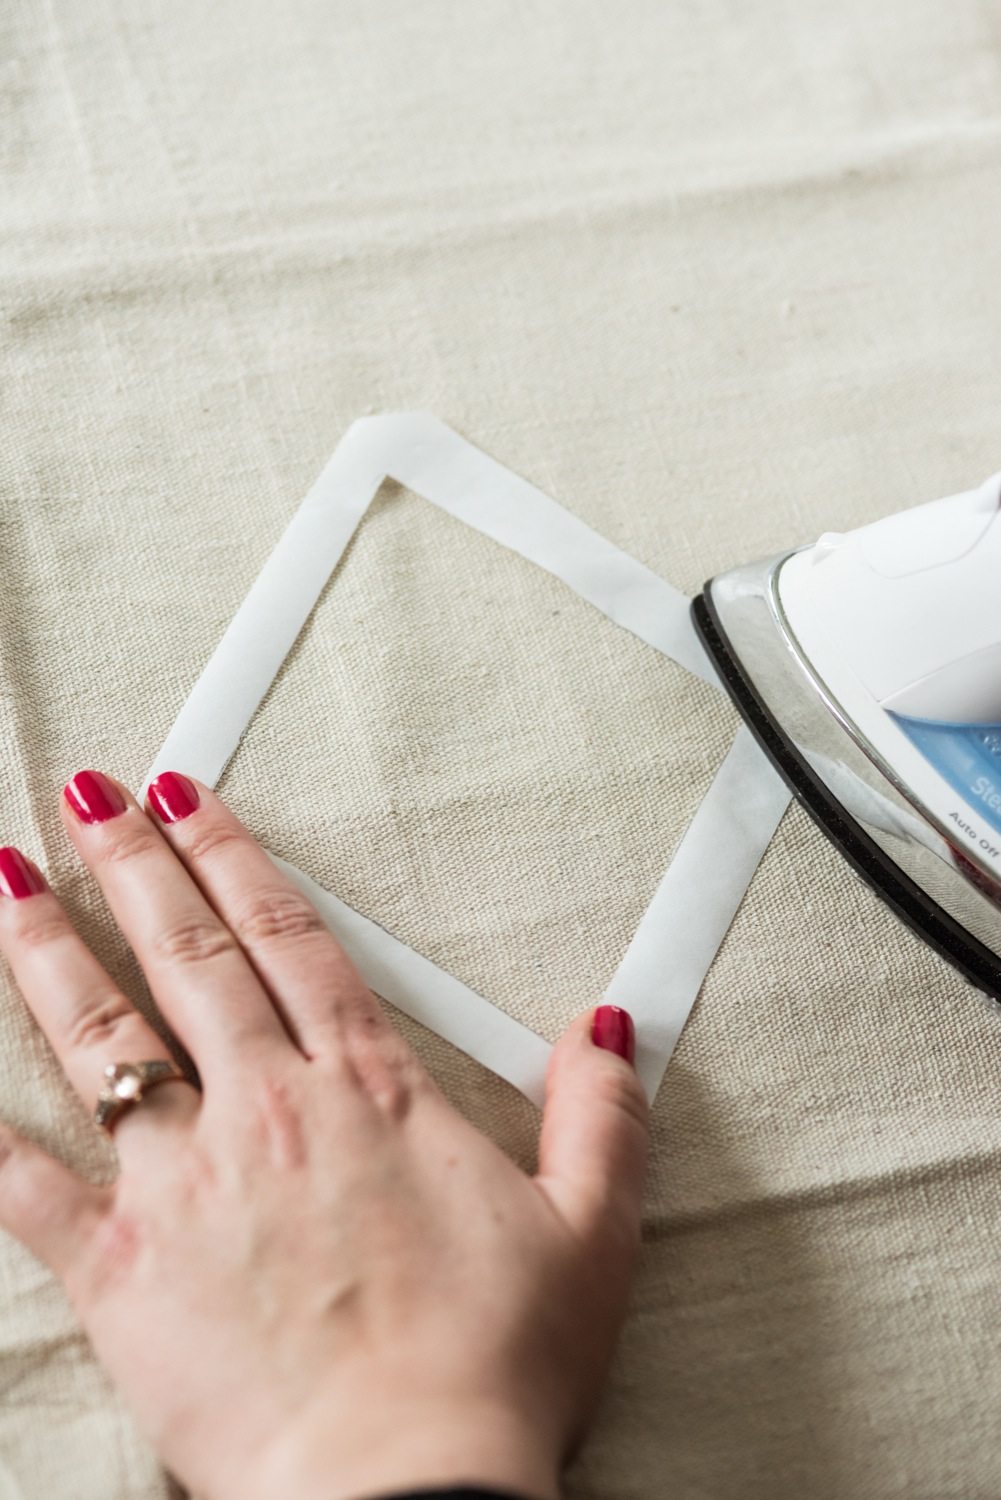
Use a craft knife and a metal straight edge (or sharp scissors) to carefully cut out each diamond shape, being sure to leave a border at least 1/2″ around the outside. This is probably the most time consuming part of the whole process, but it’s super simple. Place them sporadically across your drop cloth and use a medium, dry iron to tack down your freezer paper stencils, waxy side down. The freezer paper acts as a seal so you can easily and quickly paint your shapes without worrying about the paint bleeding.

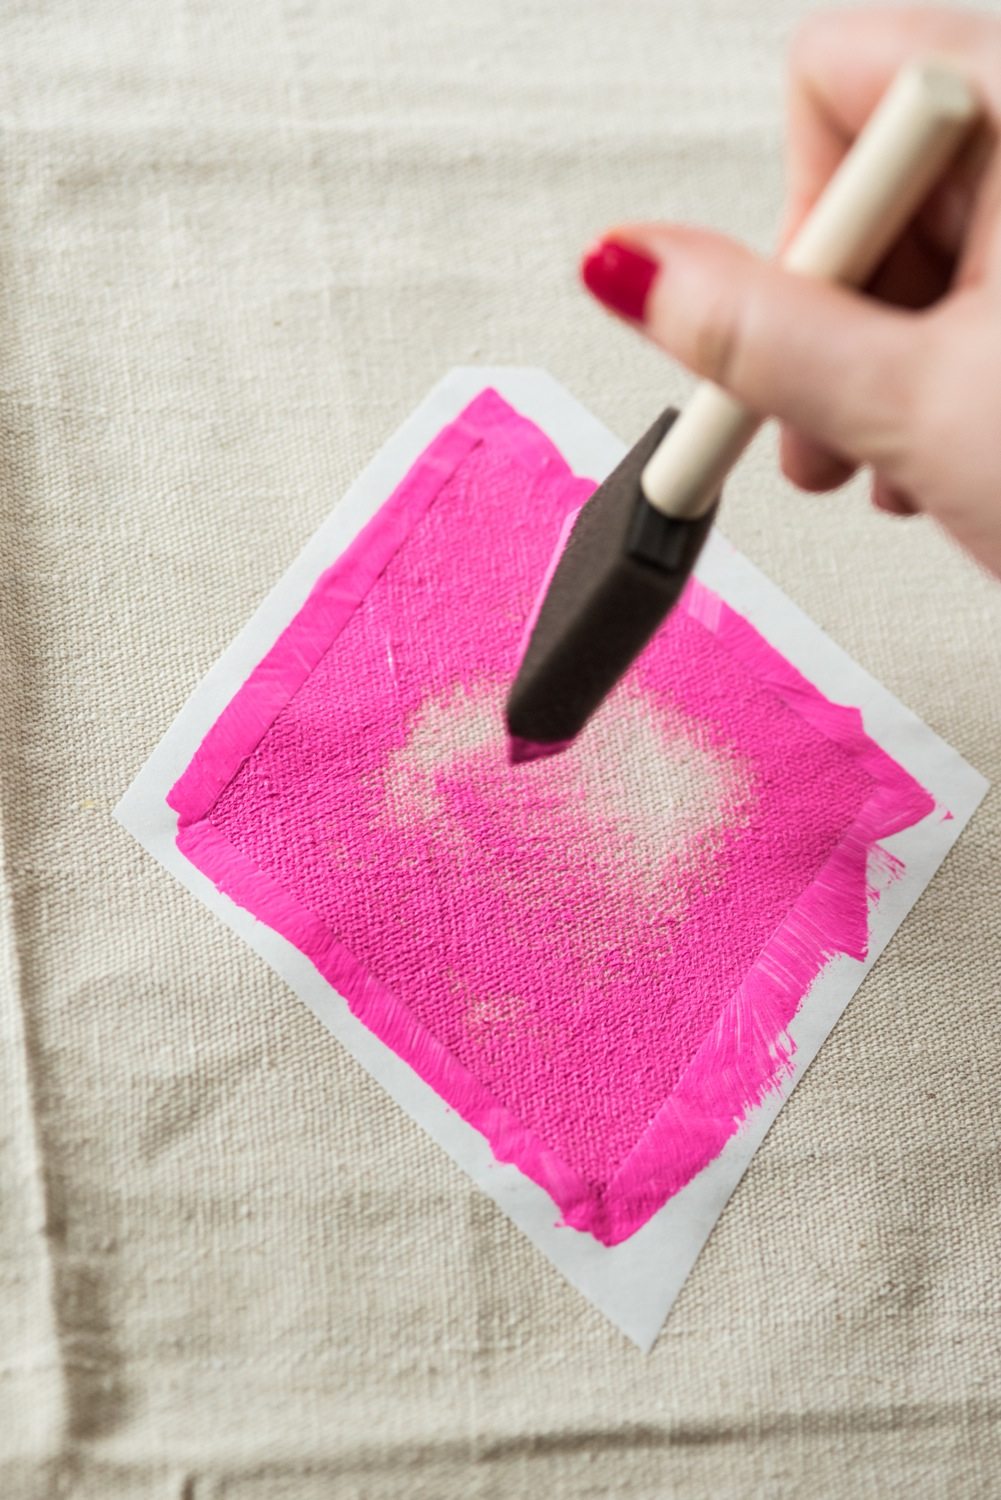
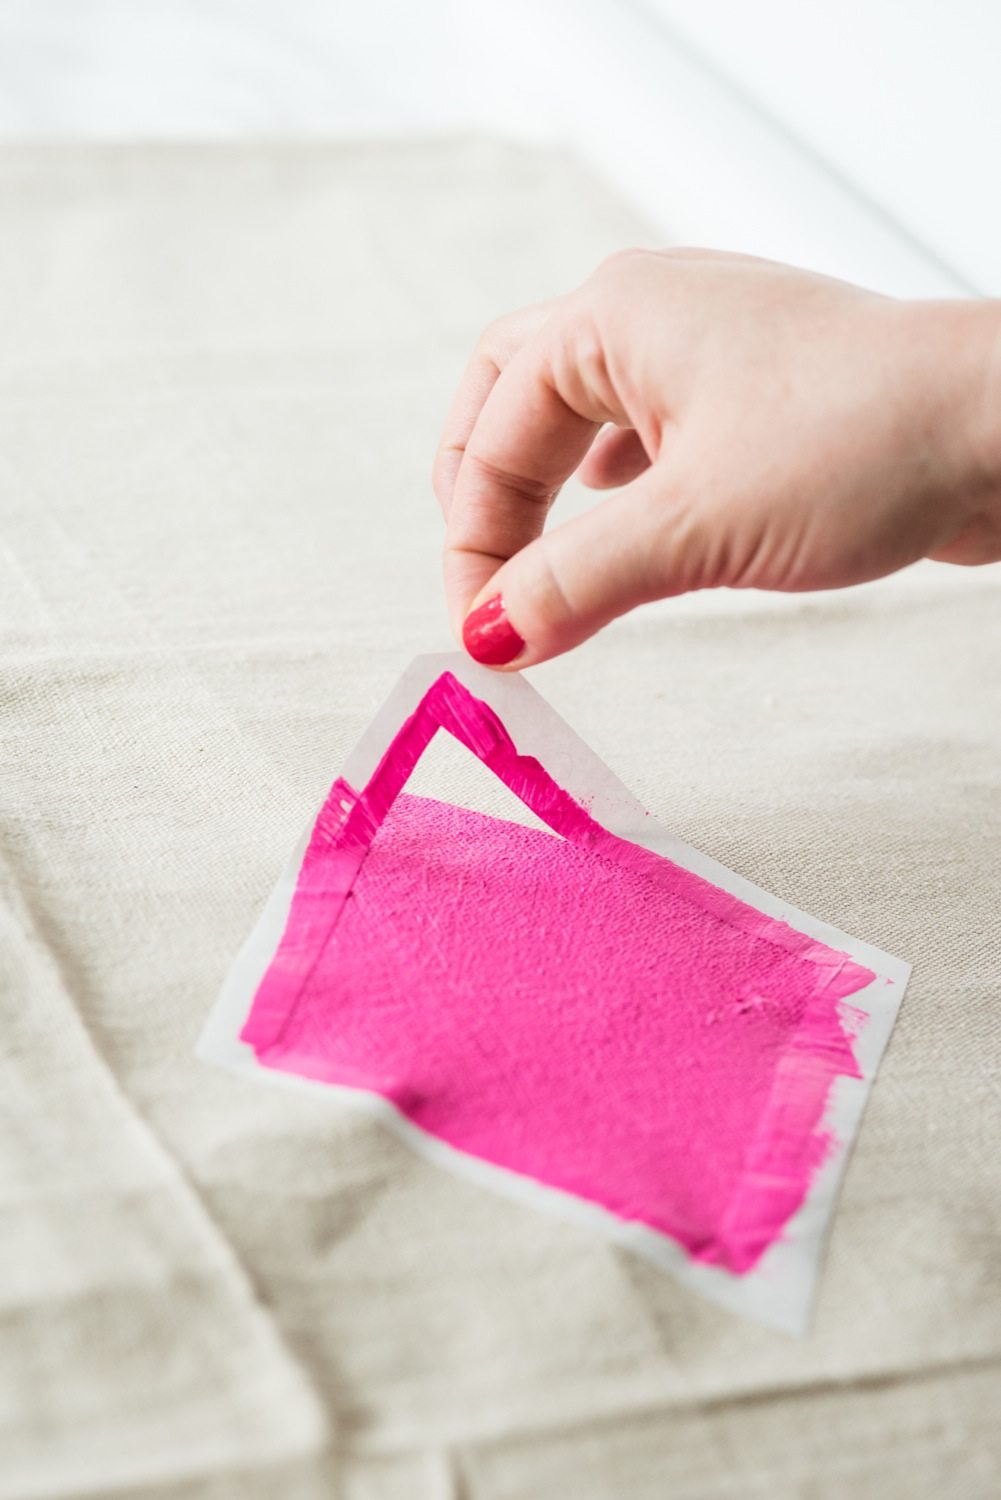
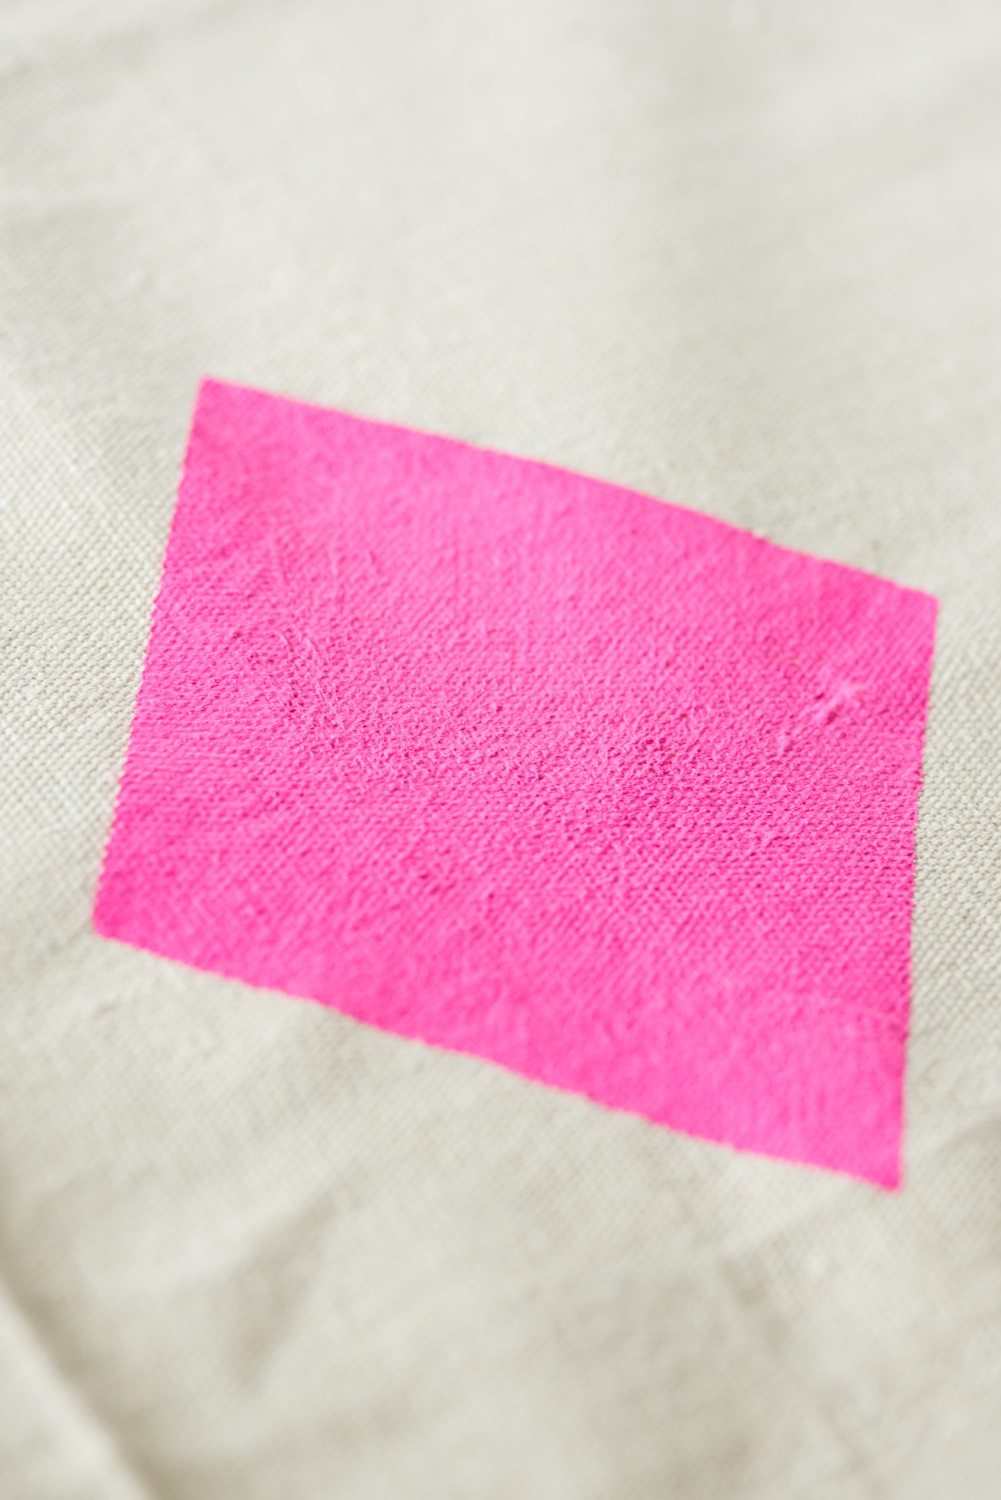
Then it’s time for paint! I used basic craft paints in assorted bright, rainbow-esque colors and inexpensive foam paint brushes for my blanket. Begin by applying the paint along the edge of your stencil, brushing inward away from the edge. This will help to prevent any paint running underneath your freezer paper stencil. Then just continue filling in the shape until the paint is nice and solid. Immediately lift up the edge of your stencil to remove it (do not let the paint dry), and you’ll have nice crisp lines! Continue this process until all of your shapes are painted, then allow it to dry overnight. Before using, quickly iron the backside of your blanket where the painted shapes are to help set the paint. This is washable, but some paint may wear off over time. You can always touch it up later if you’d like!

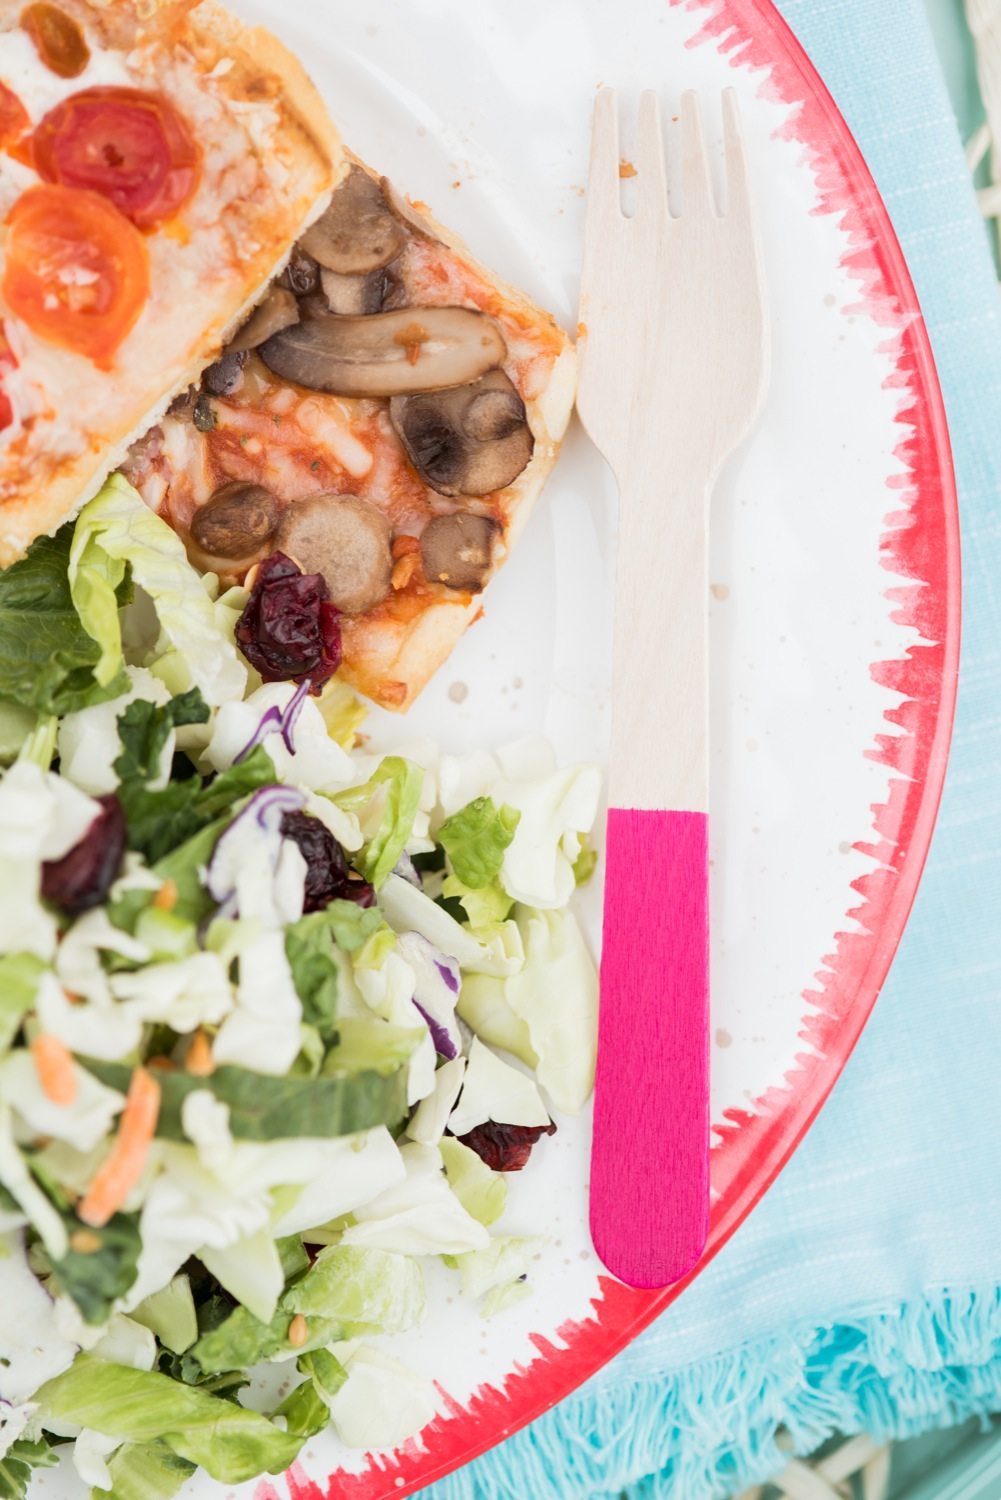

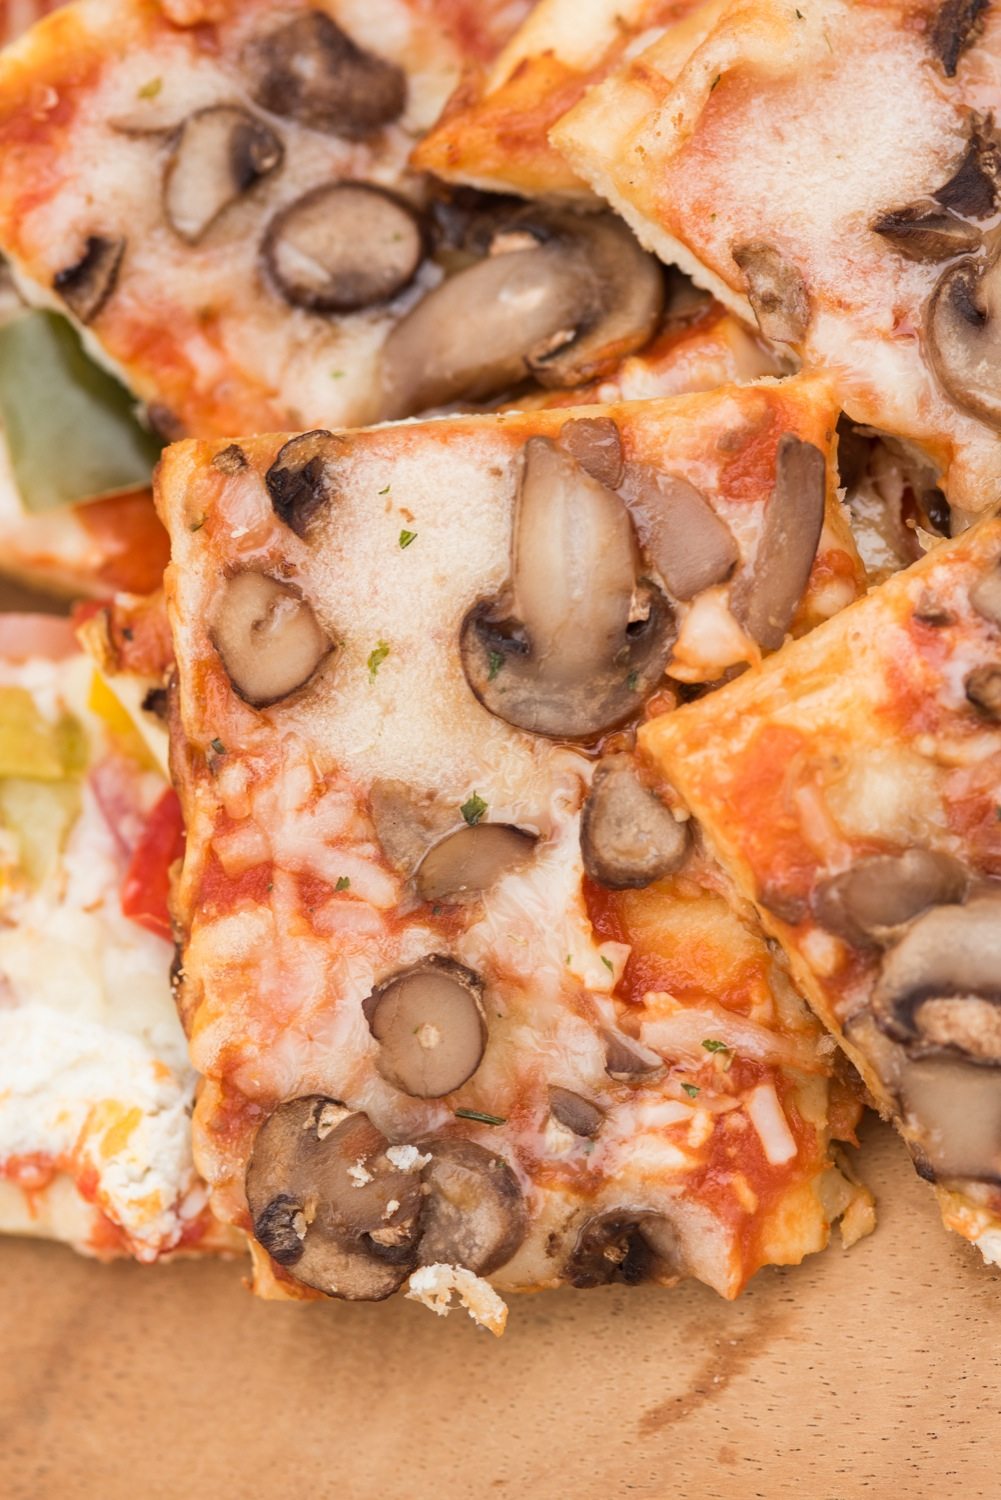
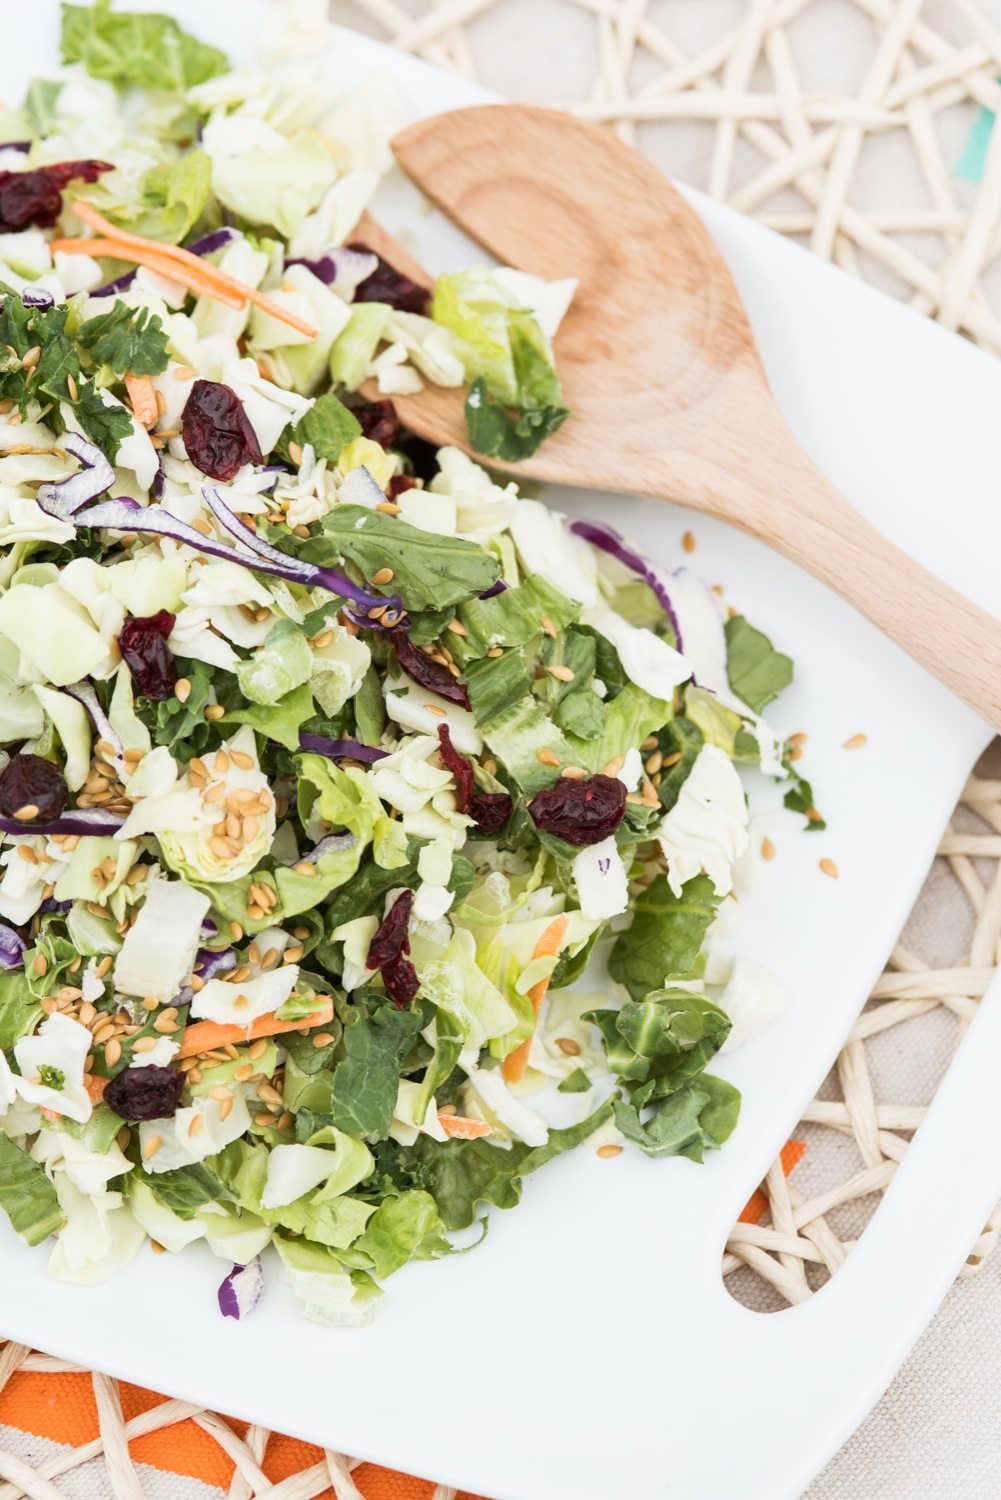
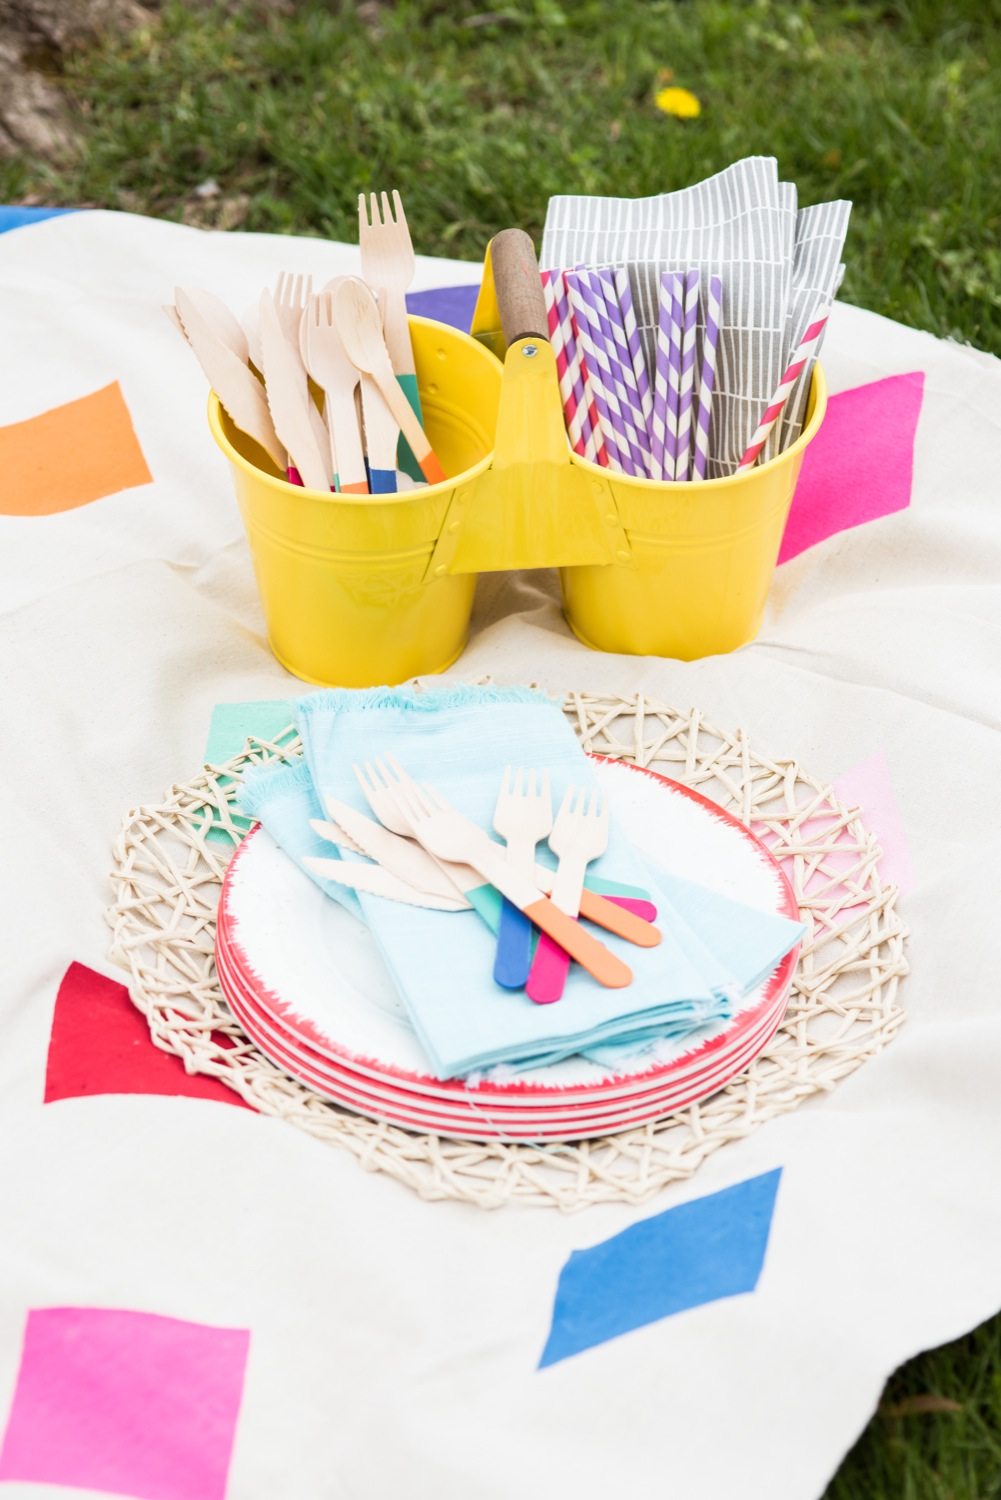
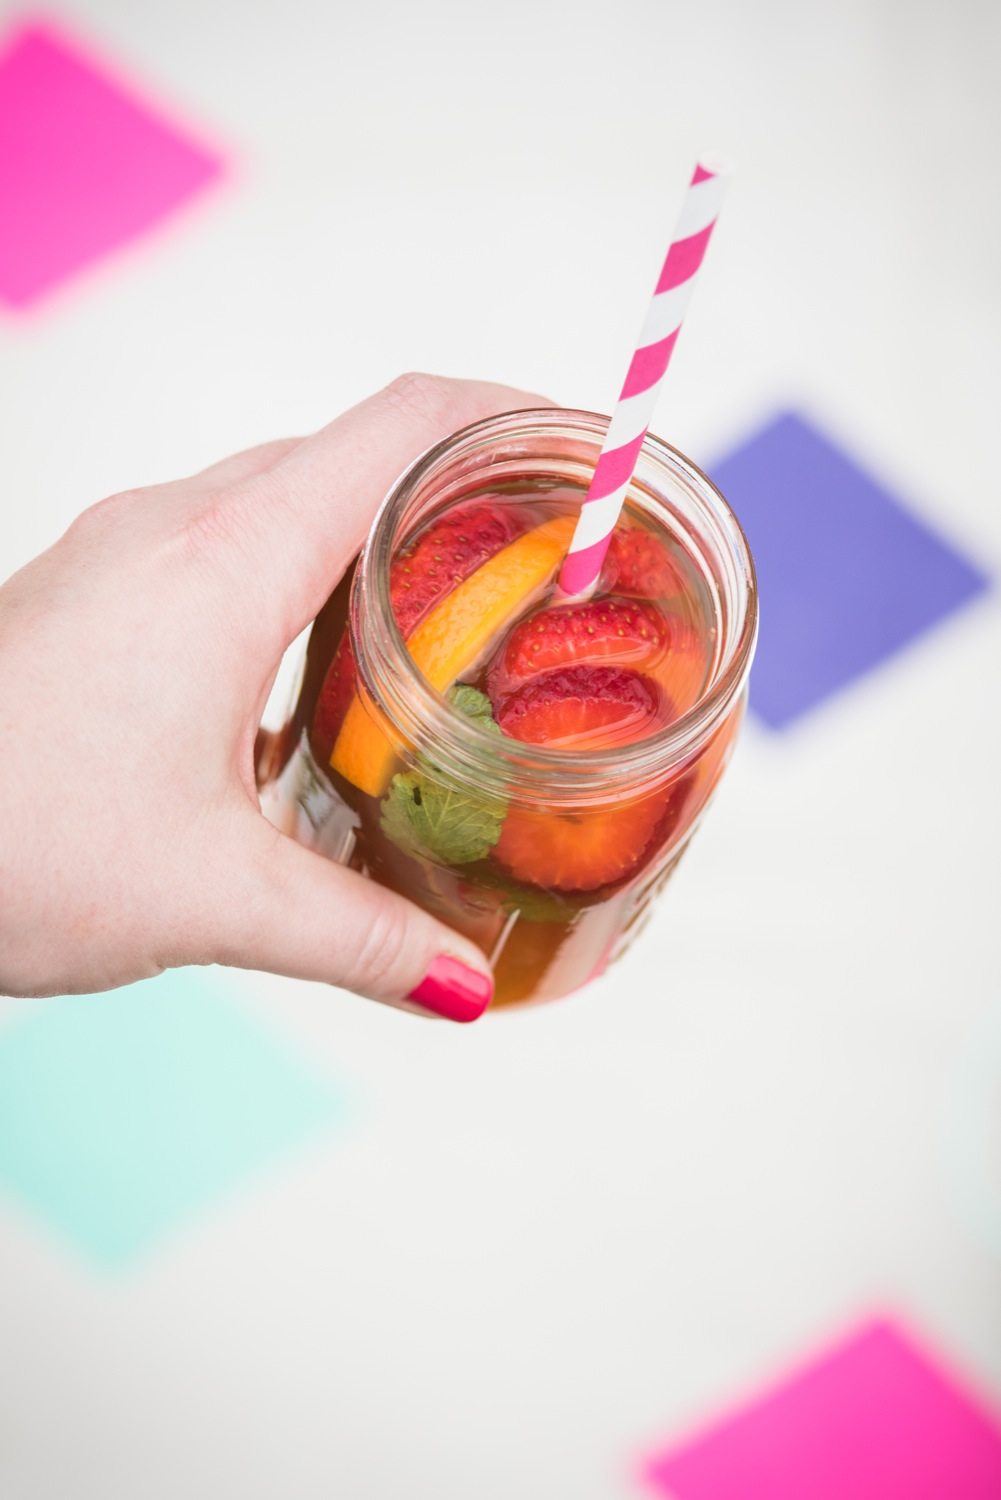
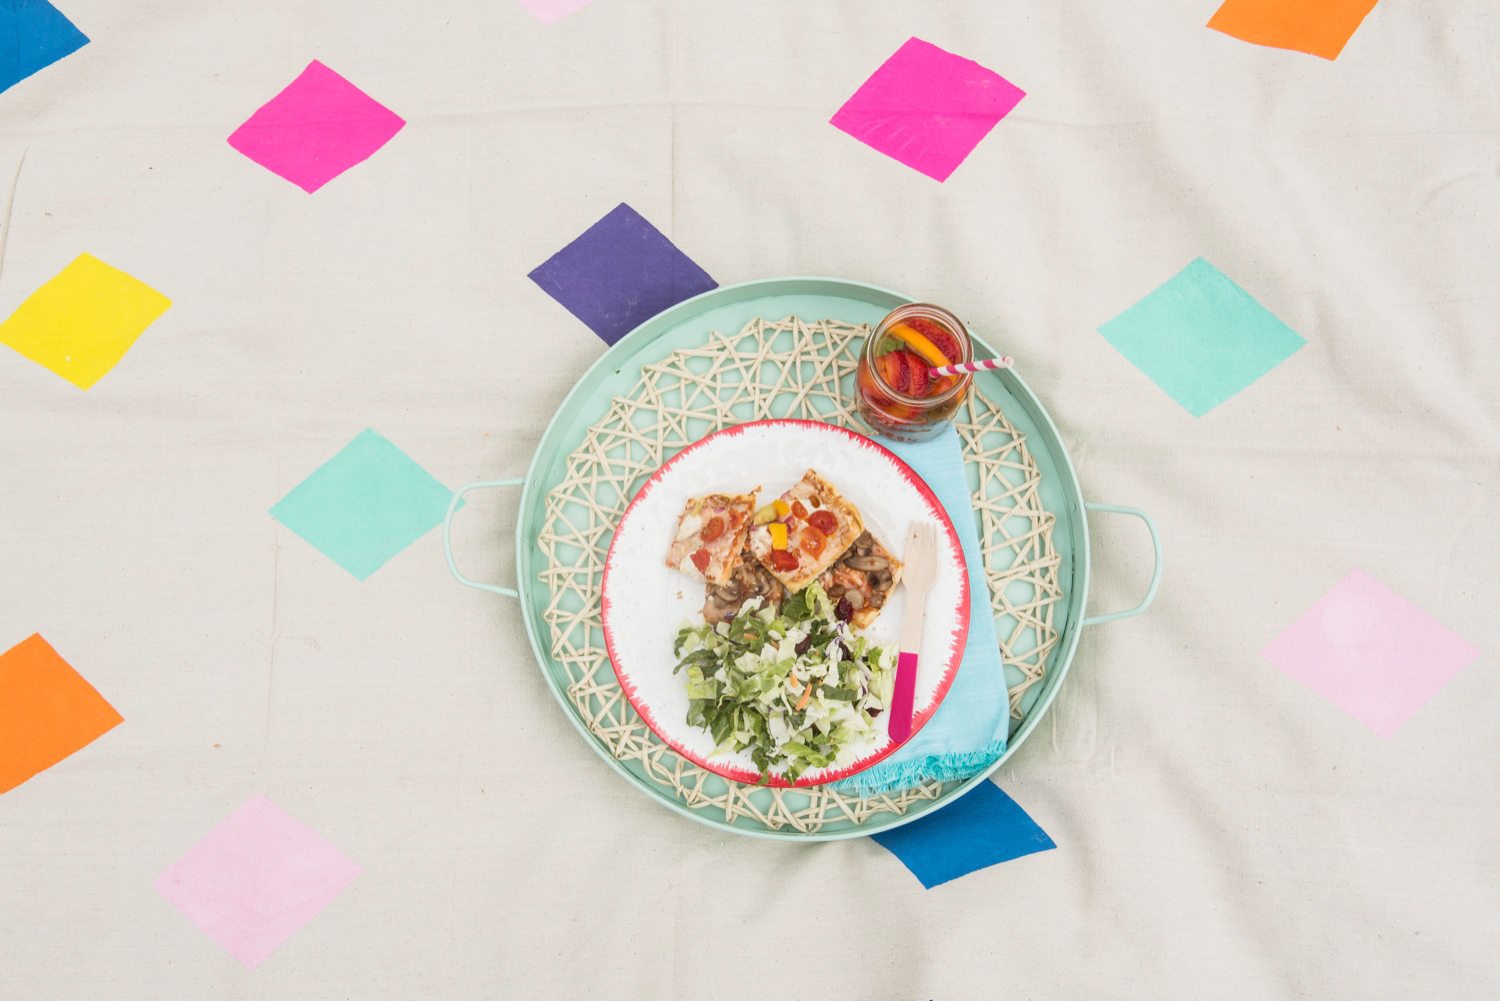
Now, onto the picnic food! If you haven’t guessed it, the star of this backyard picnic is your favorite variety of Ristorante. My recent obsessions have been the Pizza Funghi and Vegetale flavors, but the Pizza Spinaci and Pizza Mozzarella are also longtime favorites around here. (Check out the store locator to find where Ristorante is sold or put in a request with the manager at your favorite store.) The thin, crispy crust and the gourmet flavor pairings leave you with spot on perfect pizza in about 12 to 14 minutes, so you can whip up a big hearty salad and a couple of cocktails for your picnic in the meantime. I think cocktails pre-made in jars that you can just open and sip in the backyard are the perfect way to go. Throw in some cute straws and some wooden picnic utensils and you’re good to go! The easier the better when it comes to backyard entertaining and this is as easy as it gets.


For more recipes, tips and entertaining ideas, be sure to give Dr. Oetker a follow on Facebook, Twitter and Pinterest! Anyone else as crazy about a good picnic as I am? For casual weeknight dinners or easy weekend entertaining, I just think there is no better way to go in the summer. Bring on all the picnics, I say!
![]()
[Art direction + styling by Cyd Converse | Photos by Alice G. Patterson for The Sweetest Occasion.]
This post was sponsored by Dr. Oetker USA LLC. I received compensation for this post, but all opinions are my own. Read more about our editorial policies.


 Back to Top
What a fun project to do with kids! Love the design!
I love those bright, bold colors!
I LOVE this colorful picnic blanket! Painter’s drop cloths are one of my favorite things to use for tablecloths and picnic blankets but I have never even heard of the freezer paper stencil technique that you used. That is so darn cool! I can’t wait to try it!
I want to come to your picnic! Love it all!
I am obsessed with that picnic blanket!!! all those colors are so dreamy!
Love this! I have been thinking about a DIY picnic blanket project but stencils NEVER occurred to me as an option. This is beautiful and it sort of makes me want to have a picnic in our living room!
Cute blanket – so bright and cheerful! I’ll take some pizza too :0
Hahaha the pizza is yours, girl! Thanks so much, Amy! XOXO
Oh, I`ll definitely do this !!! Absolutely brilliant !!!
LOVE to hear that, Bethany! Shoot me a photo when you do? I’d love to take a look! XOXOXO
Pizza and the cutest DIY blanket ever, sounds perfect to me!
Thanks so much, Amy! Pizza and crafty things are my favorite ;-)