


Update: I am so excited that so many people are loving and trying this project! Please note that as I do not have a dishwasher in my home, I have not personally been able to test washing my pieces in a dishwasher. To date, I have had zero issues washing my pieces with normal dish soap and a soft cloth. Some people are reporting issues with the marker washing off, so you may choose to do a test first.

Today’s DIY project was completely inspired by this pin that I’ve been obsessing over on Pinterest for a while now. According to the pin, you can write or doodle on dinnerware with a Sharpie marker and bake it at 350 degrees for 30 minutes and the design will stay permanently. Guess what? It really works!

And it really is that simple. So I tried out a few different designs to create my own custom dinnerware and today I’m going to show you the pretty little things I came up with. This is so simple and such a sweet idea!

How to Make Sharpie Plates and Mugs

First up, remove any stickers or labels that might be on your dishes. I picked mine up at Christmas Tree Shop for $1 each. Then I washed and dried each piece and finally gave them a good scrubbing with glass cleaner and a soft, lint-free cloth just to make sure they were all clean and shiny.

The first piece I tackled was a little dessert plate. I found a pretty adhesive stencil with a botanical design at Michaels, positioned it where I wanted it on the plate and filled in the stencil with a fine tip black Sharpie marker. You can use any color you like, although I really loved the black on white and used it for all of my pieces.

Next up, the cutest little polka dot bowl! I decided to just freehand cute oversized polka dots all over the outside of the bowl, eyeballing the size and placement as I worked. I was a little worried it would end up looking too homemade, but I love the slightly imperfect vibe.


It’s modern and fun. These would be perfect for whipping up for a party or for making special, custom ice cream bowls for midnight snacks. You could even make personalized cereal bowls for everyone in the family! Seriously, the ideas are endless.

Then I tackled my favorite – super sweet and sentimental personalized mugs! As soon as I saw that now infamous pin, I knew I needed to make a pair of adorable mugs. This one was a little trickier as I just freehanded with marker onto each mug.

I had to try each one a few times to get them just right, but luckily you can just wipe off the marker with some glass cleaner and a bit of elbow grease and start over if you mess up. That said, remember that the hand drawn quality is what makes these pieces so darling so don’t obsess over perfection!

I completed all of the pieces one after the other and then baked them at the same time, using the 30 minutes at 350 degrees specified by the inspiration pin. To bake them, I simply placed them directly on the rack in the cool oven, then turned on the heat. After 30 minutes I turned off the oven and let it cool completely before removing my fancy new dinnerware.


Once everything was completely cool, I tried scrubbing the designs and the marker didn’t budge a bit. Voila! It actually works!
Note: I should note that I don’t have a dishwasher in my apartment, so I can’t say for sure if they’d hold up to the dishwasher, but hand washing will get the job done.

For most of my pieces I kept the marker design on the exterior, with the exception of the dessert plate. I’m not entirely sure if this would be considered non-toxic or not, so if you have little ones around I would definitely suggest just using the plates for decorative purposes, but the bowl and mugs are totally usable!
You can do this on any dinnerware you’d like to jazz up or do what I did and pick up some inexpensive pieces and give them a custom look for literally pennies. These would be perfect as bridesmaids or hostess gifts, stocking stuffers come holiday season, a sweet little trinket for your beloved…you get the idea!
[Design + styling by Cyd Converse for The Sweetest Occasion. | Photos by Alice G. Patterson.]
Make unique dinnerware using Sharpie markers and inexpensive plates, bowls and mugs!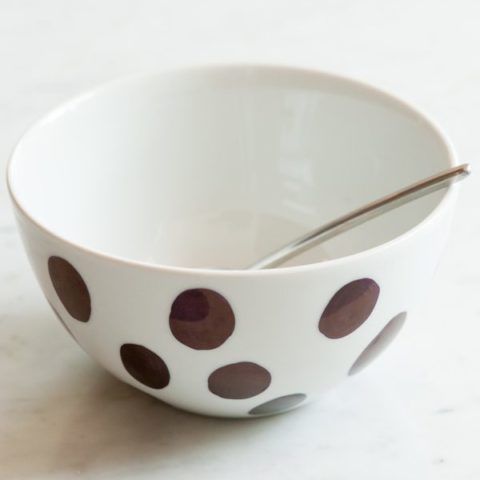
DIY Sharpie Dinnerware
Materials
Instructions


 Back to Top