


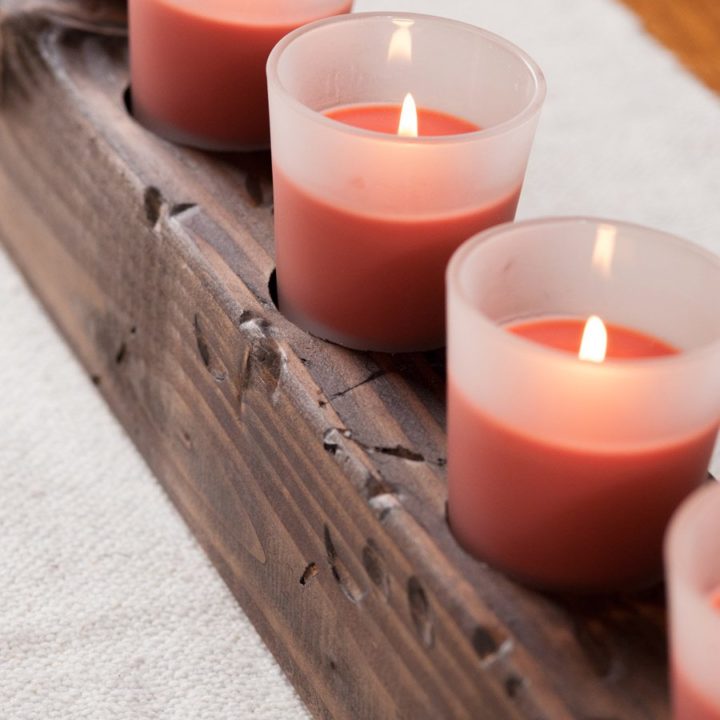
This DIY wooden candle centerpiece makes a beautiful addition to your home or patio. Use your favorite candles to create beautiful ambience in any room of the house!
One of my favorite places to source inspiration for home DIY projects is at my local hardware store or with a trip to the local home improvement store. Did you know 4×4 fence posts make a beautiful candle centerpiece?! Now you do.
This project was inspired by my love for candlelight – the more the better! It does involve a tiny bit of woodworking, but I promise it is straightforward.

I had a vision for an awesome centerpiece featuring distressed lumber that would serve as the ultimate tabletop focal point. I kept thinking of warm and cozy holiday gatherings with something yummy baking in the oven and loads of flickering candlelight.
After struggling to find any reclaimed lumber that would work for what I had in mind, a trip to Home Depot is all it took to find inspiration. And that’s how an inexpensive fencepost became a candle holder!

Fence post in hand, I set off to create the prettiest candle centerpiece. It took a bit of time and occasionally I found an extra set of hands helpful, but overall it was a simple project that came together just as I had envisioned.
It’s a really fun and special piece that will instantly add warmth to your home decor and, dare I say, I think it’d make an amazing homemade gift for the candle lover in your life, too!

Wooden Candle Centerpiece Supplies
To make this distressed wood candle holder, you will need a few fairly simple supplies. Read my notes below for tips on how to customize this candle centerpiece for your own home.
- Lumber – Find reclaimed lumber that suits the size candle holder you’d like to make, or source an untreated 4×4 fence post at a home improvement store. I asked Home Depot to cut mine to a 3′ length – they can cut it any length you’d like!
- Speed square – Using a speed square (a common tool in carpentry) will help you to find and and mark the center piece of each indentation to hold the candles. You can find them inexpensively at any hardware store.
- Pencil – This is fairly straightforward, but you will need a pencil too mark lines to locate and denote the center of each candle well
- Drill with self-feed drill bit – This tool is key to this project – you’ll need a drill with a self-feed drill bit, which is what will allow you to cute nice even circles into your lumber. I suggest selecting the candles you’d like to use first, then selecting a self-feed drill bit with a diameter approximately 1/4″ larger so your candles fit nicely, without having to wrestle them into their respective spot.
I will share with you that my initial vision for this project utilized a piece of reclaimed lumber, but after sorting through my father’s heap of old lumber and boards I came up empty handed.
So it was off to Home Depot, where I purchased a 4×4 untreated fence post and had it be cut into 3′ lengths. It turned out just as great as I’d hoped!

Scroll down for the printable instructions card!
Tip: Most home improvement stores will cut wood to length for free. Be sure your fence post is untreated as the pressure treated kind has a funky color that will be hard to work with when you get to staining later.
Step 1. Cut your lumber to size – or, as mentioned above, have it cut to size for you. For the size of my table, I wanted my candle centerpiece to end up 3′ long.
You can adjust the length to fit your home. You’ll likely have leftover lumber if you’re using a fencepost, which you can use the leftover lumber for another project!

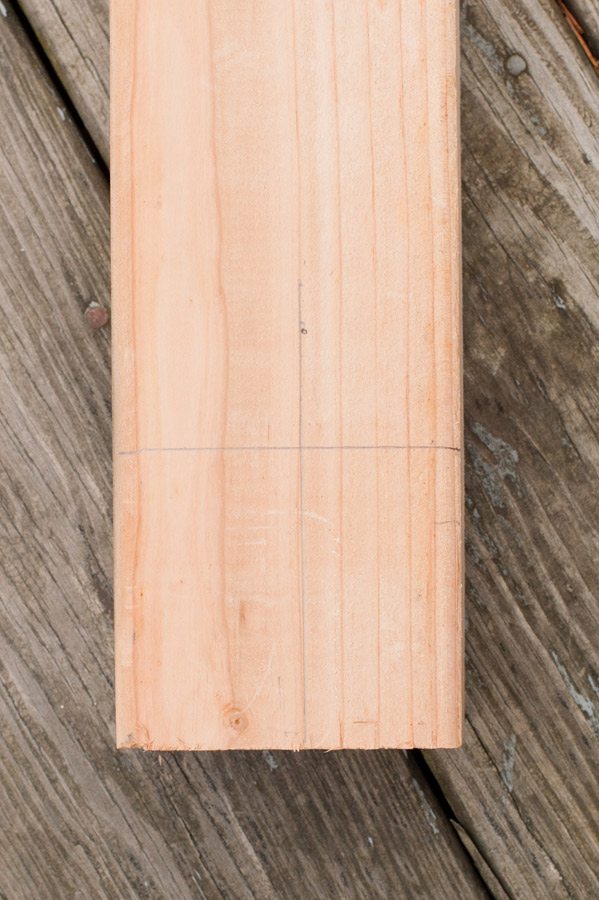
Step 2. Next up, determine where you want your candles to start along the centerpiece. I used a tape measure, square and pencil to mark the placement of each candle, leaving 3″ on either end of the candleholder.
To determine the placement and spacing, I lined up a row of candles along the top and decided that seven candles was going to be the perfect number of candles for my 3′ length of lumber.


Step 3. Make a mark along your lumber where the center of each candle will rest. Then it’s time to start drilling!
I used a self-feed drill bit with a 2-1/2″ diameter (this one although I found it locally) because the bottom of the candle measures just over 2″ across.
Yes, we’re using power tools for this, but, no, it’s not hard to do!


Step 4. Use your self-feed drill bit to cut a hole where each candle will rest along the centerpiece. You don’t have to cut very much, just go deep enough for the candle to have a little divot to sit in.
It’s ok if the holes are a little rough around the edges as it lends to the distressed look we’re going for with this project.
Of course, when using power tools be sure you’re taking the proper safety precautions! Safety first, friends.

Step 5. Next up, it’s time to talk about distressing the lumber! This is ridiculously simple.
You’ve probably seen it before, but I’d never done it, so I worried it might not be as easy as people make it sound. No worries – it really is that easy!
Just take your hammer and begin knocking small dents into the wood, being sure to cover all three sides that will be visible when the centerpiece is in use.
You can really use whatever you want to to achieve the desired look, just have fun and don’t over think the distressing process.


Step 6. Now we’re onto stain! I used Minwax in Dark Walnut, but you can use whatever you have if you happen to have some left from another project.
Just one coat, applied liberally with a lint-free cloth will get the job done!
Be sure to wear gloves because stain will definitely do a number on your manicure if you get it on your hands. Rub the stain with a pretty heavy hand into the wood and then allow it to dry completely.
I found one coat did the trick and I skipped any kind of sealer or poly coat because I wanted it to have an older, time worn look without any sheen.


And there you have it! A really awesome (even if I do say so myself) wooden candle centerpiece that will be the star of all your home decor or for holiday celebrations throughout the year!
I love the idea of using it on your dining room table or lighting it up along your coffee table and serving dessert and coffee from a comfy seat instead of at the formal table.
The best part is, this piece will look amazing all year long, so you can enjoy it for a long time to come. It would even look amazing outside on a patio or outdoor dining table!
Mine has a permanent home on our dining room table and I doubt it’s going anywhere anytime soon – I seriously love how it turned out!


[Design + styling by Cyd Converse for The Sweetest Occasion. | Photos by Alice G. Patterson.]
DIY Wooden Candle Centerpiece
This DIY wooden candle centerpiece makes a beautiful addition to your home or patio. Use your favorite candles to create beautiful ambience in any room of the house!
Materials
- Reclaimed lumber or untreated wooden fence post
- Square
- Pencil
- Drill with self-feed drill bit
- Hammer
- Tape measure
- Stain + staining cloths
- Latex gloves
Instructions
- At your local home improvement store, have a 4×4 untreated fence post cut down to 3' lengths
- Next up, determine where you want your candles to start along the centerpiece. I used a tape measure, square and pencil to mark the placement of each candle, leaving 3″ on either end of the candleholder.
- Make a mark along your lumber where the center of each candle will rest
- Use a self-feed drill bit with a 2-1/2″ diameter (or suited to your candles - mine were just over 2″ across) to cut a hole where each candle will rest
- You don’t have to cut very much, just go deep enough for the candle to have a little divot to sit in
- Next up, take your hammer and begin knocking small dents into the wood, being sure to cover all three sides that will be visible when the centerpiece is in use to create a distressed look
- Apply one coat of stain with a lint-free staining cloth and allow to dry completely
- I skipped a sealer or poly coat because I wanted the wood to have a worn, aged look so I didn't want any sheen
- Once dry, insert your candles, light them and enjoy!


 Back to Top
When I click the link, I’m unable to pull up the drill bit. Most of the ones I am finding online are 2.25″ not 2.5″ – any recommendations? Love your blog!!!
I love airwick. It keeps my house smelling great.
Brilliant idea to distress the wooden block with a hammer! As always, awesome DIY tutorial!
Really cool DIY project!
Love it. Turned out great, Cyd!
Oh my goodness, this is BEAUTIFUL Cyd! I think it’s time I invest in a drill.
This is great as a homemade Christmas gift :) I don’t have any drill like that, but I’ll look for one in order to try this DIY!
Thanks!
Wow! This diy wooden candle centerpiece tutorial seems so simple to make, I did think it would be a little challenging at first but after reading your steps seems like a breeze. I will try to incorporate this as a cute touch-up to spruce up my home.
Hi Charmaine! You’re absolutely right. It looks kind of complicated, but in reality it was kind of a cinch to make. An extra set of hands doesn’t hurt, but it’s definitely not necessary. Would love to have you update me if you make it and send along a photo! xo
I just stumbled upon your blog and I love it! Such a fun DIY post…if I had that drill bit, I could totally do this!
Hey Jessica! I found the drill bit at a local hardware store for quite a bit cheaper so it’s worth exploring. I am thinking of all kinds of projects to use it for now – I might even make another of these as a holiday gift. So it might be worth investing a little in the bit if you want to give it a go :-)