


These colorful marble mugs are a simple craft made with nail polish! This nail polish marble technique easily creates pretty marble dipped mugs to gift or to keep.
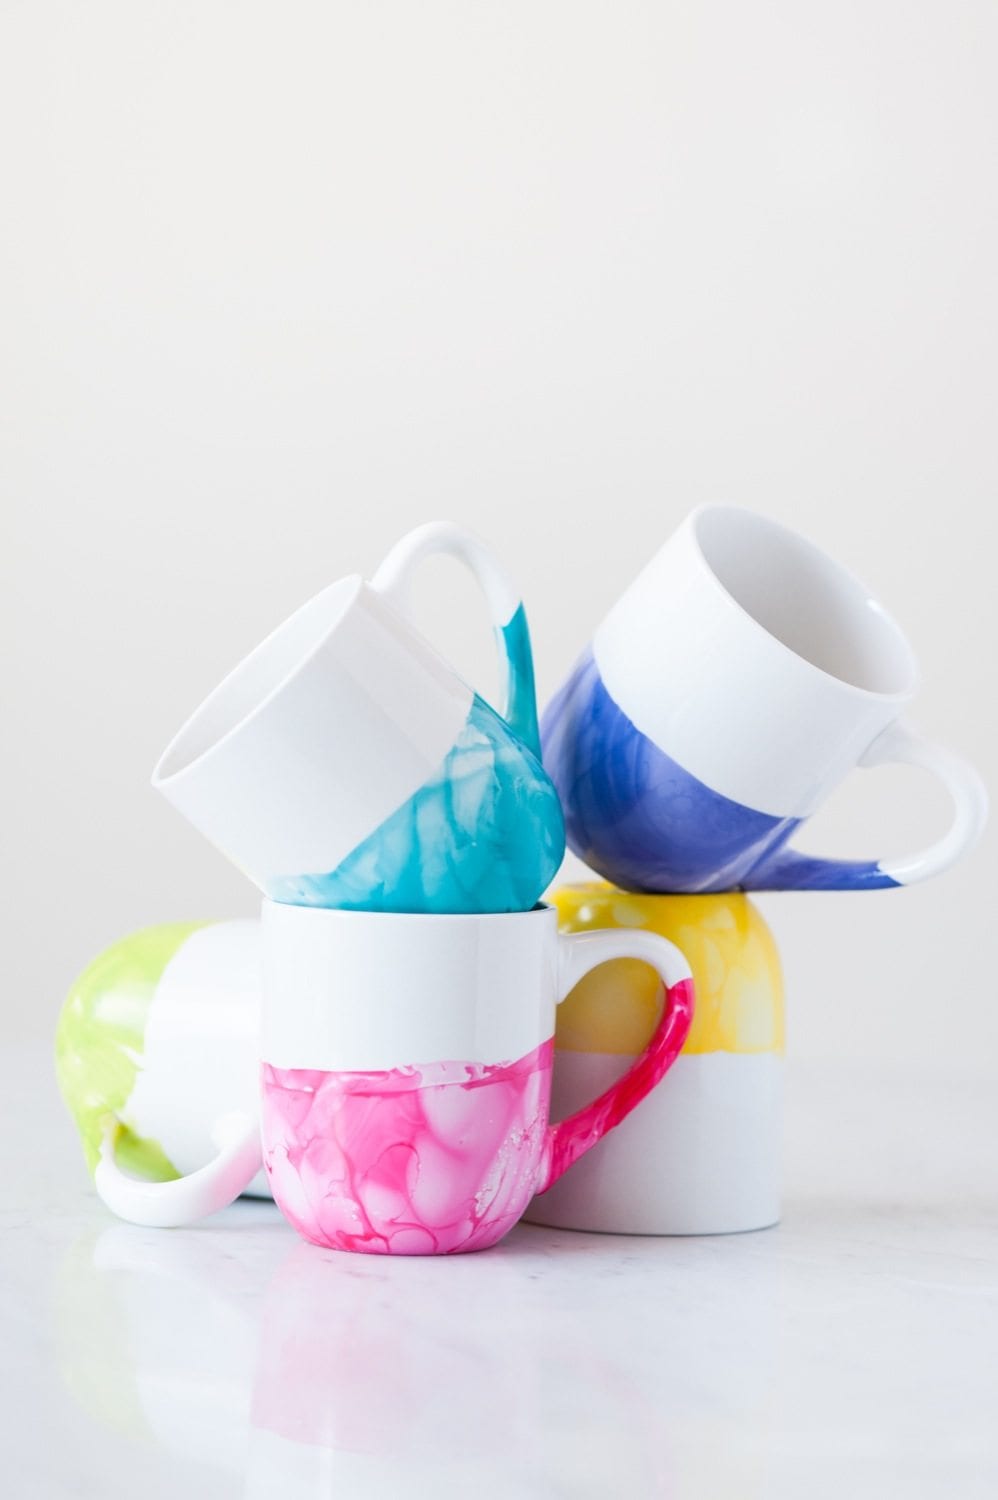
Remember a while back when I made what was arguably the world’s prettiest DIY marble pitcher? Well, I couldn’t get enough of playing with nail polish and that made resisting the urge to make DIY marble mugs impossible. The process here is much the same so scroll through for details!
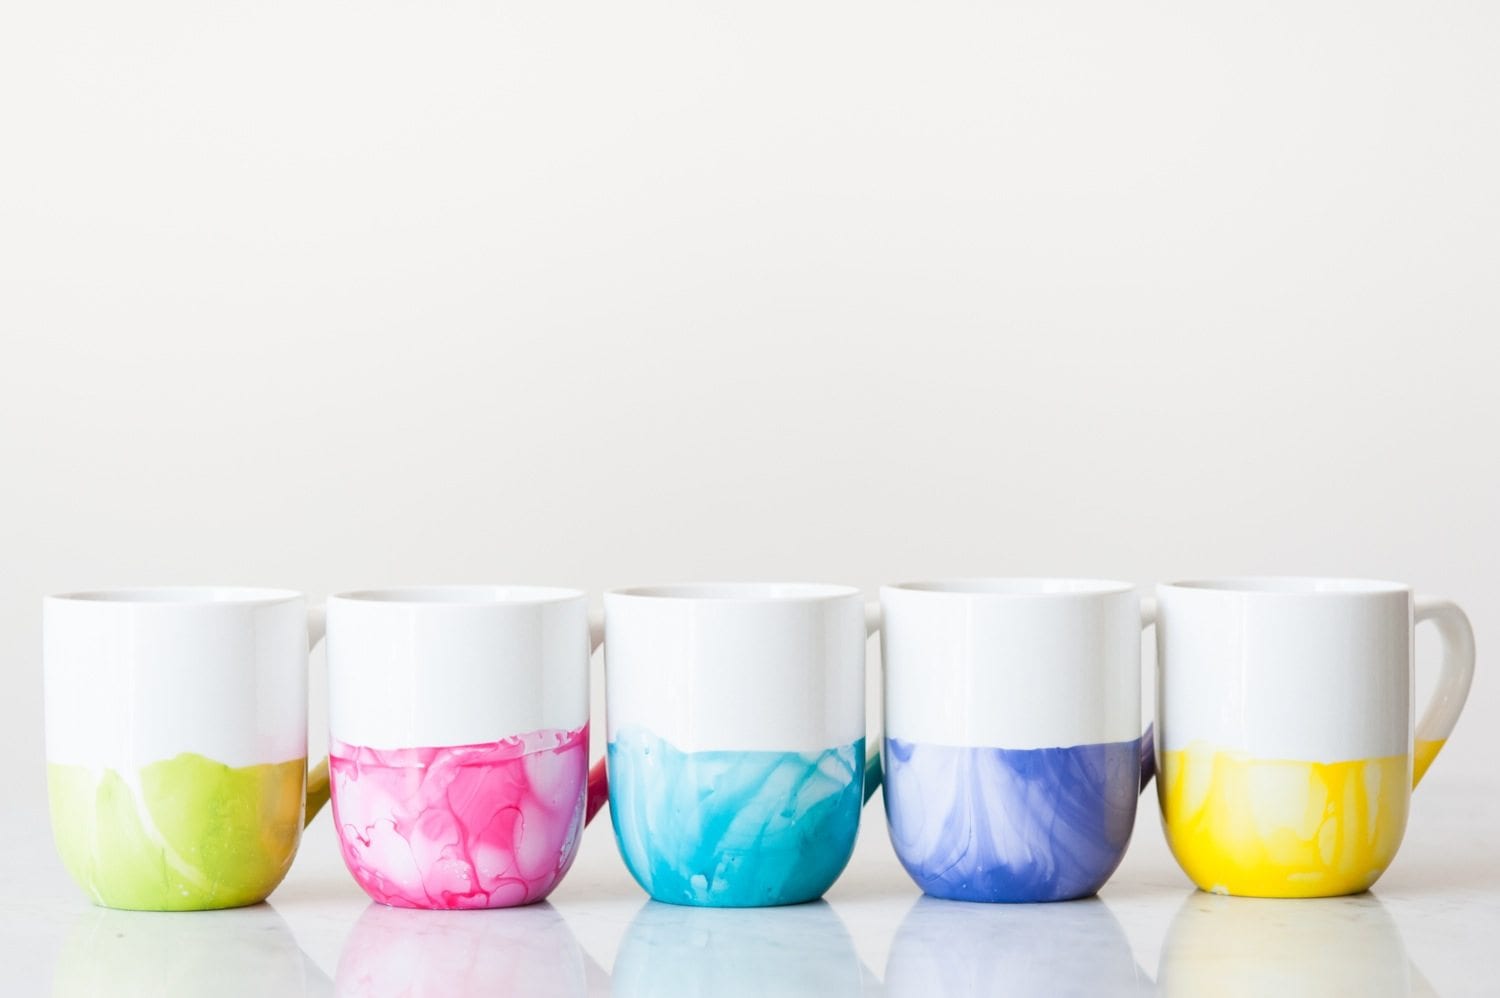
I love the idea of making a set of mugs in different bright, happy colors (like I did here) to either keep yourself or split up and give as gifts! This is another sweet, simple, inexpensive projects that is so fun. And addicting. Consider yourself warned!
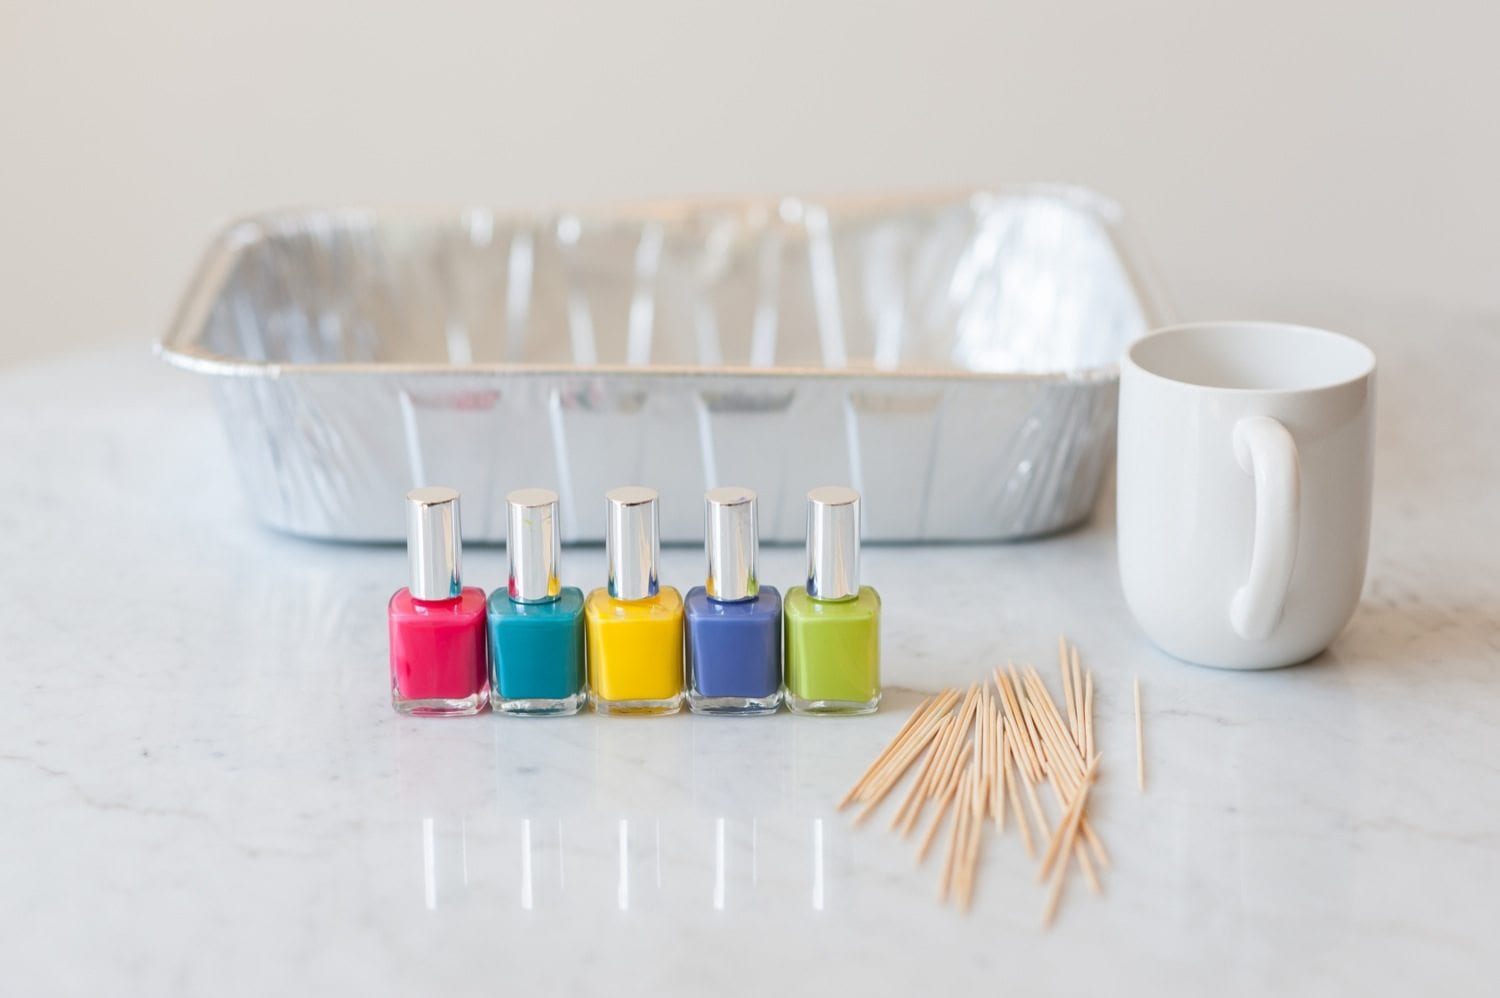
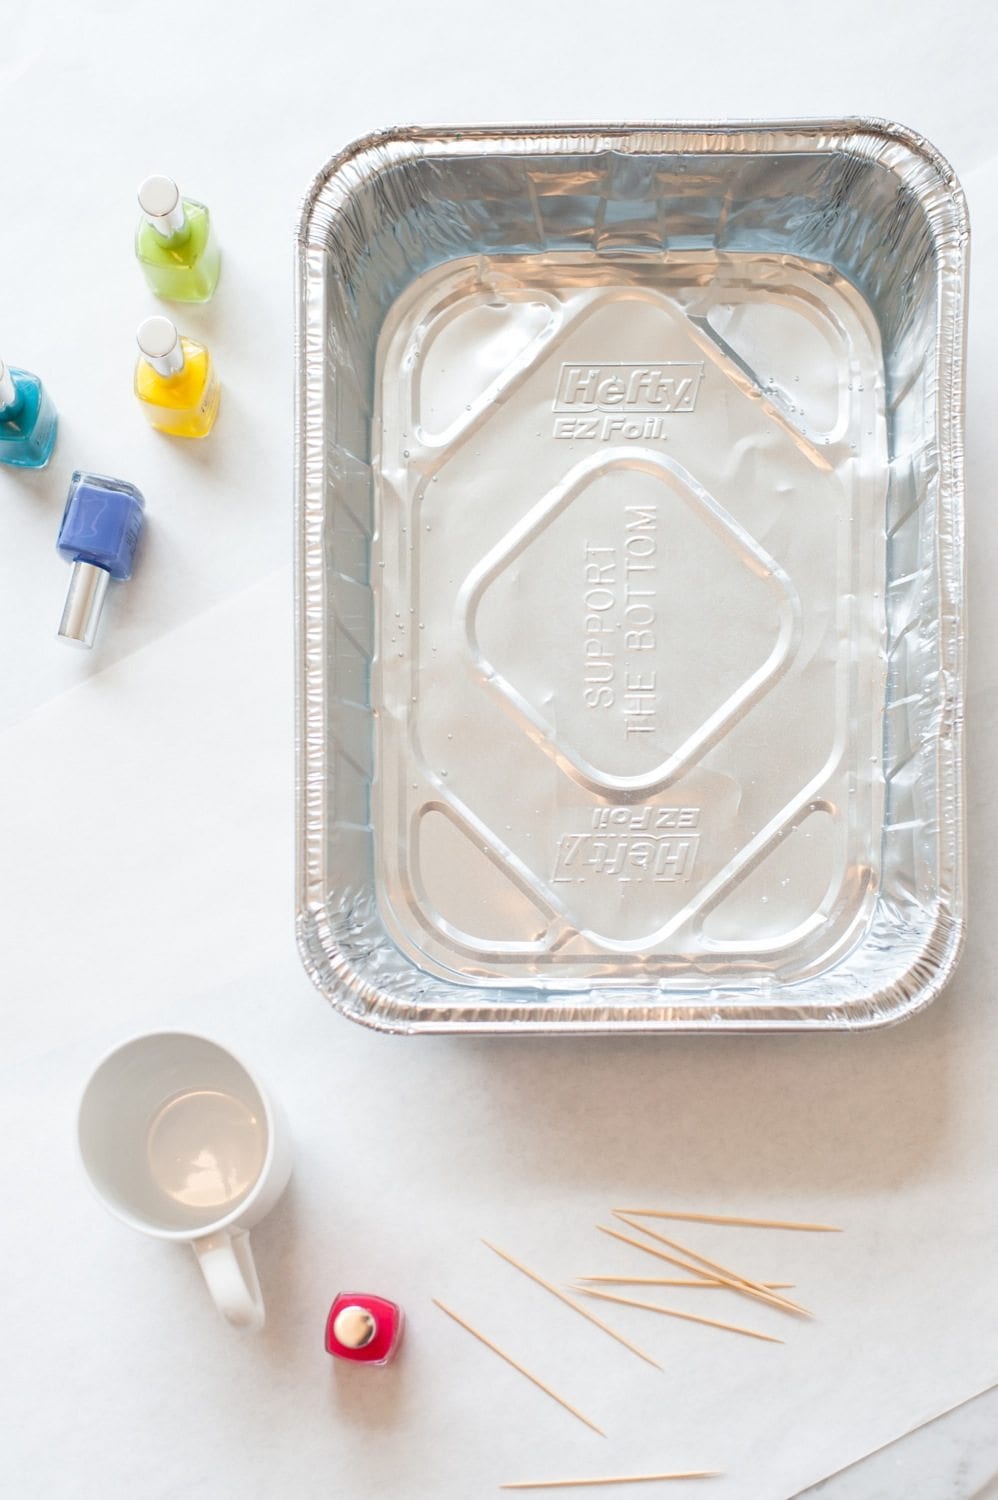
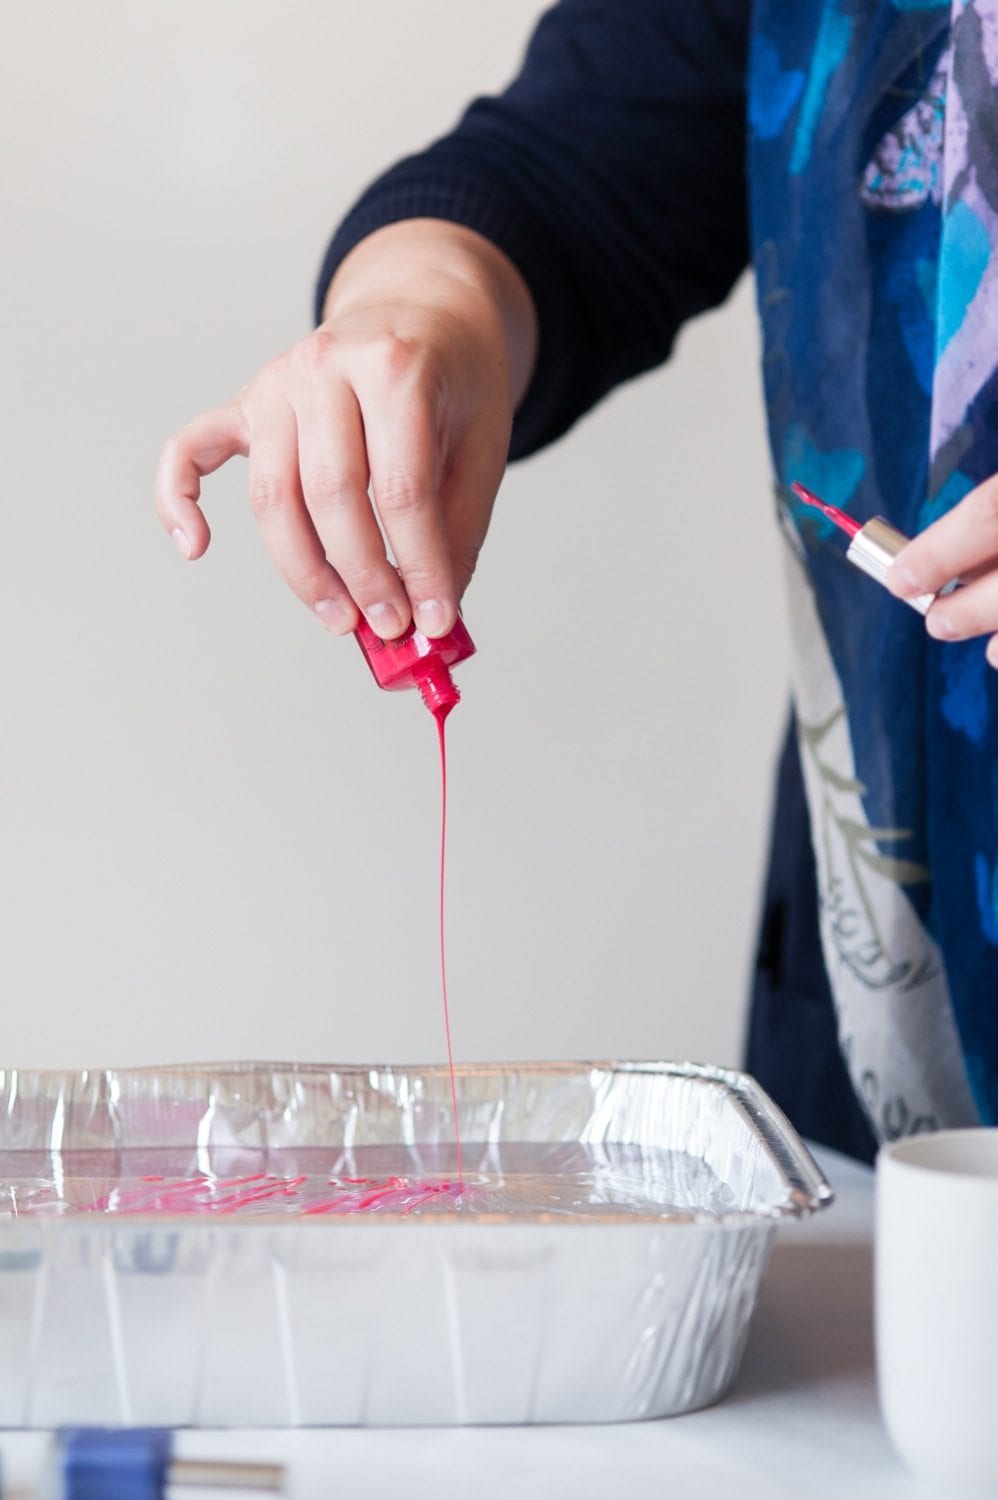
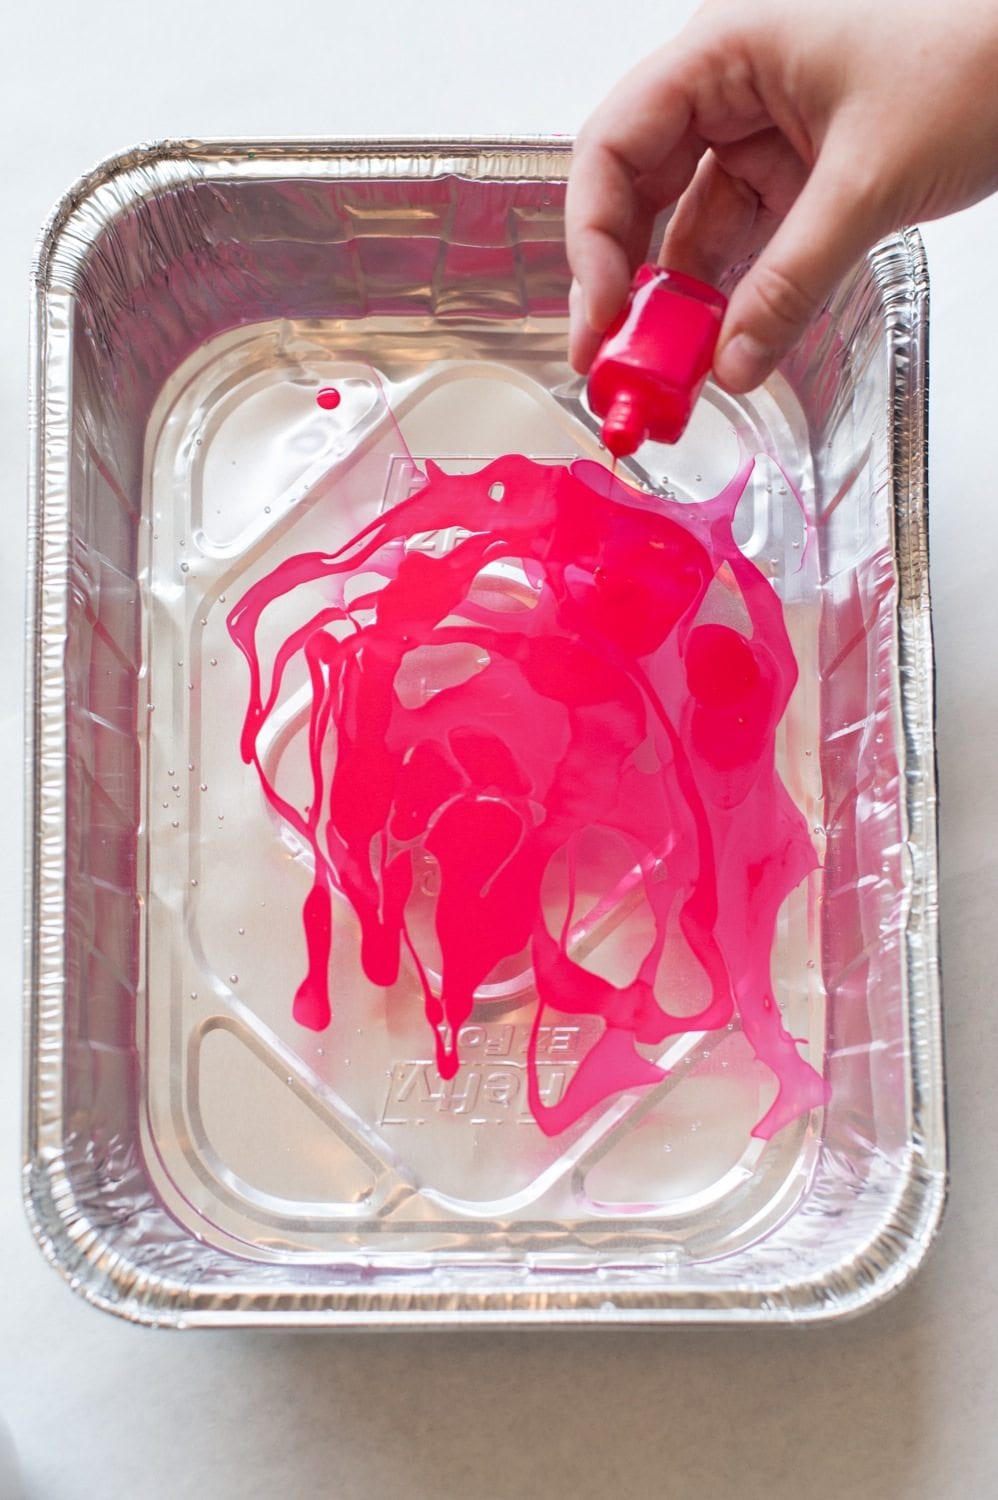

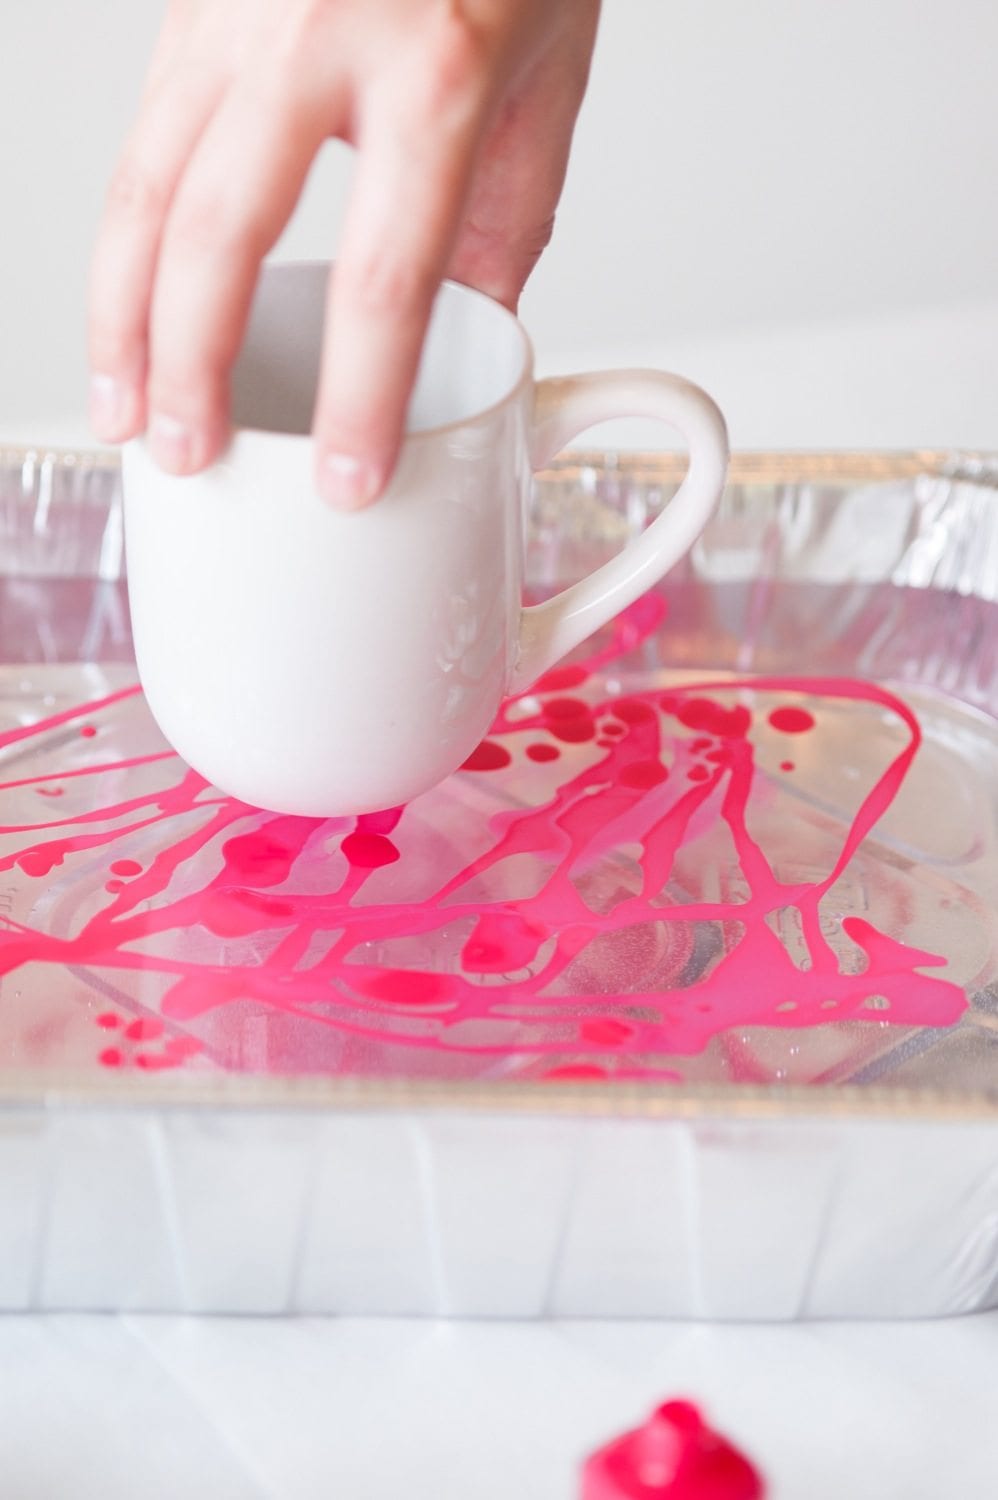
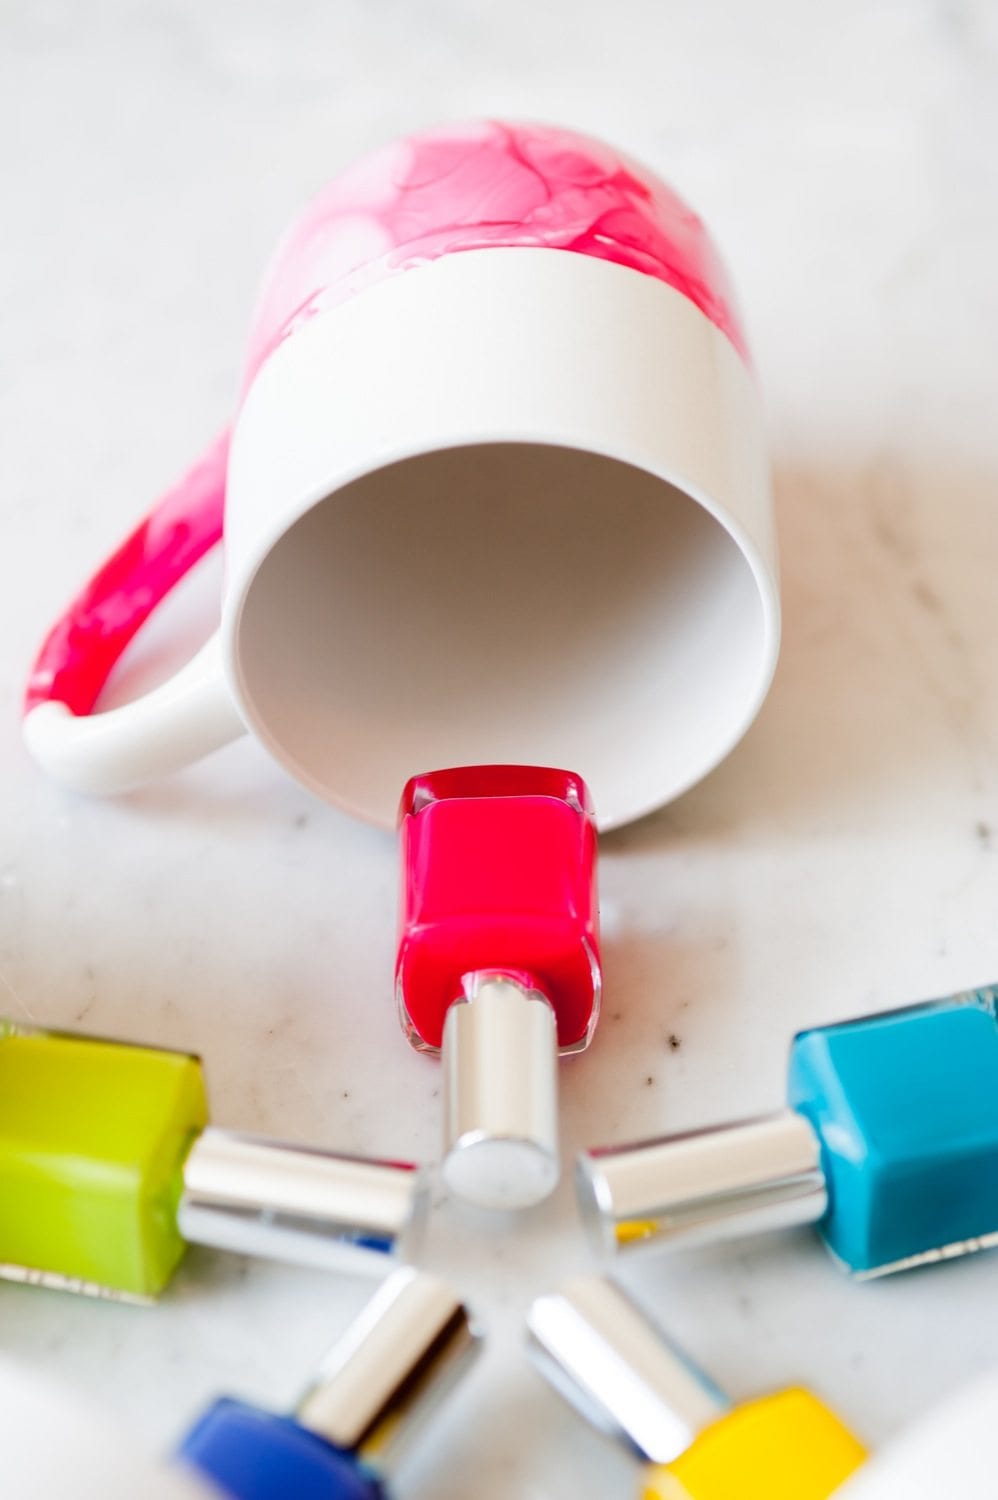
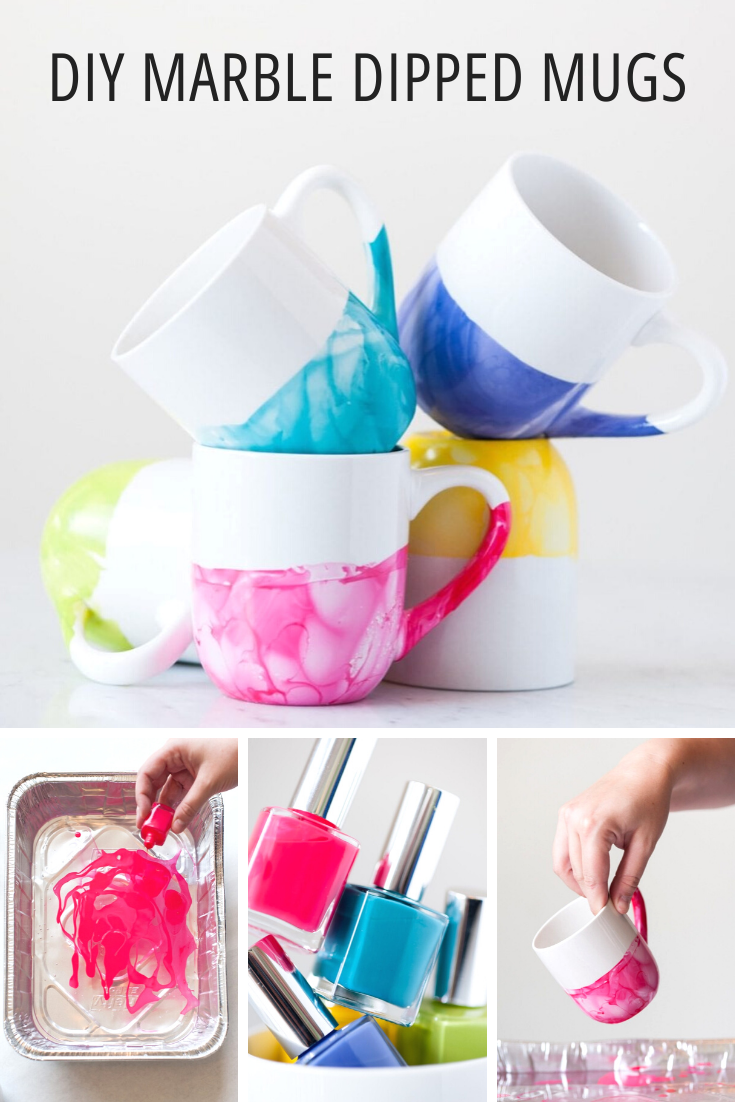
The first step to marble dipping the world’s loveliest mugs is filling a a disposable pan (or something you don’t mind getting permanently colored by nail polish) 2 – 3″ full with warm water. Add more or less depending on how high on your mug you’d like the color to reach. Make a mark on the inside of your pan to indicate the water level so you can fill it to the same spot each time if you’re making multiple mugs. Then, add your nail polish! Pour it onto the surface of the water, adding more or less depending on if you’d like more or less white to show through your marble pattern. Working super quickly, use a toothpick or skewer to swirl the nail polish across the surface of the water to help create the marble effect, but don’t think too hard about it! You don’t want to drive yourself crazy overcomplicating a simple process and you want to move quick so the nail polish doesn’t set up on the water.
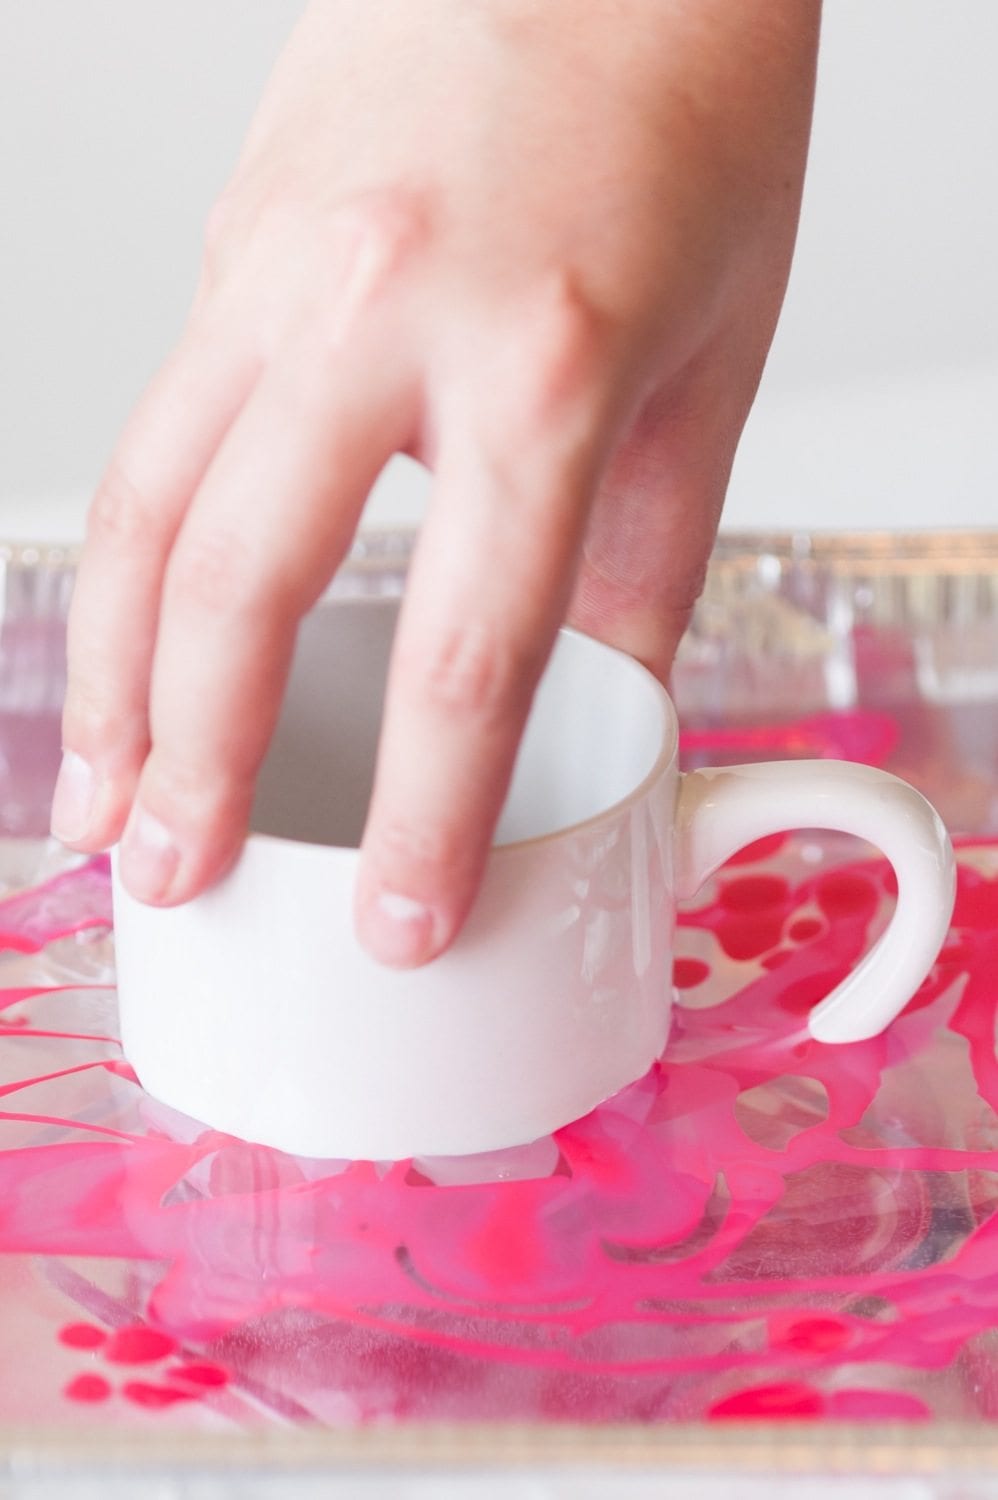
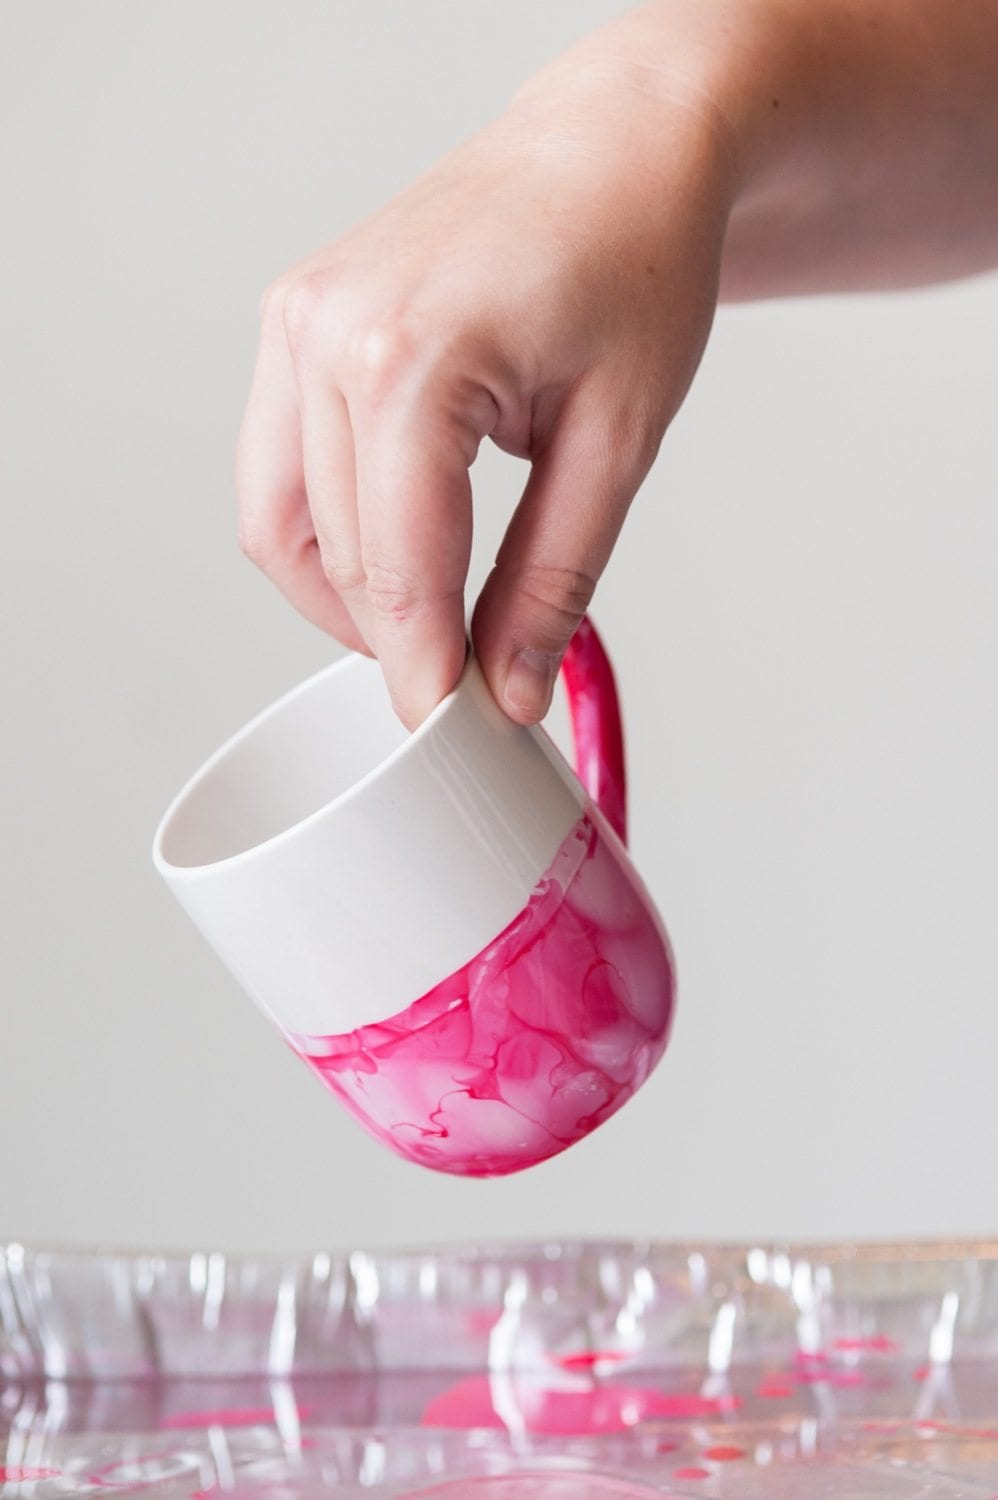
Moving equally as quick, the next step is to dunk your mug into the nail polish water. Go straight down and straight up to achieve the dipped look. Move the mug to a protected surface to dry completely, avoiding rubbing the surface of the mug until completely dry. I prefer to sit mine on top of a something to elevate it a little bit (such as a couple skewers) so it doesn’t stick to the surface it’s drying on, and I let them sit and dry overnight before touching them again. For each mug you’ll need to dump the water and start over, regardless of whether or not you’re changing color. Because the nail polish will start to set up on top of the water, it will be too thick and gloppy to get more than one dip at a time. Other than that it’s a simple process of swirling and dunking! Once dry, a super light and thin coat of dishwasher safe ModPodge (like we used with the gold glitter mugs) and your mugs will be protected when washing, too! (But hand washing to be safe is never a bad idea.)
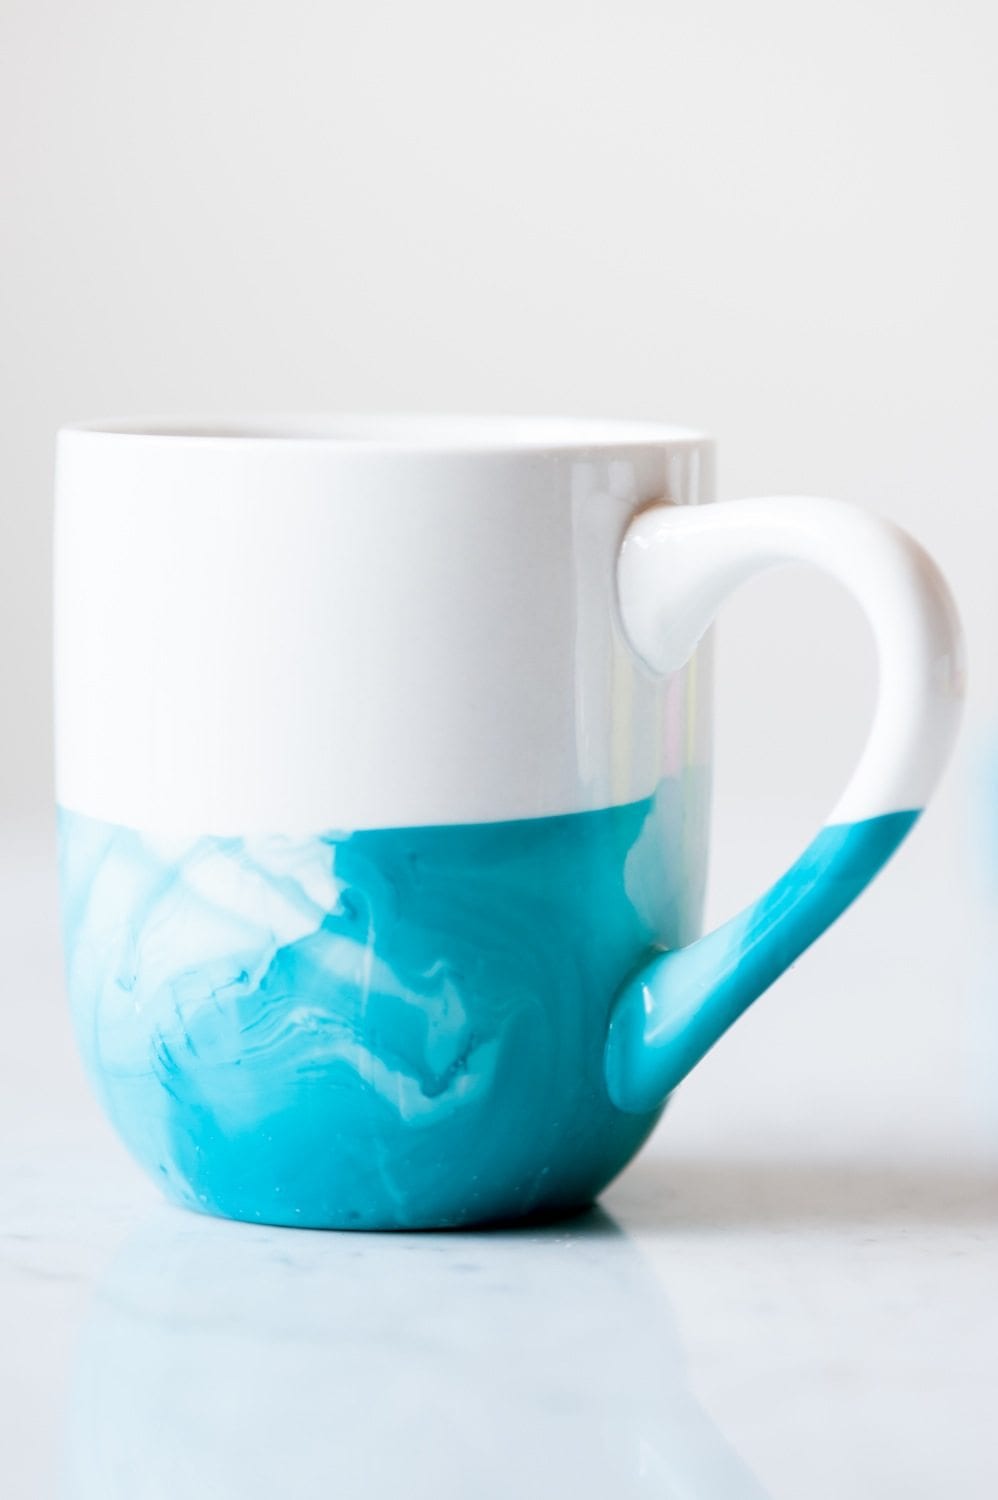
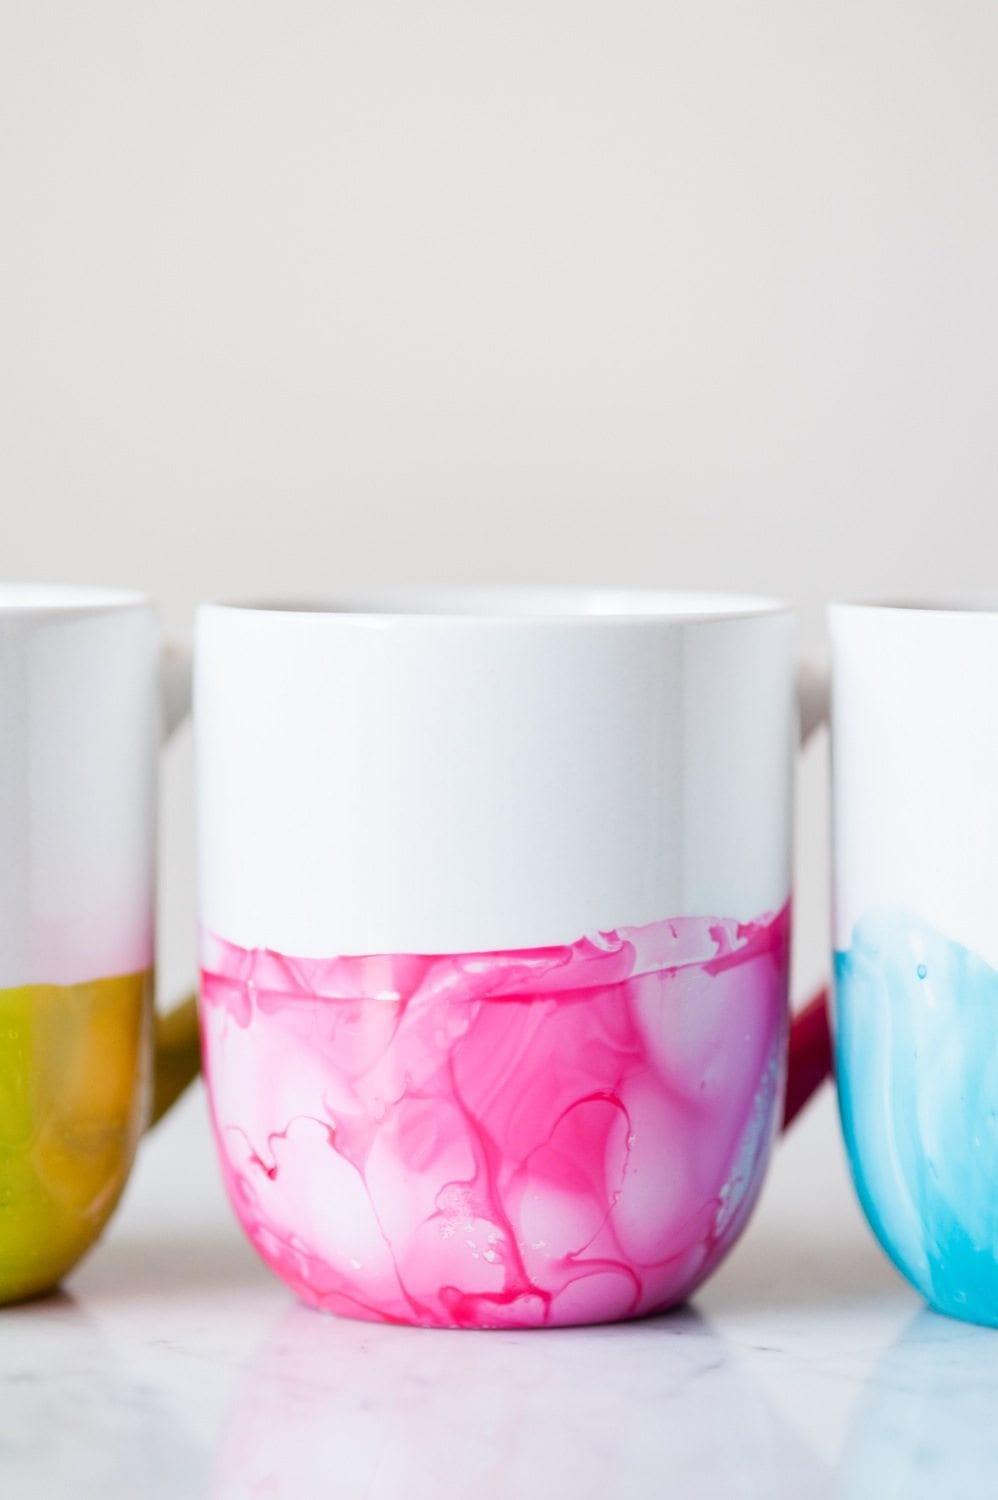
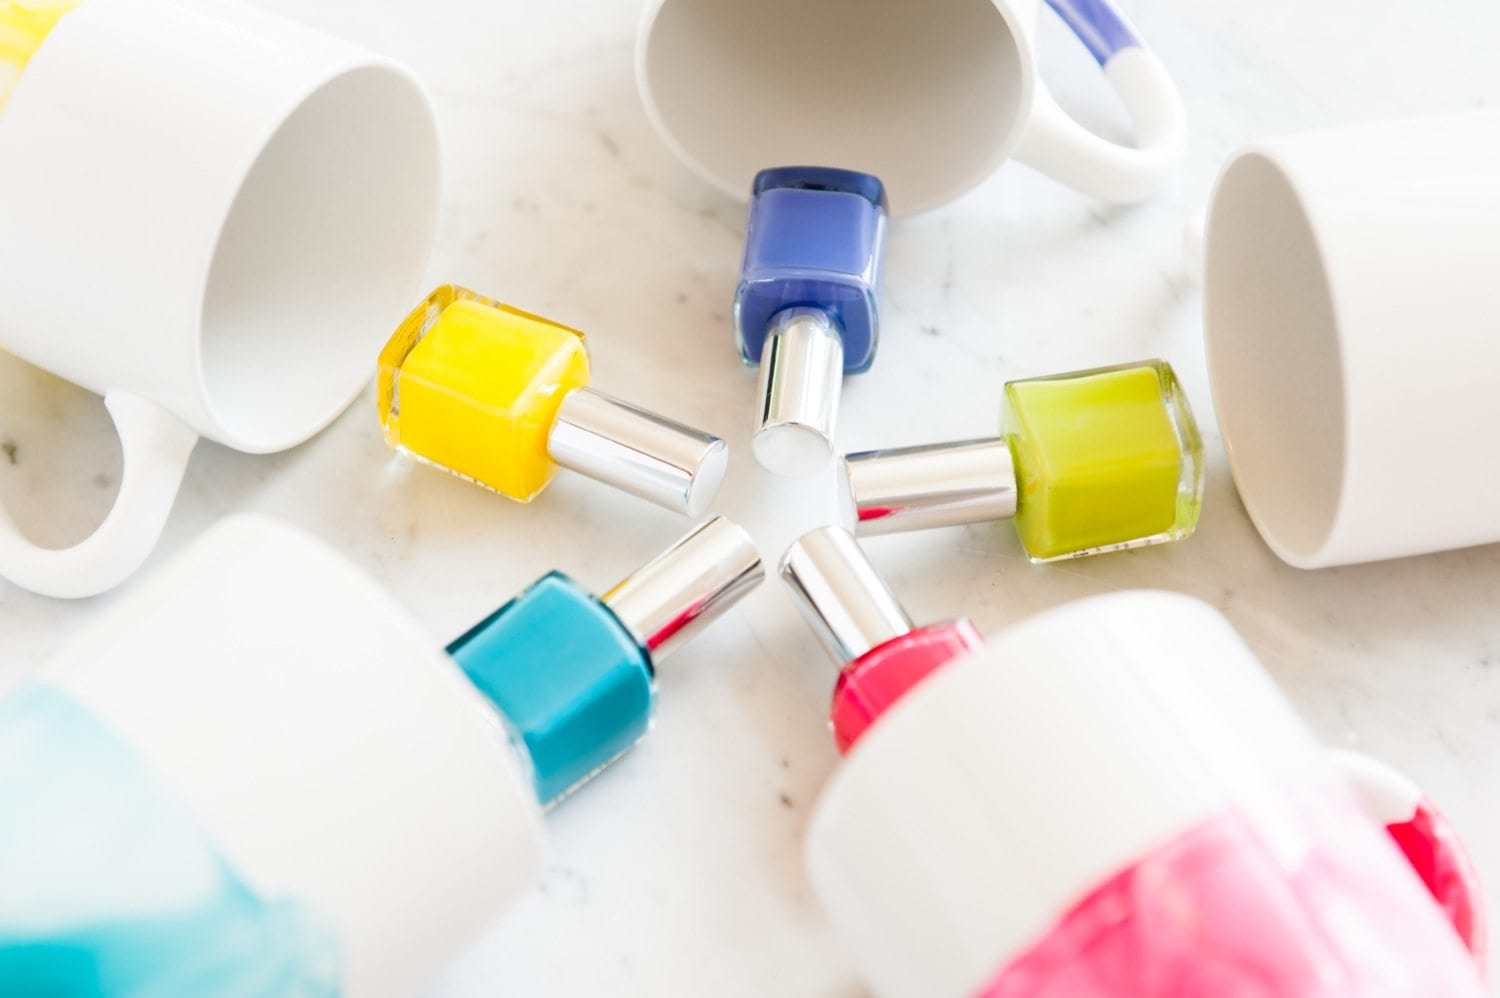

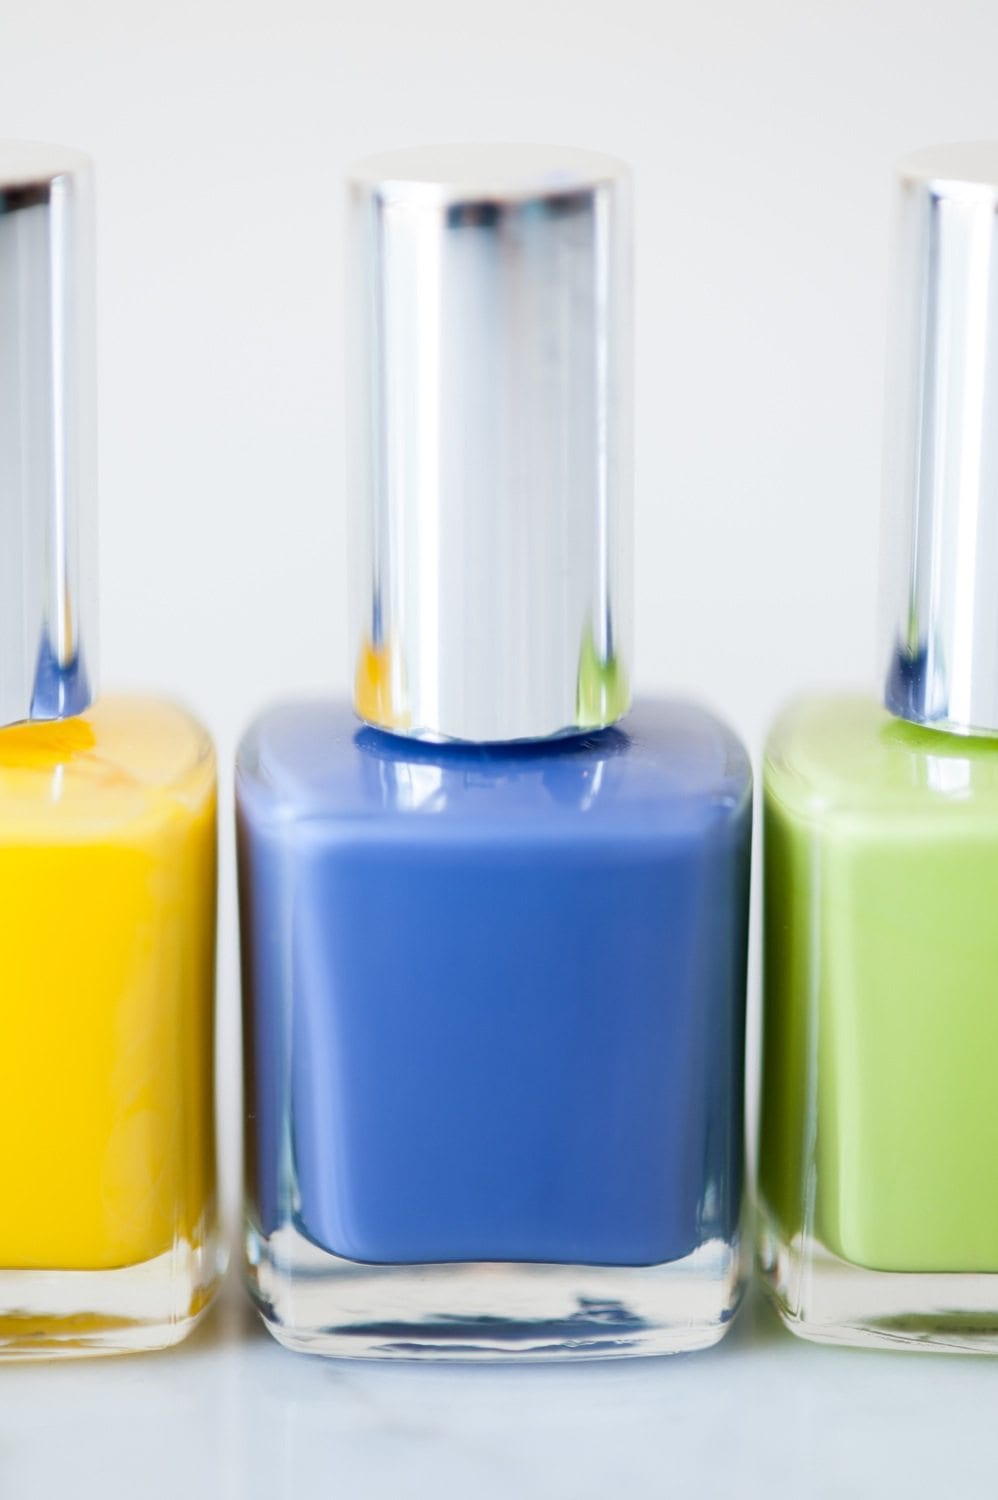
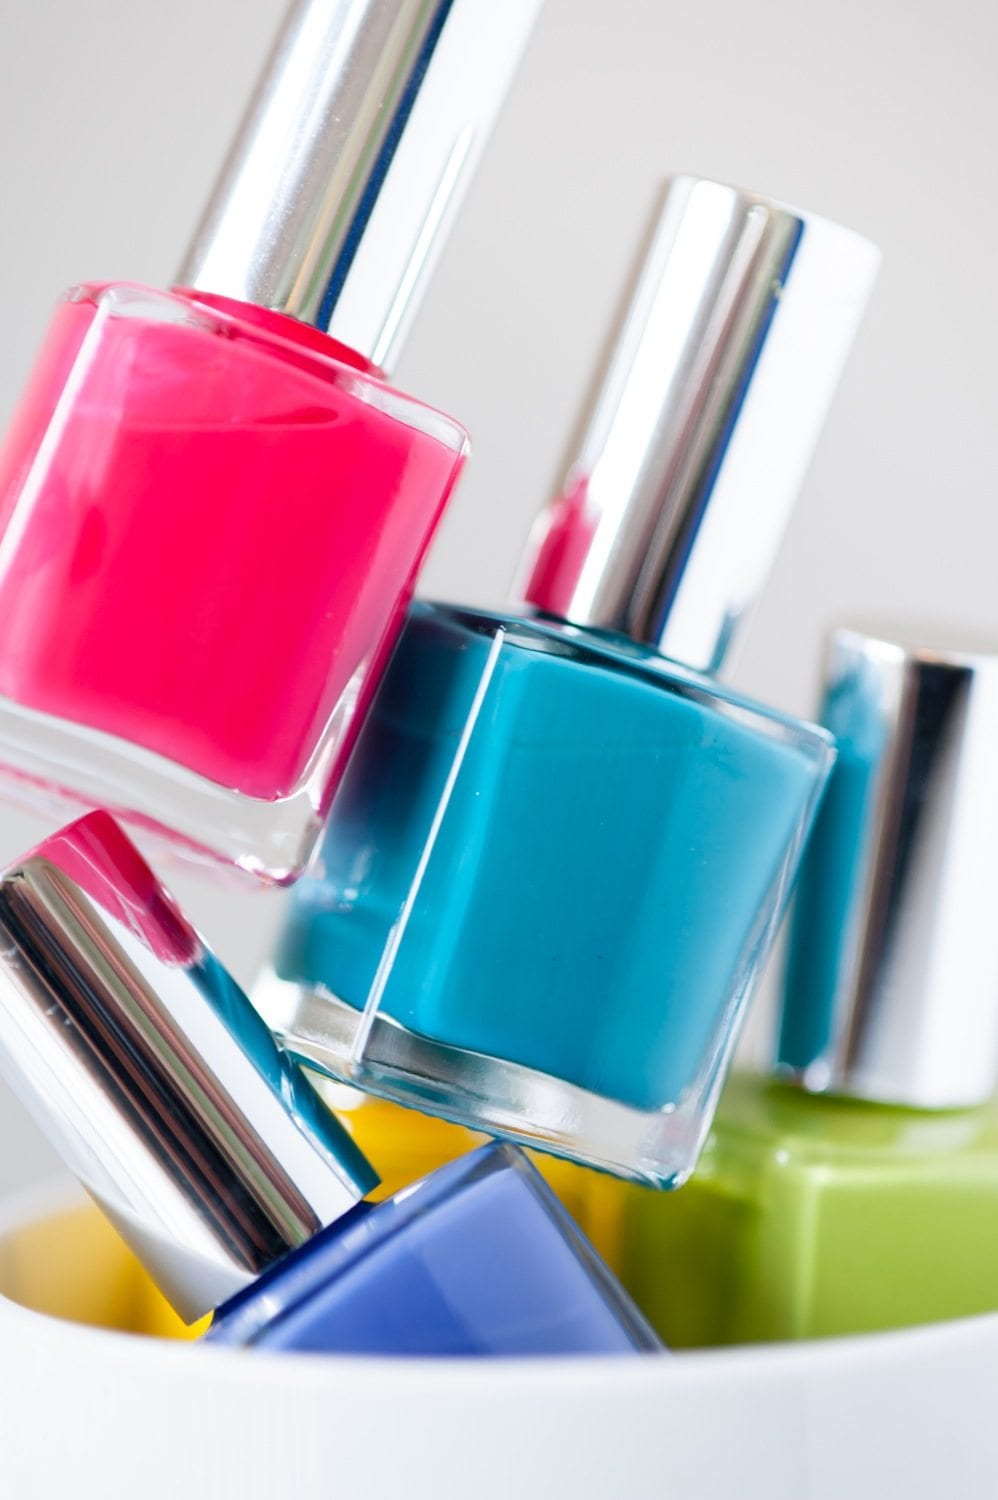
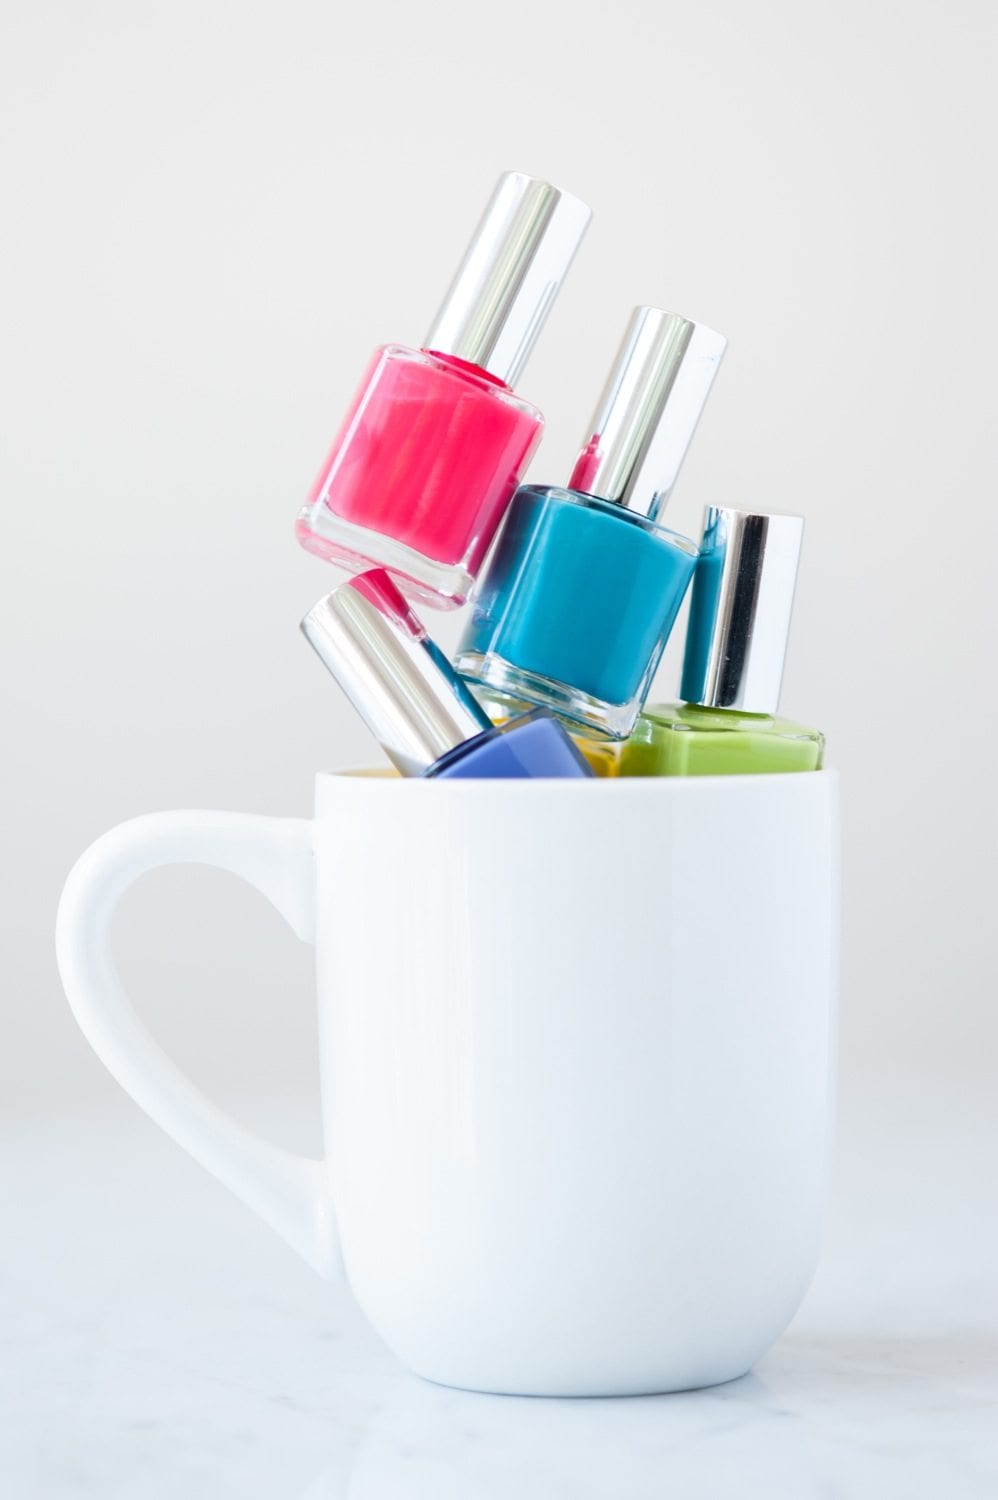
And that, friends, is all there is to it! I hit up the dollar store for these nail polish colors and picked the happiest, brightest colors I could find to make a set of mugs that’s pretty much adorable. (The lesson? This is not how you use up your $8.99 bottles of Essie!) You could split them up and give them one by one, gift the entire set or just dress up your own mug collection! You do have a mug collection right? Ours is pretty extensive and because I can’t stop dressing them up with things like nail polish and gold glitter and Sharpie marker, it just keeps growing. Oops! Feel like making some mugs or feeling otherwise inspired to get crafty? I’d love to take a look! Use the hashtag #thesweetestDIY on Instagram so I can see!
Make colorful DIY marble dipped mugs using inexpensive materials like dollar store mugs and an easy nail polish marbling technique!
DIY Marble Dipped Mugs
Materials
Instructions


 Back to Top
Chris, what is testers paint?
I. Did these, using testers paints. Worked great. Then covered them with dishwasher safe mod podge. Haven’t tried washing them.
One question: how do you dispose of the water with nail polish in it? Surely not down the drain!
Hi Jean! I just sort of scoop the nail polish off the top and toss it out, then dump the water down the drain. I hope this helps!
I just got some mugs from a charity shop today. Look very much forward to trying this. Thank you for this great tutorial. Hope mine look as good as yours!
Perfect to use thrif shop mugs, Rachel! I’m sure they’ll turn out great. Tag me on Instagram in a photo so I can take a look! XOXO
Is it possible to use 2 or more colors?
Hi Susan! You absolutely could, you just want to move quickly when pouring the polish into the water, then swirl with a toothpick or skewer very quickly before dipping. Quick quick quick is the name of the game!
My granddaughters and I are gonna give this a try. I think no matter how it turns out they will love it. Each weekend they come I try to do something different together. Teaches them to read & follow directions and get along. They love making things and cooking. Thank you for sharing it!
That is such a great idea, Lynne! And it’s definitely a great project for kids. Have fun!
Cyd, I just LOVED how yours turned out and was so excited to try, but unfortunately it did not turn out at all. Your tutorial was great, and I followed it exactly, didn’t take much time – maybe 15 seconds from the time I poured out the polished, swirled and dipped, but it did not marble like yours did – it clumped up or dispersed almost immediately. One polish sunk no matter what, and then dispersed, the other floated, but when I swirled it, it just clung to the toothpick and clumped up. I tried dipped the jar, but same thing – it just clumped on the jar. I used only new (cheap – dollar store) flat polish. Not sure what I am doing wrong. but I LOVE your projects.
Hi, great idea. I tried it on some water glasses, but it came up all globbyand didn’t stick well. It looked well ugly! I thought I was speedy enough, but reading the posts maybe I wasn’t? How warm should the water be? I had it quite warm, maybe 45 degrees celcius. Maybe this was too warm? Karen
How warm should the water be? I tried this on glass tumblers… awful mess. I think my water may have been too cold.
This is tricky! My advise… stick to flat colors, no metallics, I tried gold and silver over and over and no luck, but tried a flat pink and it turned out just like the pic!
if I dont have mod podge, will regular elmers glue work?
Hi, Emily! I don’t think it will. Elmers glue is dry and peels off of things easily and doesn’t stand up to washing. It would be best to just marble your mugs and not use them until you get mod podge. You can order it on amazon or get it in your local craft store for about 5 dollars! It is definitely worth the money because you can use it on everything. Best of luck to ya! :D
Hi there! I just tried marbling mugs a little while ago. A couple of them turned out lovely, a couple did not! I found that using old nail polish DID NOT work. I thought okay I will just use some old cheap ones…. NO! Use new cheap nail polish. Also, I found that if the mug is even a little bit wet before you dunk it, it won’t work the same. The nail polish won’t stick. I haven’t tried putting mod podge on them yet because they are still drying, but I’m sure they turn out lovely when they have been sealed over. Thanks for the tutorial!
Thanks, Ten! I’m glad you gave it a try. I honestly have only ever used new nail polish when using this technique so I appreciate the input on the older nail polish not working very well. Thank you!
Will this work on double walled tumblers? I would love to give this for a Christmas gift but I wasn’t sure if it would work.
Hi Mallory! I haven’t personally tried this technique on plastic, but I know others have and it seems to work well. I’d suggest doing a test on an extra/old tumbler you might already have lying around to see how it goes!